Be sure to take precautionary measures when using paint cleaners as the fumes and vapor are flammable. Soak the bristles directly in a small can of thinner, keeping it out of reach of children, and covering the can as your paint brush soaks. Do this in a well-ventilated area for about 30 minutes or until you see the paint settle.
How to clean paint brushes – remove oil or water-based emulsion from brush bristles
Discover how to clean paint brushes using dish soap, white spirit or even vinegar so you don’t have to buy new bristles each time you decorate with latex, oil or water-based emulsions.

(Image credit: Future)

last updated 28 April 2022
Learn how to clean paint brushes to make them last longer, and to keep taking on all manner of DIY and upcycling projects. Sure, cleaning paint brushes might not be the most fun task, but the results are rewarding and it will save you some cash on buying replacement tools too.
You won’t want to throw away your best paint brushes after one use, after all, as they are fully intended to last and be used for multiple DIY projects – which is often reflected in the price too. So whether you’re painting a deck or the whole house, keep these essential decorating tools in good nick and you’ll be able to take on anything.
Whatever your emulsion is oil or water-based, matt, eggshell, chalk or gloss, we’ll show you the best ways to get every inch of gunk off your brushes. By removing all paint residue on the bristles from a previous job, you can ensure that the results in the room you’re decorating are going to be spot-on. This is especially important when painting a room, as you wouldn’t want dirt, debris or old paint from your last project ruining your walls.
Along with other painting mistakes, there are right and wrong methods when it comes to cleaning paint brushes. So ‘brush up’ on this skill before you end up breaking or damaging your brushes.
How to clean paint brushes – removing emulsion
When weighing up the costs to paint a room, you will know that doing the job yourself instead of outsourcing a professional decorator will cost far less. But if you want pro results time and time again, you’ve got to look after your tools.
‘Not cleaning painting tools, like paintbrushes or roller covers, can make them unusable for future projects,’ warns Helen Shaw, UK director of Benjamin Moore.
‘The extra money spent on premium applicators is a wise investment, but only if you can get several uses out of them. Make sure you store your paint in a cool, dry place away from direct sunlight.’ Whether you’re using the best white paint or a shade or gree, Shaw continues, ‘Keep in mind that opened paint typically has a shelf life of two years, and possibly longer, when stored correctly. If you’re in the middle of a project or just haven’t cleaned your tools, wrap them in clear plastic wrap to not expose the paint to air.’
You will need:
- Scrap paper
- Bucket or bowl
- Dish soap
- Water
- Clean cloth
Use good quality paint brushes to start with
‘Buy good tools to start with.’ insists Sam Bramley, lead color consultant, Lick.
‘Do you know the quality of your brush affects the finish of your paint? Look for SRT, (solid round tapered) synthetic is good, and go for tipped and flagged for a beautiful lay off and clean cutting in. For extra eco points, look for FSC/carbon neutral/recycled and avoid plastic packaging.’
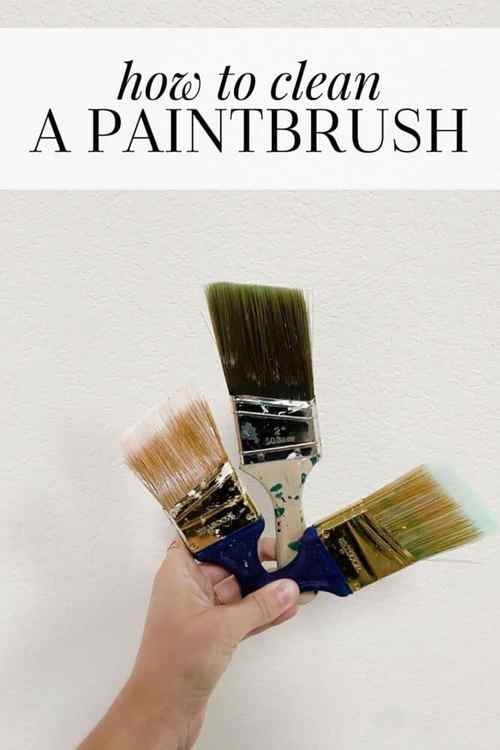
How to Clean a Paintbrush

One of the most frustrating things you can possibly experience in a DIY project is when you get yourself all hyped up and excited to dive into a new painting project, only to find that your favorite paint brush is all crusty and stiff and impossible to use.
It’s a huge annoyance, not to mention an added expense if you need to replace your paintbrush after every few uses!
Cleaning a paintbrush might sound like a super simple topic – and it is – but there are a few key tricks that you may be missing if you find that you’re constantly dealing with crusty brushes (ew).
How to Clean a Paintbrush: Before You Start
Cleaning a paintbrush is a pretty simple task, but did you know there are a couple of tips I have for you that will come into play looooong before you even need to clean it?!
That’s right – getting your paintbrush fully clean and keeping it looking great starts before you’ve even finished your paint job.
Choosing the Right Paintbrush
The first thing to consider is that a high-quality paint brush will always last longer and clean easier than a cheap one! I’ve been pretty loyal to my Wooster Shortcut brushes for a long, long time, and they’re definitely my go-to for just about every project.
Grabbing a brush that isn’t overly cheap is going to go a long way when it comes to cleaning it later – and you’ll probably be more motivated to keep a nice brush clean, too!
Don’t Overload the Brush
This is honestly maybe the most important tip there is when it comes to taking care of your paint brush!
You should never load up your brush with more than about a two-finger width of paint. Never ever ever!
Why? Well, the key of having a paintbrush that works well for you and is easy to use is that the bristles are able to easily move and bend in the direction you want them to. When you overload the paintbrush and allow paint to get all the way down to the base of the brush, it’s a lot harder to clean that paint fully out of the brush.
So, when it dries, it stiffens the bristles and makes the brush harder to use. Over time, that brush will become unusable pretty quickly just because you used too much paint at a time. You can see in the photo below, the brush on the left has been properly loaded and the brush on the right has been over loaded! If the paint goes all the way to the handle, you’ve got too much!

You’ll notice a huge difference in how easy your brushes are to clean (and how much better they are for use after cleaning) if you start paying closer attention to how much paint you’re loading up on the brush and commit to stop overloading it with as much paint as possible!
Store Properly Between Painting Sessions
Sometimes you won’t finish up a painting job in one go. I rarely have more than a couple of hours at a time to work, so I often need to store my paintbrush for several hours or even a couple of days between painting sessions.
If you don’t store your paintbrush properly in the interim, the paint will dry out and your brush will become gross and unusable.
The best way to store a paintbrush between painting sessions is to wrap it in plastic wrap (or an old grocery bag) and store it in the refrigerator. They sell fancy little plastic paintbrush covers that you can use, but I’ve found that some good ol’ plastic wrap or a plastic bag is more than sufficient.
Your paintbrush will stay good in the fridge for multiple days. I’ve really pushed the limit of this in the past, and I’ve found you’re usually find to just pick the brush up and keep using it for up to about 4 days – after that, things get a little sketchy.
How to Clean a Paintbrush
Once you’re done with your project and ready to start the cleaning process, here are the basic steps you should follow. Note that I’m assuming you’re working with latex paint or water-based acrylic paint here – if you’re working with oil-based paint or shellac, you’ll want to do all of the same things, but with different solvents. Those paints require mineral spirits instead of just soapy water!
Step One: Get Rid of Excess Paint
The very first thing you’ll want to do is wipe any extra paint off the brush. If you’re a rebel like me, you can just wipe the paintbrush on the edge of the paint can and let the paint drip back in there.
Technically, this can allow little pieces of dust from your walls or dried bits of paint to get back into your remaining paint, so the official recommendation would be to wipe the excess into a separate container (like your HANDy Paint Pail if you’re using one, or even a plastic cup).
But, for most of us, wiping it off into the paint can is honestly perfectly fine.
Plus, it’s fun to break the rules sometimes.
Step Two: Rinse the Brush with Warm Water + Dish Soap


Now you’ll take your brush over to the sink – yes, I clean my brushes in the kitchen sink! The sink will clean up just fine afterwards, I promise.
Turn your water on nice and warm, and rinse the excess paint off your brush. If you use really hot water, the ferrule (the part that connects the bristles to the brush) can expand and loosen. This can cause the brush’s bristles to start falling out, and we don’t want that!
You’ll always want to be sure the bristles are facing downwards as you rinse – you don’t want to push the paint back towards the base of the brush. If you let the water run into the brush with the bristles facing up, you may end up with stiff brushes!
Once I’ve done an initial rinse of my brush, I like to add a bit of dish soap to my brush and gently massage it in, then rinse it out.
And, as I mentioned before, if you were working with an oil-based paint, my recommendation would be to do this exact same thing, except with mineral spirits (or turpentine) + a small bucket! Be sure to wear gloves, because those are strong chemicals! Be sure when you’re working with any paint thinners or chemical cleaners that you check the instructions and follow them closely. The fumes are no joke, so be sure to focus on safety first here.
Step Three: Remove Excess Water From the Brush

If I had to pick the two biggest mistakes people make when it comes to cleaning their brushes, it would be overloading their brushes when painting and neglecting to remove excess water when cleaning!
This step is vital and will make a huge difference in how your brushes dry.
Once you’ve finished rinsing off your brushes, run your fingers over the bristles a few times to “flick” the excess water back into the sink. If you have a brush comb, this is also a good time to run it through to remove any dried bits of paint. If there is any paint residue remaining in the brush, “flicking” it can help remove them and prevent them from drying into the bristles and giving you a stiff brush.
After I flick the extra water out a few times, I also grab a dishtowel or paper towel, wrap it around the bristles, and gently squeeze out any extra water – particularly at the base of the brush!
Once you’re done with this step, your brush should feel more damp than wet. You don’t ever want to just leave a fully soaked brush sitting around to dry, or you’ll probably be surprised to find it’s in bad shape a few hours later!
Allow to Air Dry, Then Store!

I like to leave my brush with the bristles hanging over the edge of the sink for about 12 hours or so after I clean it – I want it to be fully dry before I toss it back into my storage bin in the garage!
After that, you’re done!
How do I Clean a Dried-Out Paint Brush?
If your paint brush is already fully dried out, you may be tempted to just toss it. But hold off on that – you may still be able to save it.
Here are a few methods that can help you:
- Create a solution of water with a small amount of fabric softener diluted in it. You only need about a tablespoon of fabric softener per cup of water. Swirl your brush around in the solution and let it soak until the paint softens up. Then, clean as normal.
- Heat some white vinegar in a pot on the stove top until it begins to simmer or lightly boil. Soak your paintbrush in the vinegar for about 30 minutes, then pull out and rinse as normal. A brush cleaning tool helps here!
- Soak your paintbrush in plain apple cider vinegar overnight.
- Many professional painters also swear by powdered Tide detergent mixed with water.
- And finally, if none of the other solutions work for you, you can always just use a harder chemical like this Paint Brush Rescue or brush cleaner.