First, Kachorek says to shake the can for three minutes before using it. Then, check the can to see how far away you should hold it while spraying. (Spray.Bike should be held closer to the bike than other paints, between one to four inches away.) Paint should be sprayed on evenly and with one coat at a time. Keep your hand moving at a steady pace while spraying, too.
How to Paint a Bike: 6 Steps for the Perfect Custom Look
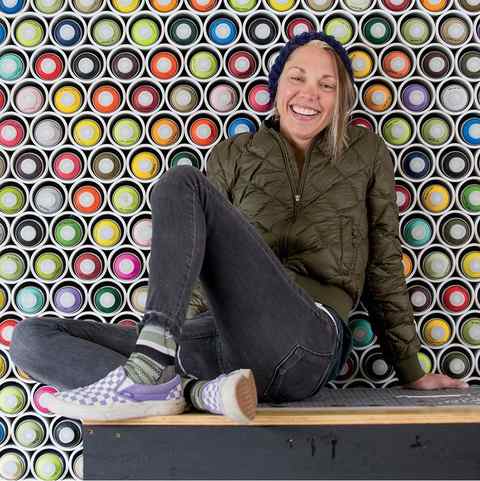
Kickass cyclocross racer and DIY evangelist Emily Kachorek of Squid Bikes helps you go your own way.
by Molly Hurford Updated: Aug 25, 2021
Save Article
British cycling coach Juliet Elliott shows how to paint a bike above in a video featured on Squidbikes.com.
“I’m racing a bike with ice cream on it,” says Emily Kachorek. “You don’t have to like it, but I do. And at least it makes you turn your head!”
Kachorek, an elite cyclocross racer, former biologist, and the cofounder of Squid Bikes, discovered her creative side early. “As a kid I was always building bows and arrows and slingshots,” she says. Now she gets paid to spray paint bikes in eye-popping patterns and create cycling kits that stand out even when they’re covered in mud.
Squid started in part because of a screwup. In 2013, Kachorek worked with a bike company to design a frame to match her then-neon kit—but the paint job came back the wrong shade of yellow. She asked the owner of the brand if she could fix it herself. “I decaled the shit out of the frame,” she says, laughing. “It was neon vomit. It looked different than everything else out there. I wondered if I’d be embarrassed on the start line.”
Instead, Kachorek discovered that people were digging her bold and playful style. She and her Squid Bikes cofounders sourced American-made aluminum frames and started spraying. “I’m a child of the ’80s; I love neon obnoxious things,” Kachorek says. “I realized that bikes don’t look like this. They’re black and red and white and blue. I like to think we’ve helped that culture evolve a little.”
“Not many people do this,” says Kachorek of Squid’s vibrant aesthetic. “But people connect with it.”
Carl Costas
Kachorek founded Squid to not just share her own vision, but also to let other riders express theirs: The company sells several frames (as well as framesets and different builds) that customers can finish themselves, or you can have Squid Bikes paint the frame for you. Squid also sells ‘Sprayed n Ready’ frames that they painted, but never built up. (They’re usually from trade shows, but sometimes they sell frames painted by featured artists.)
One of Kachorek’s favorite bikes of all time was a Creamsicle-and-cloud design that came to her in a dream. She painted the frame in front of an audience at a gravel road race to show how easy the process can be. “It’s our way of having fun and not taking everything so seriously,” she says. “It’s not going to be perfect, but it’s going to be yours.”

Cyclocross racer Samantha Runnels from team Squid x Eliel.
Icon Sportswire // Getty Images
6 Tips for How to Paint a Bike
Whether you’ve always wanted to try your own custom paint job on your bike, or you’ve recently dusted off your bike because of COVID-19, a fresh look for your ride is always a great idea. Along with advice from Kachorek, we’ve put together some tips for making your paint job a successful one.
If this is your first time painting a bike, or if you’re using a different paint than last time, you might want to practice. You can experiment on a cheap frame that you won’t mind messing up, or even a cheap metal tube.
Prep the Bike
You’ll want to make sure that the frame is ready to be painted. First, clean it with rubbing alcohol and a lint free towel. Make sure that the frame is completely clean. If it’s not raw aluminum, steel, or carbon, give it a light sanding so the paint has something to stick to. Use 1,000 to 1,500-grit sandpaper, and rub just enough to texture the surface—you don’t want to take any material completely off.
Related Stories
How To Paint Your Own Bike
I’ve pined after pretty vintage bikes but never come across one with quite the shape I loved until recently. I was on a quest to bring home something old and beautiful when I ran across a purple and white 1960’s Hiawatha with the most charming headlights and original stickers. It was in working shape but needed a little TLC so I brought it home to see what I could do.
A little elbow grease and a few cans of spray paint later and I now have a shiny new bike!
Giving your bike a makeover can feel intimidating but I’m here to share a few things I learned along the way that will help you end up with something you can be proud to ride down the street.
Supplies: You’ll need a bike, hehe, a sandpaper block in a medium-light grade, painter’s tape, a wrench, a screw driver or two depending on your bike screws, scissors (optional), a big box to flatten out and use to protect your surface, primer spray paint, spray paint in choice of color(s), wash rag, painters mask (not shown) and eye goggles (optional). 1. Take lots of detail shots of your bike before you take it apart so you can see how things fit back together when you get to that step. I didn’t remember if the bike rack legs went on the inside or outside of the bike frame so I was glad I could refer back to my photos. 2. I also drew a little picture of my bike on another piece of paper and laid out all the screws I took out on the bike part where they belonged. I suggest numbering the steps you took the bike apart in as well so you can put it back together faster. Once your bike is in pieces, lightly sand the parts you want to paint. I chose to paint my fenders but not my handlebar and pedals. I set aside my seat and taped everything I couldn’t physically remove from the frame such as the gear and pedals (they were stuck on!), the handlebars, and the chain. 3. Next I used a wet cloth to wipe down each piece to remove dust and previously sanded paint fragments and let it dry. Then I applied three thin coats of primer spray paint following the manufacturer’s instructions to allow 10 minutes of dry time between each coat. Once I had the primer on, I let it dry overnight to set. Then I applied three thin coats of my top coat of spray paint making sure to let one side dry before doing the other side. Again, follow the directions on your can and don’t over spray because you’ll have ugly drips and want to curse. Let it set again for 24 hours and then add two coats of polyurethane spray paint to seal it. Put it back together following your photos in reverse order and you’re done!
Note: If you find a bike with a lot of rust you’ll need to use a power sander or rust remover before painting. As always, safety first!
I chose not to reattach the headlight portion of my bike because it wasn’t taking the new spray paint and was too rusted to reattach without it looking terrible. I like the new shape that I got because of it being off but I’m saving it just in case. I also added a basket to the front. I found it at a major hobby store and just tied it to the handlebars with twine. Zip ties are an option if you can find them in clear but I liked the aesthetic of twine better. It’s more for decoration than utility anyway. If you have to store your bike in the elements you’ll want to consider something that won’t wear out quickly such as a wicker or wire basket. My next plans for this bike are to add reflectors for night riding and get a new brown leather seat cover and new handle covers. I might even need to add some tassels!
I hope this gives some of you courage to tackle your own bike makeover! –Rachel