Finish of the Inside of Each Ear
Using zig zags, add in a few lines inside of each ear to finish off the details for each ear. This will give it that furry look just like real Koala ears .Add An Arm Cuddling The Tree
Time to start drawing the arms of the koala! Starting from the middle of the chin, draw across to the right and curve back with another straight line .Draw in A Knee
Now to really make it look like the Koala is cuddling the tree, is to draw in the knee. This is quite simple, you draw a rainbow shape from near the armpit of the arm you just drew .
How To Draw a Koala – Easy Step By Step Guide for Kids
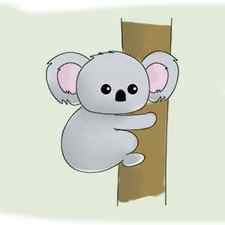
Looking for a new drawing project to do with the kids? Show them how to draw a Koala with the easy step by step guide with pictures! Koalas are an iconic Australian animal that every kid grows up learning about, so grab some pencils along with some colouring materials and get started drawing a Koala.
What you will need
- Pencil – Find Pencils
- Watercolour Pencil / Watercolour Paints – Find Watercolour Pencils, Find Watercolour Paint
- Eraser – Find Erasers
- A surface to draw on – Find Pads
- Start the Koala’s Eyes
Draw in two little circles to be the koala’s eyes, but make sure not to put them too close together as we will be drawing a nose in between. Once you have done that, make sure you shade in the majority with a little circle of white that will be the glare. - Include A Nose
In between the two eyes, draw a square with curved edges and a rounded top. It will look roughly like a lowercase n. - Give The Koala a Chin
Add in a squared chin underneath the nose that curves out wider than the eyes to make the cheeks. Make sure that the left cheek is wider than the right, given the angle we’re looking at the koala in this drawing .
Add onto the right cheek line and bring the forehead up and over to the top left, including a few zig zags to give the head a furry look.
Now, a C-like shape connecting the top of the head to the jaw of the Koala, including a little fur on the outer side to make it look fluffy. Koala bears have larger ears so make sure it isn’t too small!
Next we need to add in another ear on the right side, so draw another big furry Koala ear using similar heights as the ear you just drew on the left side .
Using zig zags, add in a few lines inside of each ear to finish off the details for each ear. This will give it that furry look just like real Koala ears .
Time to start drawing the arms of the koala! Starting from the middle of the chin, draw across to the right and curve back with another straight line .
Now to really make it look like the Koala is cuddling the tree, is to draw in the knee. This is quite simple, you draw a rainbow shape from near the armpit of the arm you just drew .
Finish off the leg by adding a foot underneath the knee. Wrap it around from the shin area and loop across the bottom .
Draw the back of the Koala connecting the heel with the neck. A long line that curved out wide to make it extra cuddly!
Not much left now, we have to draw in the tree. Simply add two parallel lines to be the tree trunk that the Koala is clutching onto. Feel free to use a ruler if that makes it easier for you .
Give the koala life by adding some colour, using whatever colouring medium you like! Koala fur is grey, so you will want to make sure that it is used and add in some pink in the ears to make them stand out more . And that’s how to draw a koala!
Koala Name Decoration To Make
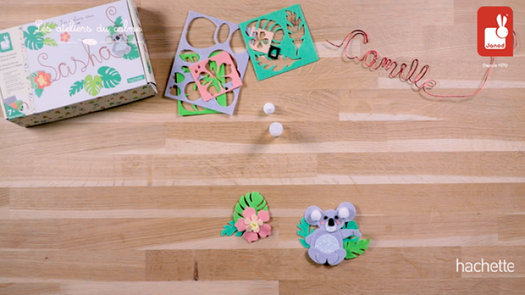
Here is a pretty wall decoration to create and personalise with your first name! This creative kit allows you to make a children’s room decoration in aluminium wire and felt with a pretty, soft koala. The double-sided poster serves as a template for forming all the letters of the first name, to a maximum of 10, in lower and upper case. You then need to assemble the pre-cut felt elements by following the booklet step by step to create the decoration around the name. Then simply hang the magnificent creation on the wall or the door! This creative activity helps develop fine motor skills and creativity and is ideal for children aged 7 and over.
Product info
| Dimensions | 22 x 4 x 13 cm (8.66 x 1.57 x 5.11″) |
| Material(s) | Glue, felt, paper, plastic, iron |
| Box type | Pretty closed box |
See also
- New
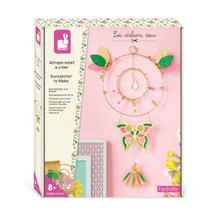
Suncatcher To Make
We’ve all heard of dream catchers but have you ever heard of a sun catcher? Its shiny elements allow the sun’s rays to be reflected and diffuse a beautiful light and bright spots in whichever room it is located. This decorative kit allows a sun catcher to be created by following the steps in the included instruction booklet. The set contains 2 different-sized gold circles, gold and transparent nylon wire, a gold chain, one gold hanging ring, some mini gold rings, 39 faceted beads, a drop bead, 2 sheets of pink and dark green tracing paper, glitter and gold metallic paper and a pre-cut card. All these elements will let children aged 8 years and up create a magnificent decoration that they can either choose to keep for themselves or give to others. They’ll have a lot to be proud of! This activity develops fine motor skills and concentration.
€22.99
In stock
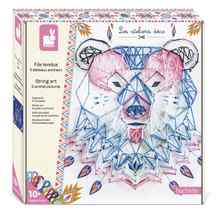
String Art Animal Pictures
This creative kit allows you to make 5 amazing string art portraits of animals (1 large and 4 small) by following the step-by-step instruction booklet. The box contains: 4 foam boards 12.5 x 12.5 cm, 1 foam board 25 x 25 cm, 800 nails, 10 skeins of thread (7 m), 1 tool and an instruction booklet. Pretty creations to decorate a room!
€22.99
In stock
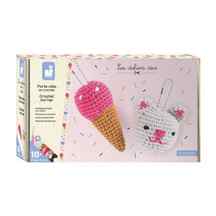
Creative Kit – Crochet Keyring
Crochet is making a big comeback! It’s a calming activity we all love, and you can hang these two crochet keyrings on your bag or give them as gifts. The kit includes everything you need to make a pretty ice cream and an ultra-cute kitten using four balls of wool. The ice cream keyring is 14.5 cm long, and the kitten measures 9 cm. This creative activity is recommended for children aged 10 and over, and will help them to develop their fine motor skills dexterity and thinking skills. This kit contains: 4 balls of wool, 1 crochet hook, 2 chains with clasp, 1 plastic needle, 1 marker ring and 1 instruction booklet.
€11.50
In stock
- New
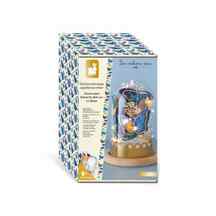
Illuminated Butterfly Bell Jar To Make
Introducing a craft activity that will make a wonderful bedroom or living room decoration! The blue and gold butterflies are further accentuated by the transparent bell jar for a stunning end result. The craft set contains a plastic bell jar and wooden stand, 2 gold and 3 printed pre-cut boards, a sheet of half beads, a foam base, flexible aluminium wire, a 10-LED garland with battery included and 1 instruction booklet. All the elements are provided to help children aged 8 years and over make this beautiful decoration by assembling the butterflies and then attaching them to the aluminium wire. A step-by-step instruction booklet is also provided. This original activity develops concentration and fine motor skills, and takes around 2 hours to complete.