This diy fall pumpkin topiary has to be one of the easiest fall decors I’ve ever made, but I absolutely love how it turned out. To me, it’s a classic fall look that is fabulous not only on the front porch but possibly as a pair flanking the garage doors. Just picture it — sooo pretty!
Creating a Pumpkin Topiary
Autumn is my favorite time of year. Because I live in such a hot, dry area of the country, I look forward to the relief of the crisper, cooler weather and all that goes along with it. Family gatherings, bonfires, pumpkins, and cozy food are the thoughts that keep me going during the hot summer months. So when October rolls around, I’m ready for fall garden decorating!

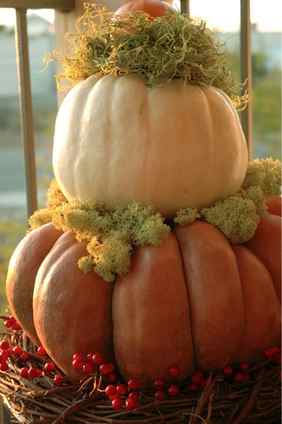
One of my favorite projects to do every fall is the Pumpkin Topiary. It’s so simple, costs just a few dollars, and creates a harvest focal point by your entryway, on the patio or deck, or even right in your garden. And did I mention it takes all of ten minutes from start to finish?
Materials
- Tall planter (optional, but great for increased height)
- 3 pumpkins in graduated sizes — think Papa bear, Mama bear, and Baby bear (and it’s great to choose different types and colors of pumpkins, too)
- Grapevine wreath (large enough for your largest pumpkin to sit on)
- Bagged moss (different colors)
- Decorative items from the floral department of the craft store (I like the red berry floral picks and vines)
- Start by placing the grapevine wreath on top of your empty planter
- Top with the largest pumpkin
- Add some moss to the top of the pumpkin and stack your medium-sized pumpkin on top
- Add more moss and finish with your smallest pumpkin
- Add decorative details as desired
Suggested Pumpkins
- Large Fairytale or Cinderella pumpkins for the base
- Warty or white pumpkins as the middle tier
- Smaller pumpkins like pie pumpkins or Wee Be Little for the top
- Look for pumpkins that are free of puncture marks, holes, or gouges – this type of damage will allow decay to set in much more quickly. If you choose a well-formed pumpkin with no visible holes or scratches, you can have your Pumpkin Topiary outside through the end of November.
Happy Halloween and Happy Thanksgiving!
Jenny Peterson is an Austin, Texas-based garden designer with her own firm, J. Peterson Garden Design, as well as a writer, author and speaker. She specializes in designing, writing and speaking about gardens that enhance the quality of life, heal from the inside out and help to create balance and wellness.
Here’s what you need to make this diy fall pumpkin topiary:
(affiliate links may be included for your convenience)
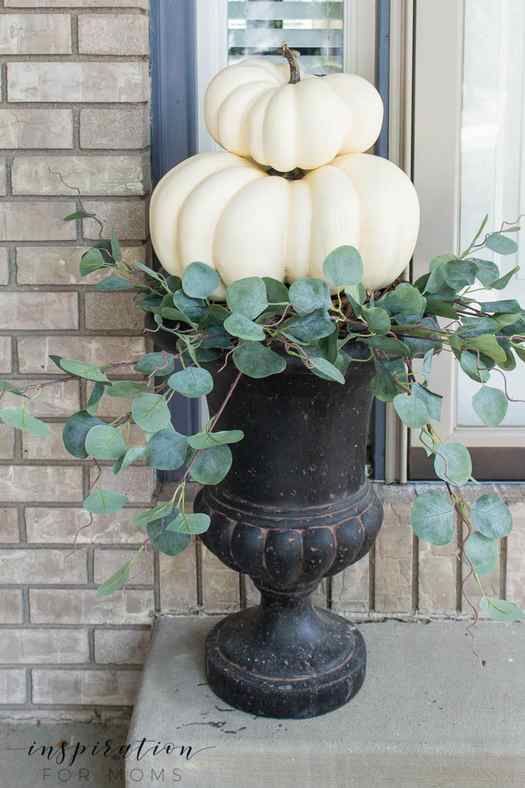
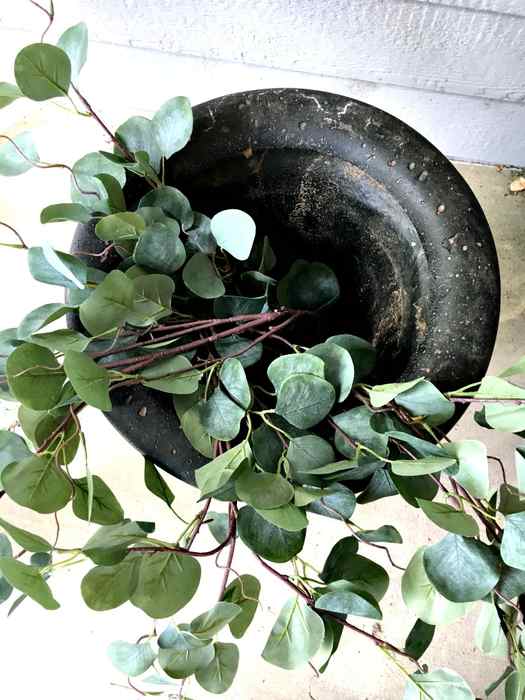
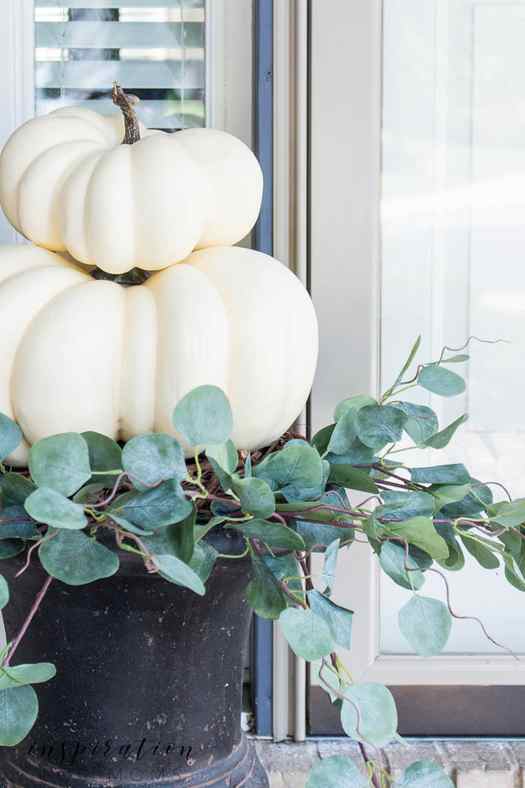
The first thing I did was add the eucalyptus branches. I bent the branches (adding a little curve) right below where the leaves started. This way the branch would rest on the lip of the urn easily and be more likely to stay in place. I added four branches, one at a time, bending them into a nice arrangement off the urn. I only placed them towards one-half of the urn…so basically the back has none. When I place them up against the house, no one will see the back, so why decorate there!
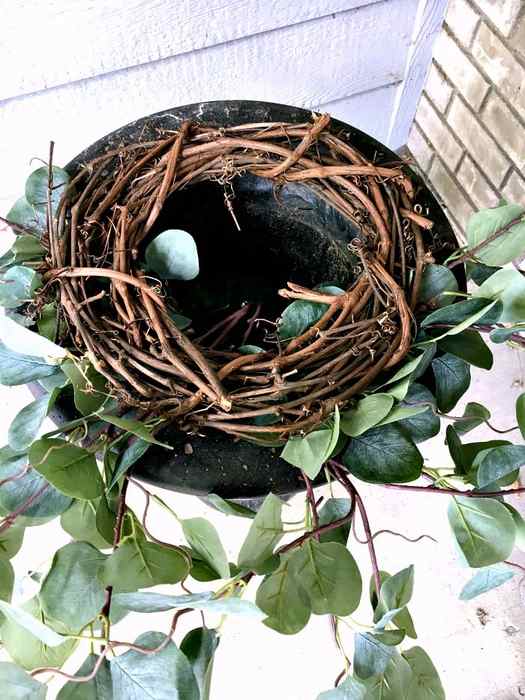
Top With Grapevine Wreath
Once I have the eucalyptus in the urn, I placed my 10-inch grapevine wreath right on top. It’s not wired down or anything — just sitting there. The wreath will help secure the eucalyptus and give the pumpkins a good foundation to rest on. And I love the look of the grapevine peeking out next to the eucalyptus. So pretty!
Stack with Pumpkins
Starting with the largest pumpkin first, I placed it directly on top of the grapevine wreath. To get the topiary effect, I needed to stack another smaller pumpkin on top. But the stem on bottom pumpkin was keeping the pumpkin from sitting flat.
At first, I thought I would just remove the stem from the larger pumpkin. BUT if I wanted to use it later in another display — it would be stemless. Not good. So instead, I decided to just get a small knife and cut a small hole out of the bottom of the smaller pumpkin. This way, I can reuse both pumpkins later and no one will ever see any of the damage! Smart, right?!
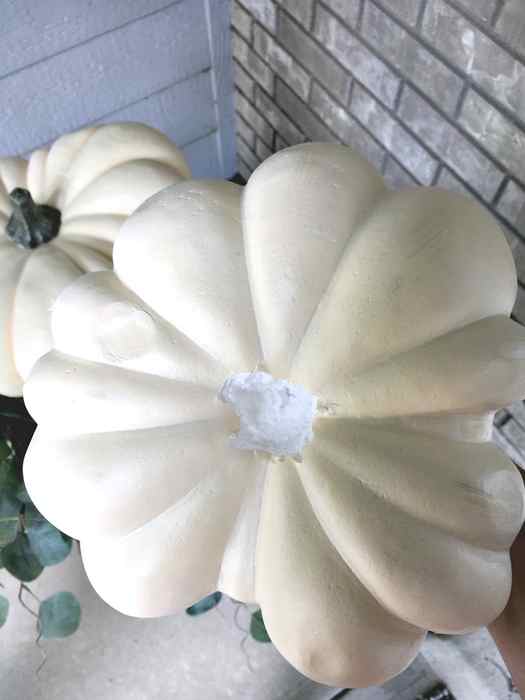
Once the small hole was cut out, I just placed the smaller pumpkin right on top of the larger one. I then stepped back and tweaked a few little details and that was it.
Actually, I made two; one for each side of the door. But today I’m only showing you the one until I reveal the complete fall porch tour in a few weeks! I love how nice it looks right next to the front door and my fall rug/mat combo.
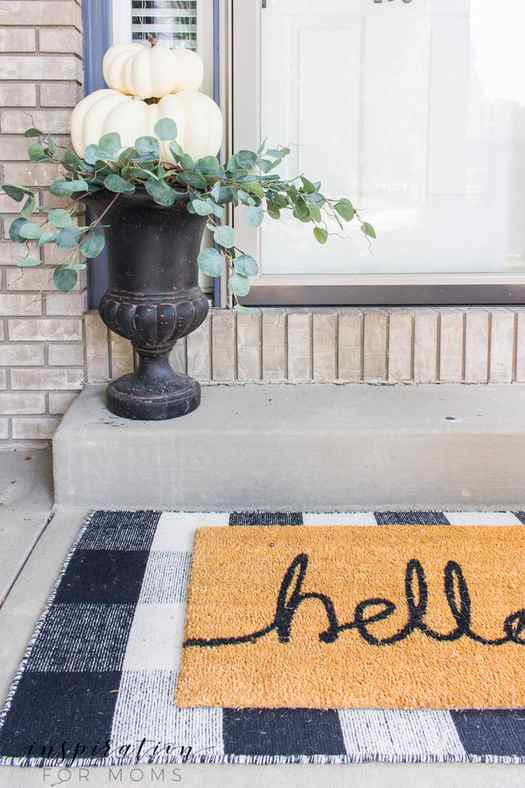
This year, my buffalo check rug has made it’s way to the front porch. You know I how much I love that neutral pattern. And when I paired it with my hello mat, it was like a match made in heaven.