Painting Clouds/Smoke

A tutorial I whipped up on how to paint clouds/smoke/steam or whatever. Its all basically the same technique anyway right? ;] The full-sized images are actually the size I’ve painted them at. I believe that the technique shown here works best when you are working HUGE and resize your painting down. Its just not as easy to form the details correctly when working this small, so I encourage everyone who follows this tut to start with a larger canvas. 🙂
Oh yeah. and don’t tell anyone but this is only my second time to paint clouds. So we are both going through a learning experience here. *grin*
Step 1 – We’re starting on a neutral toned, washy, textured background. Just used a series of rough brushes here.

Step 2 – Using a rather large brush, lay out the path of your smoke (or clouds). Determine the light source and paint in general “puff” shapes using your highlight color. This smoke is going straight up, but that’s not very realistic. usually the wind will catch it and pull it off to the side, especially once its high in the air. Feel free to paint them going whichever way you want. 🙂

Step 3 – Just a continuation of step 2, except we’re working more with shadow at this point.

Step 4 – With a soft brush I’ve gone in to define some areas. Smoke billows up into large fluffy masses, but starts out much more condensed. The closer to the source, the more little ridges and bumps you will see. I went back with some smudging to smooth things out.

Step 5 – Adding in details with two different brushes. A medium sized textured brush and a smaller round, hard edged brush. Smoke tends to kind of layer up on top of itself. So imagine a bunch of irregular shaped discs when working, all overlapping on top of eachother. Think of fish scales. Each pieces has a small bit of shadow at the bottom and then fades up into a brilliant highlight where it “fluffs” out. Sometimes, depending on the way the light is coming in this effect can be done backwards (see the final image)

Step 6 – Continuing upwards. Smoothing rough edges as needed, but still trying to keep texture intact. I also scribbled in a tiny volcano. Ain’t it cute? You’d never think it would smoke so much would you? Yeah well, don’t question the volcano!

Step 7 – Final step! I rushed this last step like you wouldn’t believe. Just finishing up some of the fluffy areas, although I think there should be at least twice as many. I got lazy, what can I say? But you can’t get lazy. No sireee. you must continue to paint puffs and puffs and puffs into you have one giant beautiful mass of smokey goodness.


These are some clouds I’ve painted using the same technique as above.
Hope this tut proved helpful to someone.
How to Paint with Smoke
wikiHow is a “wiki,” similar to Wikipedia, which means that many of our articles are co-written by multiple authors. To create this article, 25 people, some anonymous, worked to edit and improve it over time.
This article has been viewed 285,975 times.
Maybe you’ve painted before, but did you know you can paint with smoke? This art known as “fumage” has been practiced by many visionary artists, including well-known surrealist Salvador Dali. We’re here to teach you how to start using this delicate medium to create exciting new textures and patterns. Read on to learn how you can create your own smoke-based masterpiece.
Steps
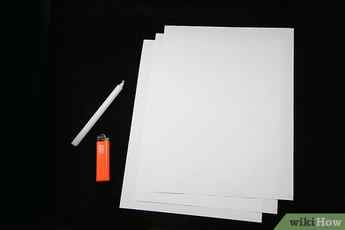
Protect your workspace. If you do not have a work area that you can afford to mark with wax drippings, lay out a covering (such as an old tablecloth) to catch the dripping wax.

Prop up your board or paper (hereafter referred to generically as “canvas”) so that you are looking up at it. You’ll need to work from beneath the canvas most of the time, so you may want to hang it from an elevated position, but if you can manage to hold it with one hand, you can use your non-dominant hand to change its angle as the candle’s flame moves across the surface. [1] X Research source
Advertisement
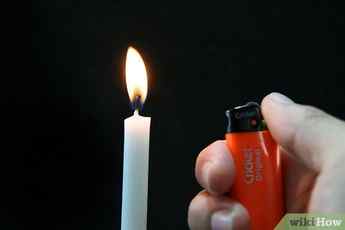
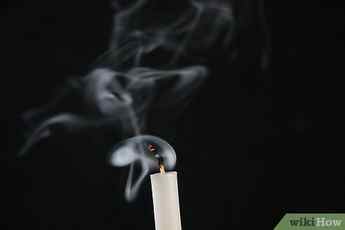
Light your candle. Slender candles work best, but feel free to experiment. It’s helpful to keep a pillar candle lit nearby to quickly re-light the one in use. [2] X Research source
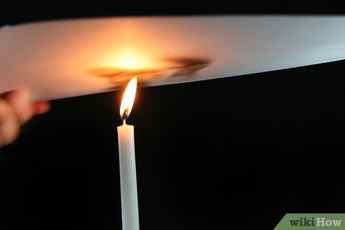
Begin dragging the candle flame along the underside of the canvas. As you guide the candle just beneath the canvas, you will see dark shapes forming on the surface of your canvas.
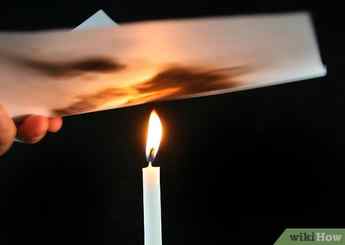
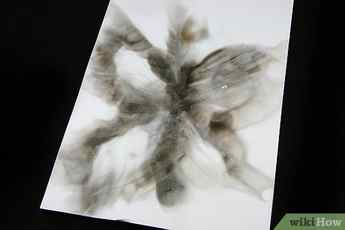
Vary the motions of your candle and the angle of the canvas. The best way to “learn” fumage is to experiment with it. See what effects you can get by using tilting the canvas or the candle slightly, or by moving the candle at different speeds or in different patterns of motion. For more information, see the “tips” section below. [3] X Research source
Blow out the candle and spray the surface with fixative. When you are satisfied with your design, apply the fixative (a stabilizing or preserving agent, such as varnish) to keep it from smearing. Before you do so, you may wish to intentionally smear some of the soot marks with your hand, a brush, or some other implement.
Experiment using fumage in combination with other media. Wolfgang Paalen, the father of fumage, quickly progressed toward using fumage as a catalyst for his artworks, the seed from which the whole work would spring forth. With the fumage work providing his starting point, he would then add layers of oil paint, for example, to fully express his artistic vision. You can apply other media to the canvas either before or after you apply the fixative. [4] X Research source
Advertisement
Community Q&A
Search
Question
Would it not burn the paper?
Community Answer
No, smoke alone will not burn it, as long as the heat source is kept a safe distance.
Thanks! We’re glad this was helpful.
Thank you for your feedback.
As a small thank you, we’d like to offer you a $30 gift card (valid at GoNift.com). Use it to try out great new products and services nationwide without paying full price—wine, food delivery, clothing and more. Enjoy! Claim Your Gift If wikiHow has helped you, please consider a small contribution to support us in helping more readers like you. We’re committed to providing the world with free how-to resources, and even $1 helps us in our mission. Support wikiHow


