Add your paint medium to the pigment. Start with approximately 2 tablespoons, or 1 fl. oz., of your liquid paint medium. The medium you choose depends on what type of paint you want to make. Art supply stores sell different mediums for acrylics, or you can get a plant-based oil to make oil paint. [5] X Research source
- For example, you can use a gloss medium to make thin, transparent acrylic paint.
- You could add a gel medium to acrylic paint for an impasto-style painting. [6] X Expert Source
How to Make Your Own Paint
This article was co-authored by Jeanine Hattas Wilson. Jeanine Hattas Wilson is a Professional Painter and the President of Hattas Public Murals, Inc. With nearly 20 years of experience, Jeanine specializes in creating, overseeing, designing, and painting murals. Jeanine holds a BA in Advertising from Marquette University and a Studio Painting Minor from The Milwaukee Institute of Art & Design. She has studied at The Atelier Artien in Paris, France, Los Angeles Academy of Figurative Art, and under renowned artists such as Robert Liberace, Michael Siegel, and William Cochran. To date, Hattas Public Murals has painted nearly 5,000 commissioned works of art in homes and commercial and public spaces.
There are 13 references cited in this article, which can be found at the bottom of the page.
This article has been viewed 299,446 times.
Instead of shopping for manufactured paint, make your own out of a few inexpensive ingredients! Paint that is safe for children of all ages can be made quickly with flour or corn syrup. More experienced artists can mix their own acrylic paint using raw pigment and a medium. We’ll show you how to DIY your own flour-based, watercolor, and acrylic paint for a satisfying, yet entertaining project that also saves you money.
Steps
Method 1
Method 1 of 5:
Making Acrylic or Oil Paint
- The paints are non-toxic unless you use metal-based pigments like “cadmium red.” However, these paints are not meant for use on skin.
- You can find dry paint pigment at art supply stores. Each pigment has a visible color and is labeled appropriately, such as Titanium White or Red Iron.
- Many artists use glass or stone slabs. You may be able to find plexiglass at a home improvement store and use that to mix your paint.
Advertisement
- If the pigment isn’t completely smooth, the paint may look grainy once you use it later.
- You might not be able to remove all the lumps right away. This is okay, since you will get another chance to thin the paint.
- If you make your own paint often, consider purchasing a paint muller online or from an art supply store. A paint muller grinds and disperses raw pigment.
Add your paint medium to the pigment. Start with approximately 2 tablespoons, or 1 fl. oz., of your liquid paint medium. The medium you choose depends on what type of paint you want to make. Art supply stores sell different mediums for acrylics, or you can get a plant-based oil to make oil paint. [5] X Research source
- For example, you can use a gloss medium to make thin, transparent acrylic paint.
- You could add a gel medium to acrylic paint for an impasto-style painting. [6] X Expert Source
- Add the medium gradually while mixing it into the paint. Check the consistency frequently so you don’t add too much.
- Excess paint may be spread onto tin foil, wrapped up tightly, and preserved in a freezer for at least 2 or 3 months.
Advertisement
Method 2
Method 2 of 5:
Making Watercolor Paint
- Instead of doing this, you can purchase light corn syrup from a grocery store. You don’t need to boil anything. Simply mix the syrup in with the other ingredients.
- This creates a non-toxic paint safe for children. It’s easier to spread and more similar to store-bought watercolors than flour paint.
- Scoop up the mixture with a spoon to check for undissolved sugar crystals.
- The longer you boil the mixture, the thicker it becomes after it cools. If you boil it too long, it may burn.
- You can find all of these ingredients at most grocery stores.
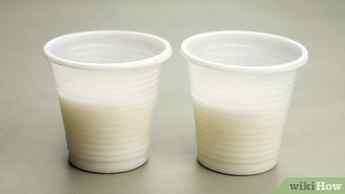
Pour the paint into small containers. Separate the paint into small bowls, such as tea-light holders. Use a different container for each color of paint you wish to make. [11] X Research source
- If you can’t find a specific color, mix different colors to create it. For instance, mixing 2 drops of yellow and 1 drop of red can create orange.
- Wash off your paint brush after using it to crossing colors.
- This paint is like store-bought watercolors, so you can mix colors on paper. The paint also dries slowly, drying faster under heat.
- The paint can be stored in a covered container in a refrigerator. It will usually last a couple of weeks. Throw it away if you notice mold growing on it.
Advertisement
Method 3
Method 3 of 5:
Creating Chalk Paint for Furniture
- This paint is an inexpensive way to give furniture an aged, distressed look.
- The paint is non-toxic, but swallowing it can make you feel temporarily sick.
- The paint can also be made with Plaster of Paris or unsanded grout instead of baking soda. Use 4 ounces (110 g) of either substance. [15] X Research source
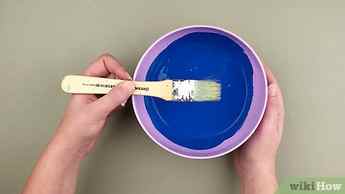
Stir the mixture until it looks smooth. Swirl the mixture in the bowl with a mixing spoon or another utensil. Continue mixing until all of the baking soda disperses. The liquid should look completely smooth.
- You can get latex paint at a home improvement store. Make sure it is latex-based. Oil paints are different and dry slower.
- The paint will begin drying within a few hours. Wait about a day to ensure it dries completely.
- After the paint dries, you can sand it even with 180 to 220-grit sandpaper.
- To dispose of excess paint, leave it out in the open. Since it is made with latex paint, it will dry. Then you can throw it in the trash.
Advertisement
Method 4
Method 4 of 5:
Making Flour-Based Paint

- This creates a quick-drying, non-toxic paint safe for children of any age.
- Adjust the amount of each ingredient you use to create more or less paint. Keep the ingredients in the same ratio.
- With a zippered plastic bag, you can cut a corner later to let out a steady drip of paint. This eliminates overturned paint containers and reduces messes.
- If you can’t find a specific food coloring, mix drops of other colors. For example, try adding 3 drops of red and 1 drop of blue to make purple.
- If you are using resealable bags, leave the bag open slightly so that excess air can escape. Be careful to avoid squeezing the paint out of the opening.
- Since the paint is non-toxic, you can safely touch it with your fingers as well as pour it from the container.
- This paint tends to be a little thicker than traditional store-bought paints, so it isn’t quite as easy to spread.
- The paint should be safe to use for about 2 weeks. However, it may harden over time.
Advertisement
Method 5
Method 5 of 5:
Making Flour-Based Wall Paint
- This mixture will create an inexpensive, non-toxic paint that can be used to give walls and other surfaces a matte finish.
- This paint is similar to store-bought paints, so it will last for many years.
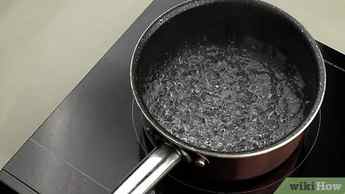
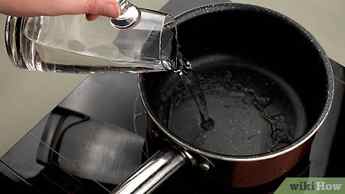
Boil 12 fluid ounces (350 ml) of water on the stove. Pour about 1 ½ cups of water into a pot safe to be heated on a stove. Turn the heat on the stove up to high and wait for the water to boil. [24] X Research source
- Check the paste’s consistency to ensure that it is thick. If it seems runny, give it more cooking time.
- Adding the water too quickly can thin the paste out more than you want, so it won’t be thick enough to cover your walls.
- Screened clay can be ordered online or from landscaping companies.
- Powder fillers are often available at home improvements stores and can also be purchased online.
- You can thin the paint further by boiling it for up to 30 minutes, then mixing in about 32 fluid ounces (950 ml) of linseed oil. Let it cool to the touch before using it. [29] X Research source
- Properly-stored paint should last 5 to 10 years.
- You can also leave the excess paint out in the open to dry, then dispose of it in the trash.
Advertisement
Community Q&A
Search
Question
I want to paint a donut rack I made. What paint should I use that would be food-safe?
Rosie V.
Community Answer
You can use most acrylic paints, as they are not toxic, however the paint could wear down and chip or peel as it comes into contact with food. Your best bet is to get some sort of high-solids epoxy paint because it is non-toxic and will not peel and wear down with use.
Thanks! We’re glad this was helpful.
Thank you for your feedback.
As a small thank you, we’d like to offer you a $30 gift card (valid at GoNift.com). Use it to try out great new products and services nationwide without paying full price—wine, food delivery, clothing and more. Enjoy! Claim Your Gift If wikiHow has helped you, please consider a small contribution to support us in helping more readers like you. We’re committed to providing the world with free how-to resources, and even $1 helps us in our mission. Support wikiHow
Ask a Question
200 characters left
Include your email address to get a message when this question is answered.
Advertisement
Video .
By using this service, some information may be shared with YouTube.
Tips
Paint can be made many different ways, so choose a paint that suits your project.
Thanks
Wear an apron to avoid paint stains.
Thanks
Adjust the amount of paint you make according to how much you need so that you can avoid waste.
Thanks
Submit a Tip
All tip submissions are carefully reviewed before being published
Thanks for submitting a tip for review!

Advertisement
Warnings
If the paint is meant for very young children, make the paint out of organic materials. The paint won’t hurt them if they consume it.
Thanks
Advertisement
Things You’ll Need
Making Flour-Based Drip Paint
Making Watercolor Paint
Mixing Acrylic or Oil Paint
Creating Chalk Paint for Furniture
Making Flour-Based Wall Paint
You Might Also Like
The 8 Best Ways to Make Paintbrushes Soft Again
The Best Ways to Thin Acrylic Paint
How to
Match Paint Colors
How to Make Sage Green Paint
DIY Glow-in-the-Dark Paint
How to
Calculate Amount of Paint to Paint a Room
How to
Thicken Paint
How to
Identify Lead Paint
How to Thin Latex Paint for Spraying, Brushing & Rolling
How to
Repair Peeling Paint
How to Texture Paint with Baking Soda, Silica Sand & More
How to
Use a Paint Roller
How to
Make a Paintbrush
How to
Open a Paint Can
Advertisement
References
- ↑https://www.artistsnetwork.com/art-techniques/make-your-own-paint/
- ↑https://www.artistsnetwork.com/art-techniques/make-your-own-paint/
- ↑https://www.artistsnetwork.com/art-techniques/make-your-own-paint/
- ↑https://www.artistsandillustrators.co.uk/how-to/oil-painting/1067/how-to-make-oil-paint
- ↑https://www.artistsnetwork.com/art-techniques/make-your-own-paint/
- ↑ Jeanine Hattas Wilson. Professional Painter. Expert Interview. 7 July 2021.
- ↑https://www.artistsandillustrators.co.uk/how-to/oil-painting/1067/how-to-make-oil-paint
- ↑http://www.pbs.org/parents/crafts-for-kids/watercolor-paints/
- ↑https://whatscookingamerica.net/Sauces_Condiments/SimpleSyrup.htm
- ↑http://www.pbs.org/parents/crafts-for-kids/watercolor-paints/
- ↑http://www.pbs.org/parents/crafts-for-kids/watercolor-paints/
- ↑http://www.pbs.org/parents/crafts-for-kids/watercolor-paints/
- ↑http://www.pbs.org/parents/crafts-for-kids/watercolor-paints/
- ↑http://www.dummies.com/home-garden/home-painting/3-ways-to-create-your-own-chalk-paint/
- ↑https://www.bobvila.com/articles/homemade-paint/
- ↑http://www.dummies.com/home-garden/home-painting/3-ways-to-create-your-own-chalk-paint/
- ↑http://www.dummies.com/home-garden/home-painting/3-ways-to-create-your-own-chalk-paint/
- ↑http://redtri.com/bump-baby/how-to-make-your-own-baby-safe-edible-finger-paint/
- ↑https://www.carlemuseum.org/blogs/making-art/toddler-art-activity-flour-paint-experiment
- ↑http://redtri.com/bump-baby/how-to-make-your-own-baby-safe-edible-finger-paint/
- ↑https://www.kidspot.com.au/parenting/things-to-do/homemade-puff-paint/news-story/8247367c5c2b66c512e7a3e09b3fd450
- ↑https://www.carlemuseum.org/blogs/making-art/toddler-art-activity-flour-paint-experiment
- ↑https://greenlivingideas.com/2012/02/17/make-your-own-natural-flour-paint/
- ↑https://greenlivingideas.com/2012/02/17/make-your-own-natural-flour-paint/
- ↑https://ardec.ca/en/blog/2/flour-paint-an-easy-to-prepare-non-toxic-long-lasting-and-dirt-cheap-exteri
- ↑https://greenlivingideas.com/2012/02/17/make-your-own-natural-flour-paint/
- ↑https://greenlivingideas.com/2012/02/17/make-your-own-natural-flour-paint/
- ↑https://www.motherearthliving.com/mother-earth-living/homemade-paint
- ↑https://www.bobvila.com/articles/homemade-paint/
How we made homemade paint
My toddler is at that stage where she loves squeezing paint out of the bottles. I gave into this to give her the chance to explore this phenomena, but after using an inordinate amount of paint in the process, I thought it might be more frugal to make a batch of homemade salt and flour paint for more economical squeeze painting.
This homemade paint recipe is simple, non-toxic, and it costs next to nothing to make. Not to mention it’s pretty rewarding to make your own art materials. I made these while my daughter was napping, but next time I’ll include her in the process. The following recipe makes enough paint to fill 3 2 ounce bottles (affiliate).
Keep in mind that this paint is perfect for exploring the process of painting, but it’s not great for creating a masterpiece to hang above the mantle. In essence, it’s not a tempera or acrylic paint replacement!

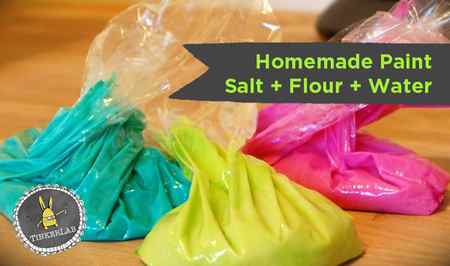
Recipe for Homemade Salt and Flour Paint
- 1/2 cup flour
- 1/2 cup salt
- 1/2 cup water
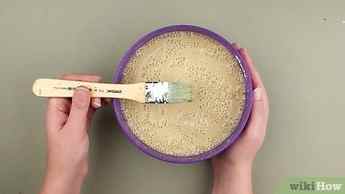
Blend 1/2 cup of flour with 1/2 cup of salt. Add 1/2 cup of water…

and mix until smooth.

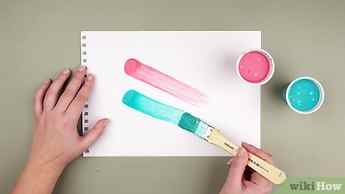
Divide it up into three sandwich bags and add a few drops of liquid watercolor or food coloring to each bag.

Squish them up until the “paint” is well blended. Use Ziplock bags if small children are helping with this step. Add more water if you’d like a thinner paint. Cut a corner off the baggie and squeeze the paint mixture into your squeeze bottle.

This homemade paint came out pretty thick, and was a little hard to squeeze. Next time we’ll dilute it with a bit more water. The good news is that the paint dries quickly. The squeeze paintings we made with regular tempera paint (2 days ago) are still wet, while these are already completely dry! And they have a nice puffy, sparkly texture too!
If you’re looking for a smooth paint (like tempera from the art store), this paint may be disappointing. Because of the salt, it will have a grainy texture to it, which makes it great for squeezing and not so good for painting with a brush

.
A question for you:
What’s your favorite kind of paint and/or painting process?
- Egg Tempera Paint
- Sweetened Condensed Milk Paint
- Bubble Paint
- Microwave Puffy Paint
- Colored Glue
Our favorite toddler art recipe homemade playdough. It’s easy to make, non-toxic, and inexpensive. This recipe has been successfully used thousands of times.


