6 Easy Acrylic Pouring Techniques: The Ultimate Step By Step Beginners Guide
There are many different acrylic pouring techniques but we are going to simplify it for you, taking you over the easiest and best right through to some challenges you should try.
A lot of the same principles for one acrylic pouring technique is used in the next. So once you have got the hang of one technique, it is pretty easy to pick up the next one!
In this article, we will take you step-by-step on how to acrylic pour, plus 7 easy techniques to get you started.
A lot of the tricks you need to know are actually in the consistency of your paint, for different techniques which we will go over in this article.
From dirty pours to blow torching, below I have compiled a list of how to avoid the most common errors and the best acrylic pouring techniques for you to try with easy to follow steps.
In this article:
- 1) Dirty pour technique
- What supplies do I need?
- How to do a dirty pour
- How much do I fill a pouring cup?
- 2) Flip cup pour
- How to flip the cup onto the canvas
- How to get MORE cells
- Why getting the right consistency is KEY
- 3) Puddle Pour
- 4) Tree ring or swirl pour
- 5) Bottle bottom puddle pour or flower pour
- Bonus: 6 How to pour on a cheeseboard
- 7) What to mix with acrylic paints
- 8) Different types of pouring mediums
Popular acrylic pouring techniques:
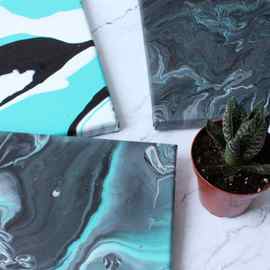
The dirty pour technique is a never-fail crowd pleaser. It is simple and effective, plus the end result is unique every time, it can be quite addictive.
What supplies do I need?:
Supplies for a dirty pour include:
- 1 blank canvas
- 10 cups (try to always use reusable cups)
- Approx. 5-8 acrylic paint 50ml tubes in different colours (White essential)
- 500ml Floetrol
- 10-20 Popsticks
- A straw
- A protective sheet you don’t mind getting dirty
- A cardboard box or similar to catch paint drips
- Gloves and other protective gear
How to do a dirty pour:
Step 1) First choose your desired paint color combination. For example, above we have used gold, white, teal plus some purple and orange in one mix, and blues in the other.
Techniques for Acrylic Pour Painting
Acrylic pour paintings are fluid and unpredictable artistic expressions that are very fun to create. Once you’ve made one, you’ll immediately want to try it again! Here are 3 methods for creating your own unique pour painting. As with all pour paintings, make sure your work area is level before you begin. For each of the methods mentioned below, the paint must first be prepared by diluting it with water and pouring medium until it has a viscous but fluid consistency.
MATERIALS:
- Stretched canvas
- Acrylic paints
- Pouring medium
- Plastic cups
- Plastic bags or drop cloth
- Level
- Water
- Stir sticks
How to create an acrylic pour painting: 3 techniques
Step 1: Straight pour technique
Going from the darkest colour to the lightest colour, pour some paint into the middle of your canvas and let it pool. Pour the next colour into the center and watch how the first colour moves outward. Continue pouring all your colours in this way. Pouring smaller quantities will result in smaller rings or cells of colour. Let your painting dry completely in a level, dust-free area.

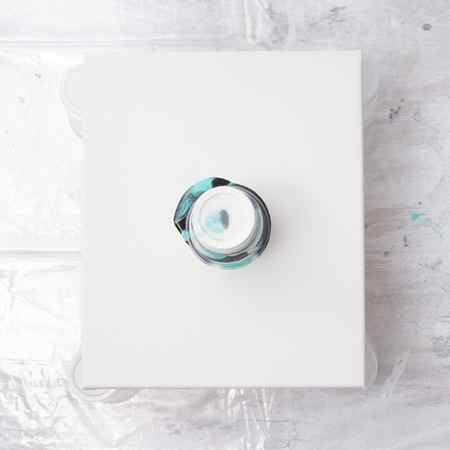
Step 2: Flip cup technique
In separate plastic cups, prepare each paint colour by diluting it with water and pouring medium until it has a viscous but fluid consistency. Layer all your colours in a single cup and quickly flip it onto the canvas so that no paint spills out. Gently lift the cup and watch the paint pool and drip over the canvas. Let your painting dry completely in a level, dust-free area.
Step 3: Dirty pour technique
Layer all your colours in a single cup and gently drag a stir stick through the paint several times. The goal is to slightly combine the colours without mixing them into one solid hue. Pour the mixture over your canvas and let it settle and pool. Let your painting dry completely in a level, dust-free area.


