Using a narrow liner brush paint the vertical lines for the pine trees. Don’t make them all the same size.
Pine Tree Wood Craft for the Winter Season
Project: Decorate your own pine tree for the holiday or winter season!
Project Time: 30 minutes (plus drying time)
Suggested Materials:
*The Wooden Pine Trees pack of 6 also includes sandpaper and instructions.
Instructions
1. Sand the wooden trees until they are smooth (remove the dust with a soft cloth).
2. You may choose to apply a coat of wood stain before painting, or you can simply paint after sanding. A combination of acrylic paint and stain does looks great! Let it dry.
3. Decorate the trees with any craft materials you choose!
We love this idea for the winter season because of how beautiful the pine trees look in the snow. You can add cotton balls to the base to represent snow, or our special sparkling snow glitter to the tree itself. You can also add colorful pom poms or sequins to represent lights or ornaments for a Christmas tree. Use glitter glue for the garland, and don’t forget the star at the top!
View our printable guide for Wood Decorating Instructions and Tips to help your group with this project.
Customer Ideas & Tips
“These wooden trees are worth the price. They are about the size of my hand, so have a nice area to paint. They are thick, and stand up well. Not flimsy at all! My senior residents painted these, and then glued white glitter for snow and gems for decorations and made Christmas trees. They really enjoyed these! I would buy these again.”
“What is great about this craft is that it is something residents can do start to finish in less then 20 minutes. There is not enough time for residents to lose interest. Some of our residents need projects that they can see finished in a short time.”
“Painting these trees is my favorite holiday craft for my preschool class. This year the trees are already assembled – what a great help!”
“Our clients love this activity. We color the tree and add color beads for a fun activity, allowing our patients to be creative.”
Visit our Winter Crafts section on the blog for more creative winter and seasonal ideas!
Related
More Great Blog Posts
 DIY Winter Holiday Themed Doll Pin Crafts
 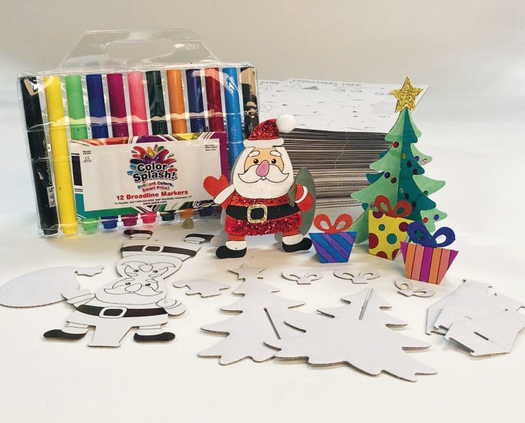 6 Easy Craft Projects for the Holiday
 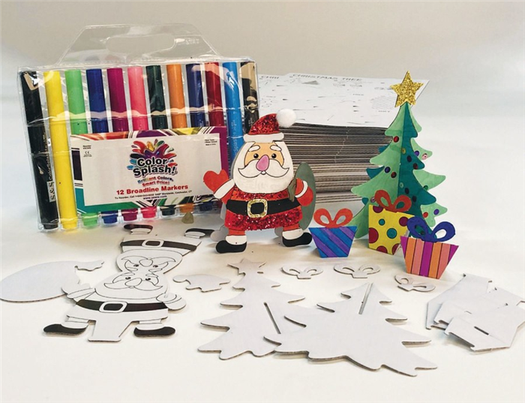 Christmas Tree & Santa Coloring Craft for Kids
Step 1: Supplies
You will need the following supplies:
Canvas, mine is 12″ x 16″
Acrylic paints: white, black, brown, blue, green, orange, red and yellow
glass of water for cleaning brushes
dish for mixing colors
Add Tip Ask Question Comment Download
Mix a small dab of blue paint into some white paint, Mix well. Paint the entire canvas with this pale blue color.
Allow to dry completely.
Add Tip Ask Question Comment Download
In the world of painting, there’s a thing called the “Rule of thirds”. It refers to the idea that the canvas should be divided into sections, the top 3rd, middle 3rd and the bottom 3rd. So, in this case, I chose to place the horizon at bottom of the top 3rd section.
If you’ve ever seen a painting that has the horizon right in the middle, it kind of cuts the painting in half.
With the horizon up high, the eye goes toward the part below the horizon, in this case, it is the water.
If the horizon is at the bottom 3rd of the painting, the eye is drawn up toward the sky.
Using a small brush, paint a dark green line across the canvas, where you want the horizon to be.
Lightly brush some small vertical strokes up across the horizon.
Add Tip Ask Question Comment Download
Step 4: Sky and Ground
Mix a small dab of red paint in with some white and mix well to make a pink color.
With a fan brush, lightly sweep this pink across the sky.
Load a medium size paintbrush with brown paint, paint the ground below the horizon and near the bottom of the canvas.
Allow the painting to dry for at least 30 minutes.
Add Tip Ask Question Comment Download
Mix a small amount of black paint to some white paint to make a light grey.
Very lightly, using the fan brush, paint vertically just below the pine trees. Then brush across horizontally very lightly.
This will create a reflection of the trees in the water.
Add Tip Ask Question Comment Download


