Planning Easter lesson plans and need some inspiration? Read on for a primer from our teacher team!
Easter 2024 Teaching Resources
Get ready for Easter 2024 in your primary school classroom with bunny classroom decorations, word walls, activities, baskets and more ways to bring the bunny hopping into your primary school festivities.
From the famous Teach Starter funky bunny to printable bonnets for your Easter bonnet parade, there’s something for every teacher in this teaching resource collection.
Planning Easter lesson plans and need some inspiration? Read on for a primer from our teacher team!
Contents
When Is Easter 2024?
Easter Sunday moves around the calendar, and this year it will be on 31 March in 2024.
Schools will be closed on Friday, 29 March for Good Friday and then on Monday, 1 April, for the Easter Monday holiday.
What Are Some Easter Activities for the Classroom?
What you do on Easter in the classroom may depend on where you are teaching as this is a religious holiday for many. Explore this list of Easter activities from our teacher team, and choose the type that is right for your class of students!
- Easter Egg Decorating — Students can decorate paper or plastic eggs with paint, markers, or other materials to create their own unique designs.
- Easter Art Projects — Students can create Easter-themed art projects such as decorating a funky bunny, writing Easter cards, building Easter baskets (this makes a great STEM activity!), or completing Easter-themed craft.
- Easter Egg Hunting — You may like to organise an Easter egg hunt for students in your classroom or around the school where they can search for plastic eggs filled with candy or small toys.
- Easter Research Projects — Students can research the history and cultural significance of Easter and present their findings to the class.
It is important to note that not all students will be able to participate in these activities and some may have a different approach depending on their religious or cultural background.
Easter Bunny Bookmark DIY – Materials:
Ok.. this will SOUND like a long list.. but it really is just a list of basic stationary items:
- one paper clip per bunny
- white or brown card + a teeny bit of white and pink paper for decorating
- coloured card for the eggs – if you don’t have any, use white card and decorate yourself
- bakers twine (we LOVE it… stock up today!! US / UK – this assorted set is great too US/ UK)
- Tape
- Glue stick
- Scissors & black pen
Affiliate links added for convenience
Easter Bunny Bookmark DIY – How To:
As per usual, we have, what we hope is a helpful video on autoplay for you….. but I have also written out the instructions below!
As mentioned in the video, there are two ways of making these adorable Easter Bunny Bookmarks – a, uhm, simple and a slightly less simple, but simple really way (hahaha that made sense, right?!). Basically, you can either have your bunnies “double side” or “single sided”! Single is cute and a super fast make. Double is just that little bit more adorable (especially as you get to add a cotton tail to your Bunny Bookmark DIY)!
On to our written step by step bunny bookmark how to –
The Basic Bunny Shape
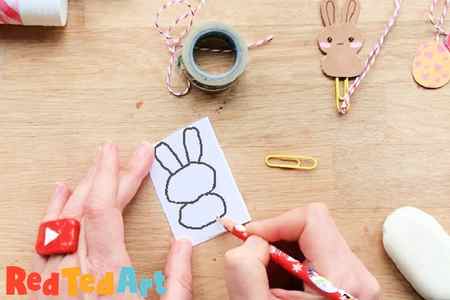
Fold some light card in half (so you can cut two bunnies at the same time). Then start off by sketching your bunny – you will need two ovals, a smaller one for the body – but wide enough to hold a strip of tape to secure the paper clip and a bigger one for the head. Then add ears.
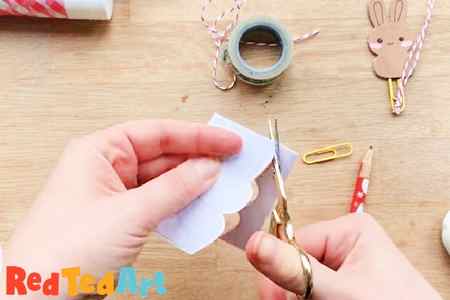
When you are happy with your design, cut out two bunny shapes the same size at the same time.
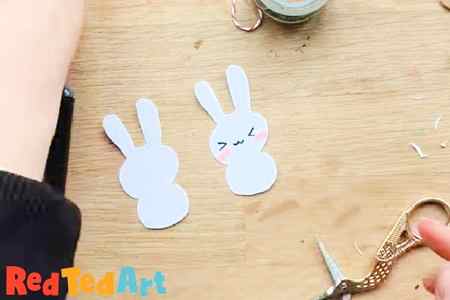
One on bunny – add our facial details (check ours for inspiration). On the second bunny, add a cotton tail. On the brown card, I glued on pieces of colored paper for details
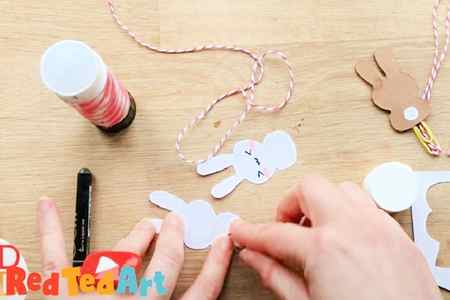
Tape your paper clip onto the cotton tail bunny – make sure enough of the paper clip sticks out, so that it will fit over your book later.
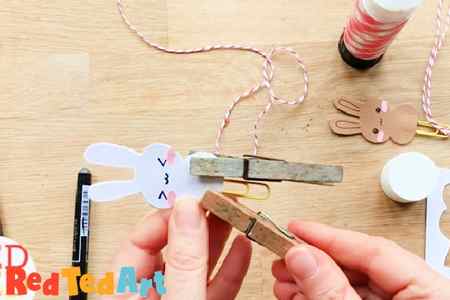
Glue your two bunny sides together.
Hold in place with clothes pegs in need be.
You could already use your bunny as a bookmark at this point! The tangling Easter Eggs are not strictly speaking necessary!
The Easter Eggs
Whilst the bunny dries, cut out 4 Easter eggs. If you have pretty paper like us, great.. if not, use white paper/ card and colour it!
Final Bookmark Assembly
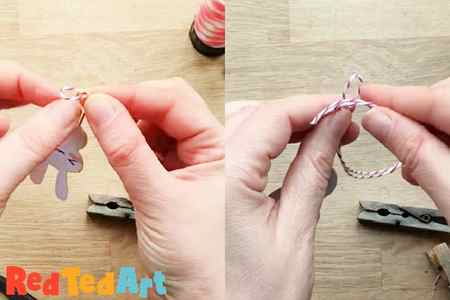
Cut a length of Baker’s twine – that is long enough to loop through you paper clip and fit the length of a book.
Loop around you paper clip.
Then glue between two eggs.
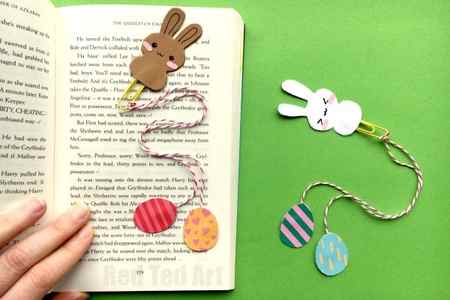
AND YOU ARE FINISHED with your Bunny Bookmarks…. aren’t they the CUTEST!?

We also have a super cute Kawaii Snowman Bookmarks version of this bookmark!

And of course TONS (74 in fact) of Corner Bookmark DIYs for you here:

This paper bunny bookmark tutorial video is also available on YouTube:


