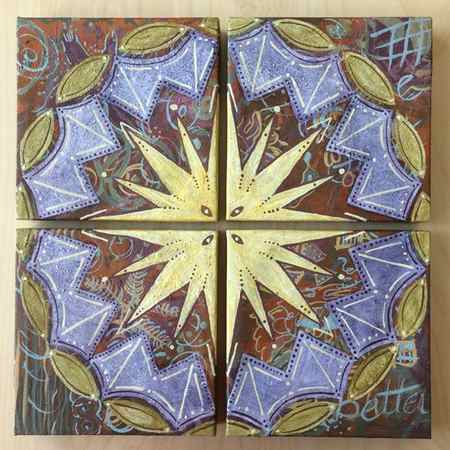
The pigments I purchased will never expire and will always be ready to be mixed up for whatever I’d like to paint. This is a huge pro in my book! Likewise, how little pigment I actually needed to complete a small painting (each of my four panels was a 5″ [13cm] square) was a pleasant surprise. If I ever need a large quantity of paint for a large canvas, this would be a great way to go.
How To Make Paint With Flour
How do you make paint with flour? You can totally make your own homemade paint with flour with just a few simple kitchen ingredients! No need to go to the store or order paint online, we’ve got you covered with a totally “do-able” easy paint recipe you can make with your kiddos. Whip up a batch of flour paint for your next art session, and paint in a rainbow of colors. Are you ready to explore amazing art projects with homemade paints this year?

HOMEMADE PAINT
Make your own easy paint with our homemade paint recipes the kids will love to mix up with you. From our popular puffy paint recipe to DIY watercolors, we have tonnes of fun ideas for how to make paint at home or in the classroom.


Our art and craft activities are designed with you, the parent or teacher, in mind! Easy to set up, quick to do, most activities will take only 15 to 30 minutes to complete and are heaps of fun! Plus, our supplies lists usually contain only free or cheap materials you can source from home!
Find out how to make your own flour paint below with our easy paint recipe. Only a few simple ingredients, are needed for super fun non toxic DIY flour paint. Let’s get started!
Looking for easy to print art activities?
We have you covered…
Click below for your FREE 7 Days of Art Activities
FLOUR PAINT RECIPE
Which flour is used to make paint? We have used plain white flour for our paint recipe. But you could use whatever you have on hand. You may need to adjust the amount of water though to get the paint consistency right.
YOU WILL NEED:
- 2 cups salt
- 2 cups hot water
- 2 cups flour
- Water-soluble food coloring

HOW TO MAKE PAINT WITH FLOUR
STEP 1. In a large bowl, mix together the hot water and salt until as much of the salt dissolves as possible.
TIP: Dissolving the salt will help the paint have a less gritty texture.

STEP 2. Stir in the flour and mix until completely blended.

STEP 3. Divide into containers and then add food coloring. Stir well.

Time to get painting!
TIP: Painting with toddlers? Add the paint to empty squeeze bottles for a fun art activity for little ones. If the paint is too thick to squeeze out easily, add a little more water. Good thing is the paint will dry quickly!

Ready to Mix Your Favorite Colors?
You may already know that you can make your own paint, but have you ever actually engaged in this tactile process? The notion of making my own acrylic paint is appealing as an artist’s experience in the same way I’ve wanted to learn how to make my own paper in the past (as a first step in binding my own books). When I think of wanting to use a stamp or stencil in a work, I prefer to cut my own. Anytime there is an opportunity for me to become a more intimate part of the creative process, I’m intrigued enough to give it a try—to insert more of myself into the finished thing I create. (I also love to make my own flour tortillas for tacos when time allows, but I digress.) If this sounds like you, too, I highly encourage you to take some time to make your own paint. At the very lease, try it out once for the experience. I was worried it would be more complicated and messier that it turned out to be; I was delighted at how and rewarding fun it actually was.
3 Advantages to DIY Paints
Because I may not be able to sway some of you on the “artist’s experience” alone as a reason to give making your own paint a try, here are some advantages that might interest you.
- Cost. Buying pigment and medium separately generally end up costing less than purchasing ready-made artist’s grade acrylic paint. (Probably oil, too, but I’m more familiar with acrylic.) Exceptions might be with rare pigments.
- No toxic additives. If you’re concerned about what might be in your paint besides pigment and the vehicle/medium, you can purchase earth pigments (I ordered from earthpigments.com) and rest easy that your paint is as pure and simple as possible.
- Control. Because you decide the pigment/medium ratio as well as the amount to mix up at any particular time, you can mix up only what you need. You can also control the opacity and the body depending on pigment-to-medium ratio and the acrylic medium you use.
In full disclosure, as I discovered, there are a couple of disadvantages, also. One is that like any free-spirited recipe, unless you make meticulous notes and measure your pigment and medium, reproducing results may be challenging. Another con is that you may feel more limited in the colors you can create—particularly if you decide to use earth pigments as I did. For example, I would have loved to create a vibrant fuchsia, but just couldn’t seem to make it happen with the primary pigments I ordered. (Learn more about the pros and cons of premixing your own colors, here.)
How to Get Started
So, enough talking about it, right? Let me share with you how to make acrylic paint!
What You Need

- Acrylic medium of your choice
- Dust mask
- Dry pigments
- Fexible metal spatula or palette knife
- Glass surface (I used Plexiglas, but highly recommend glass)
- Pipette
- Water
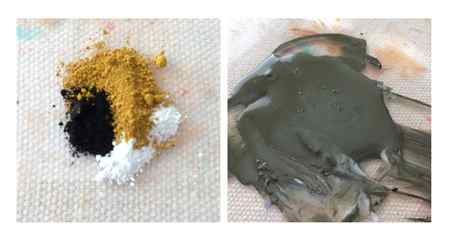
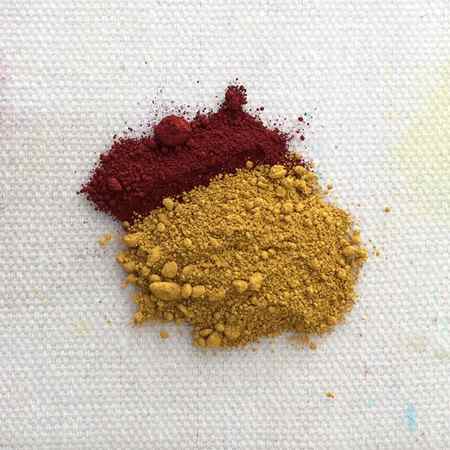
As mentioned above, I chose a few colors from Earth Pigments: Black Iron Oxide, Red Iron Oxide-Y (warm), Red Iron Oxide-B (cool), Titanium White, Ultramarine Blue and Yellow Iron Oxide. For my medium, I used Liquitex’s fluid matte medium. This brand of pigments recommends using approximately twice as much medium in the mix as pigment, so I used that information as a starting point. In my research, I also learned it was recommended to first mix the dry pigment with a small amount of alcohol or water to disperse the pigment before diving in and adding all the medium. I likened this to beating eggs before adding a lot of dry ingredients. I also read that using alcohol rather than water made dispersion easier because there’s less of a weight difference than there is with water. However (and maybe I was using too much alcohol), I found even a few drops of alcohol to dry things up pretty quickly. Using water worked just fine.
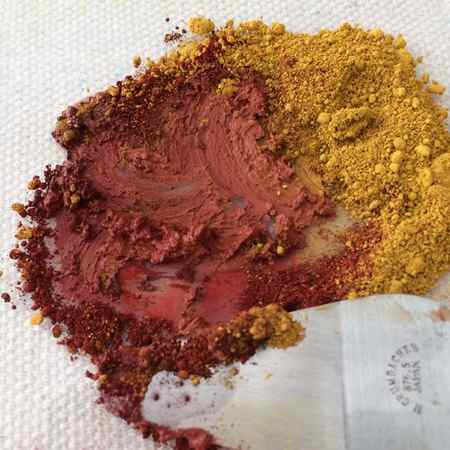
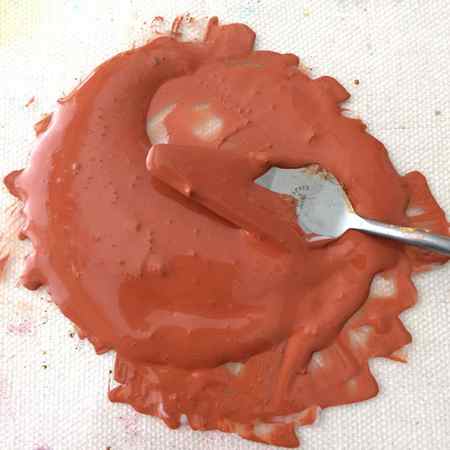
It’s worth mentioning there is a tool made for the purpose of grinding pigment as you make your own paint. It’s called a glass muller. Think of this as a mortar and pestle setup for paint. As a first-timer, I decided to give a humble palette knife a whirl — and it seemed to work well for me. However, if I continue to make my own paint, I’ll probably explore this possibility.