My art style is maybe somewhere between realistic and semi-realistic and this is just my method for painting a face in acrylics. It also changes from painting to painting, but hopefully the tips in this tutorial will help you in painting a portrait with acrylics.
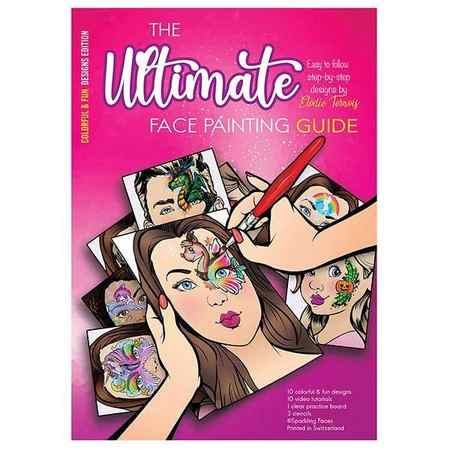
The Ultimate Face Painting Guide Colorful & Fun By Elodie Ternois
Please send me a notification when product is back in stock.
Notify Me
The Ultimate Face Painting Guide Colorful & Fun By Elodie Ternois
€ 36.50
Check out this amazing face painting guide to mastering colorful & fun designs, brought to you by the one and only Elodie Ternois!
You will earn 4 Loyalty Points for purchasing this product.
✔️ Brick And Mortar Shop
✔️ Worldwide Shipping !
Secure payment with Sofort Banking-Paypal-Mister-Cash-CreditCard.
✔️ High Customers Service (rating 9,5 kiyoh)
The Ultimate Face Painting Guide Colorful & Fun By Elodie Ternois
NEW: 3 free stencils inside! (10.5 x 15 cm (4.1’ x 5,9’)
Check out this amazing face painting guide to mastering colorful & fun designs, brought to you by the one and only Elodie Ternois!
Elodie is an award-winning face painter and an international instructor from France. She is well-known for her adorable cartoony-type face paintings, full of bright colors and sparkly glitter. Each one of Elodie’s designs is a unique piece of art, which is admired by artists all over the world. Much of her work has been featured in magazines, one of them even on the cover page of the French magazine “Couleurs”. In this “Colorful & fun designs” step-by-step collection, Elodie shares her tips and tricks with you, to help your skill level blossom and bloom.
To top it all off, the world-renowned airbrush artist, Wiser Oner from the USA, has created a set of absolutely amazing stencils, which will add a wow-effect to each of your designs.
Simply select which design you would like to master, place our clear practice board over top, and paint! As you follow Elodie’s incredible designs and flow, your muscle-memory will begin to kick in. Test out what you’ve learned by moving the clear board on to the face chart to see how much you can remember. Take photographs of your completed work, and create one-of-a-kind menus which can be displayed online, or in print.
The surface of all Sparkling Faces boards is designed with a unique relief texture, so that your brush will glide across the surface easily with the gentlest of friction. No frustrating slipping to be had! For best results paint on the textured side of the board.
Your new practice board can be very easily cleaned with liquid soap and water. More stubborn stains can be removed by very gently rubbing them with a magic eraser and some sunflower oil. Make sure to wash your board with liquid soap before using it for the very first time to help break it in.
Would you like to see Elodie painting the design? Well then have we got a treat for you! This incredible artist filmed a detailed tutorial for each of her colorful & fun designs from the collection. Simply scan the QR Code supplied with your order, and enjoy her artistic magic!
This brand new product has been carefully tested, and has achieved excellent results! We are proud to offer this face painting guide to you, and we know that it will be an incredible investment to your face painting business.
Have fun, and happy painting!
Colorful & fun designs included:
Rainbow & unicorn, fairy, ice queen, pumpkin, spider, dragon, skull, dolphin, reindeer, realistic unicorn.
Brushes Used:
One Stroke Nr 20 (1’)
Round Nr 0, Nr 1, Nr 2
Angle Nr 10 (3/8’), Nr 12 (1/2’), Nr 16 (3/4’)
Life, Art, and Face Paint
Face Painting, Arts and Crafts, Body Painting, Personal Stuff, Rants, Reviews Fun Stuff, and More.
You are at a public event on commission, you have a 40 foot line, every kid wants a full face complex design, and they all took advantage of the free sugar shots booth before sitting in your chair, you are booked for a limited time, and you got a birthday party right after the gig.
You gotta move and groove the line to show the client who hired you that you can handle large crowds, and thus book you again, and not have your client make the mistake of thinking simpler amateur face painting is faster.
What can you do.
10. Load Properly:

This is something that comes with practice, but loading your brush and sponges properly is the #1 thing you can do to be faster at face painting.
When loading your sponge, too wet and you have a drippy mess or something that takes forever to dry, to dry and you just have to go back for more paint too frequently. First of all, make sure you are using a water atomizer to spray your sponge instead of dipping it in your paint water. This allows for greater control over the amount of water you get on your sponge. I always load on the edge of the sponge and concentrate the paint there. This way you get more paint in one area for bolder colors, and much more control over your sponge and where the paint ends up on the model. If done correctly you should be able to get a fast drying base layer of paint done with only one sponge load!
When loading your paint brush the same rules apply to having the right amount of water. This can vary depending on a few factors, like what brand your paint is, and how much water is already in your paint cake. Again practice makes perfect with knowing how much water is just enough to add and how your different paint brushes pick up and hold that water, so pay attention to this when you paint and make some mental notes.
Besides water, the most important thing about loading paint brushes is direction. Obviously with flat brushes you know to go back and forth, or else it will mess up your bristles. But did you know the same is true for round brushes? All to often I will see painters swirl their round brushes. Don’t make this mistake.
What does this mean for speed? Simple – less time reloading your brush and going back for more paint!
I can tell which artists swirl their brushes by how their paints look. I call them ‘Pot Holes!’
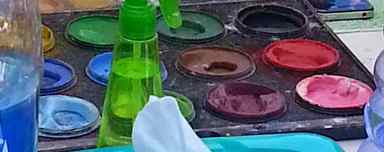
Hitting the bottom of your paint cake is normal and usually the middle is the first part to go, but notice the steep holes in the photo? Those types of holes aren’t from being gradually worn down, those are from swirling the brush in one spot over and over. Avoid having that great hole to China in your paints – load properly.
Not only does swirling your brushes also mess up their natural alignment which will cause them to fray and split, but you also aren’t picking up as much paint as you would by loading the brush back and forth.
By swirling the brush, you are picking up paint but mainly on the outside of your brush, and also the paint is a mish-mash and not pointing in the right direction. Imagine your paint like little rivers on your brush. When you swirl your brush the paint is loaded horizontally instead of vertically, so the little rivers have trouble flowing off the brush as effectively.

Don’t believe me? Try it right now. You’ll find that once your load your brush with the natural alignment of the bristles of the brush, your paint is able to ‘flow’ out of the brush much better, smoother, and most importantly, for longer.
9. Application Routine:
When doing a design make sure that part of you process is making sure you are doing each step of the design in the most efficient order. This means you shouldn’t be going back to add things you missed, doing nothing while waiting for layers to dry, or washing your brush out of the white paint that was on it then loading it up with pink for the lipstick, then washing that and loading it up again for more white details. What a time waste! Examine your design. Look at the steps involved and see how you can trim it down to the fewest steps and color switches.
Lets take this simple design for example.

Step 1. The blue/white base around the eyes and on forehead
Step 2. We can’t apply the stencil snow flakes while the base is still wet, so in order not to waste time, I do the center forehead teardrops, the dots in the corners of the eyes, and the small teardrops under the eyes. I use a new brush for the lipstick or apply the snowflake gem in the center of the forehead.
Step 3. Snow flake stencils on the side.
Step 4. Finish off adding some more tear drops, star bursts, dots, and finally add glitter.
Stream lined. This way I’m not waiting for anything to dry and can still be working on other elements that won’t get in the way for when it comes time to lay down the stencils. If for example I did step 4 after step 1, well now I’m waiting for those to dry too because they are in the area where the stencils go.
Find the most efficient way and your designs will be faster.
Also assign brushes! Depending on how many brushes you have you can pick some to only be used for certain things or certain colors. I wash my brushes between kids, but for detail brushes it’s not as much of a cross contamination risk to keep them one color through out the entire gig (mainly because it’s usually going over top of another layer or paint). So I have four #4 round brushes in my brush case right now, and 2 of those I use for black and white details. Lots of designs call for either block or white details, and some times they call for both black and white details. So instead of washing out the brush to switch between these stark opposite colors, the brushes get assigned a color at the start of the gig. This one trick has sped up my painting so much, I wish I thought of it a lot sooner!
8. Time Yourself:

Before you even go to the event you should roughly know how long each design takes you to do. When you are at home, you can time your small art on your arm with a stop watch. For full face designs it’s best to time them while painting on a real face. Choose an event that isn’t a huge rush, like a farmers market, or a time when there isn’t much of (or no) lineup. Use a stop watch (or phone App stop watch) to time yourself from the moment you start to load the brush to the moment you finish. Record this time. The goal is keep most of your designs under the 5min mark; if they take too long, work on what you can do to speed them up, like not adding as many details, or using a stencil instead of free handing an element of the design. For even higher volume events pick designs that take no more then 3 min on average to paint.
Which brings us too.
7. Limit The Choices:

First of all high volume events shouldn’t be a ‘free for all’ when it comes to choice, you should have selections for people to choose from so you don’t
A. Paint only the ‘usual suspects’ Tiger, Butterfly, Spider-man. (show you client more variety)
B. End up having to say ‘no’ to design requests, and have them think of something else to get. (time waster)
Also, I know you want to show off your best work, we all want to show the stuff we are capable of doing, but high volume events when you are on the clock and being paid, is not one of them. Realize that pretty much everything you do is amazing and better then what a volunteer, or cheap-o face painter has to offer, people are going to still be impressed by what you do. So save your really ‘wow designs’ for birthday parties.
I know it’s boring painting the same thing over an over, but it’s also faster. Another perk of having fewer options for the public is there is less time spent thinking about what to get. You can’t afford too many people to ‘um and aww’ about what to get, or spend too much time looking in a book of designs, it slows things up. Studies have proven that the human brain can in fact become overwhelmed when given too many choices.

I usually have 5 designs each gender would commonly pick, and at least 2 neutral ones making 8 full face designs in total, and 8 small cheek art designs. Some times depending on the event I might have a photo sign, but usually I opt for a ‘word sign’ so i can have more fun with colors, and changing things up a bit. If things are really busy I also have the option to paint things the same way each time.

For all of you who are sick of Frozen. I know! lol!
When face painting there are a few ultimate and hard truths
– It’s not going to be perfect
– It’s likely coming off at the end of the day
While we all want to strive to be perfect with our art, face painting is a type of art that goes on fast, and maybe lasts the day. So when it comes to being a perfectionist, it’s not really practical. You can’t treat a kids face the same way you would treat a large acrylic canvas. You can’t always fix every mistake, you can’t always just decide to start over. You gotta learn to WORK WITH your mistakes rather then fight them. Also you have to learn to live with them, which is hard to do, if you want to learn this behavior you have to practice. Start drawing with pens instead of pencils and you’ll get the idea.
As face painters we create what i call ‘5 minute master pieces’ because they take about 5 min to paint, and some times only last about 5 minutes lol. You gotta learn to let go of trying to get things perfect and realize that ‘good enough’ some times is good enough.
Want another hard truth? No one really see’s or cares about your mistakes other then you anyway. :p
Learn to let it go, and you will paint way faster with out worrying about all the mistakes you have to avoid.

I wrote an entire post that touched on the topic of having a clean an tidy work setup, so this is going to be a bit of a repeat on those points.
– Have a place for garbage – reduces clutter on your table
– Try to set up your table the exact same way every time. It helps if you choose a side to work from, if you are right handed, then ALWAYS have your set up on your right.
– Take 10 seconds to keep your table tidy and not let clutter build up.
– Have homes for things, put things in little containers or boxes to help organize
– Only keep face painting related items on the table. No keys, no coffee, no hats etc.
– Use a large enough table, so you can lay out all your stuff and avoid stacking things as much as possible.
Your table should act like a well oiled machine. Know where everything is by having it in the same spot every time, and putting it back in that spot when done. Less time spent searching for things. Develop a system because every second counts.
Read more about these points HERE.
4. Right Tools For the Right Job:

Anyone who ever said “it’s a poor craftsman who blames his tools” surely was not an artist themselves. Having the right tools is half the battle.
If you buy your brushes at the dollar store, or the bargain bin at your local craft store, your work is going to look like you brought your brushes at the dollar store! You get what you pay for! Invest in some good quality brushes that come recommended BY face painters. I got all my favorite brushes this way, by reading reviews by face painters. I used to stick my nose up and think ‘whatever, I’m an artist I can work with any brush’ – I was stupid. Once I finally got some good reviewed and recommended brushes I saw the difference instantly. I was not longer fighting my brushes to get them to work – now my brushes work FOR my not against me.
Sponges can do half the design for you if you have a few rainbow base blenders, and in half the time it takes to blend using a brush. AND the result is better! I used to think (many years ago) that those designs were airbushed to not have any lines. Nope – sponges.
Same with one stroke cakes. WAY back in the day I came across a Donna Dewberry book on one stroke painting, and instantly saw how it could be used for face painting, and made my own one strokes by cutting up my paints. What a time saver! Now-a-days companies make them for you, but the result is the same. FAST designs that look good!
Stencils are the ultimate cheat – and i love em! Some people balk at using stencils because they see it as a slippery slope to ‘anyone can do it’ and taking something away from the art form. They couldn’t be more wrong. So what if “what ever I can paint a star”, yea? So Can I. But can you paint 6-12 of different sizes in multi color in 2 seconds and have them all come out perfect? Didn’t think so. Stencils are a great way to add lots of detail to a design fast! Sure I can free hand cheetah spots, but the stencil is SO crisp and is a line buster. Just remember here’s what I say, ‘Stencils are like the sprinkles on a cake, but not the cake itself.’
3. Mirror Mirror:

What are some things besides set up and painting which also take time during a face painting gig?
– Model getting onto the chair
– Asking the model, what they want and listening
– Showing them their face in the mirror
– Model leaving the chair
(also some times cleaning the face and pinning hair back)
These things are a part of the process, and 3/4 can’t really be avoided with out help from a third party.
But one of these things can be changed – the mirror.
The model has to see their face in the mirror, this is part of face painting, and they have to be given a few seconds to look. I had Aryn time some things here and there to get some averages and here is what we found.
Time getting into the chair – 3 – 6 seconds
Asking the model, what they want and listening – 2 – 12 seconds
Time getting out of the chair – 3 – 8 seconds
Time spent looking in the mirror – 6 – 20 seconds!!
This was a time vampire.
But it’s something you can’t really ‘hurry along’, because they want to see themselves, it’s basically what they waited in line and paid to see! So how can this be solved?
Move the mirror!
Every second that kid is looking in the mirror is time another butt could be getting into your chair. If you have the mirror placed some where else you can direct them to go over there to look at themselves! If you are like me part of your payment is seeing the reaction to your work, but some times you have to get over it at large events just to be more efficient. But if the event isn’t too crazy, then you might be able to do a combo of both! I show the kid in the mirror for about 5 seconds, then direct them to the other mirror if they want to look again or see for longer. Win win.
2. Crowd Control

You know what’s hard? Saying ‘no’ to people. You know what’s harder? Learning to say ‘no’ to people. You know what’s harder-er? Trying to paint with parents and kids crowding in on all sides, a 2 year old trying to climb on your lap for a better view, and a 6 year old who puts there head in front of your field of vision while a mom tries to tell you how to paint and feeds jellybeans to her child sitting in the chair!
Dealing with people in your space is also a big time waster. Part of the face painting setup should be crowd control, because no having to keep an eye on kids trying to touch your stuff, kids gathering around getting to close etc, will make you paint faster. Make sure you have a sign saying where the line up starts, and some kind of path indicator of where the line should go. Maintain boundaries with your tools, these can be psychical boundaries like setting up against a wall, or social boundaries like having the people stand in a certain place.

or a sign people can understand
With my setup, people must wait in a certain spot depending on how my table is setup, might be on the other side of the table, or i might have a mini table with my selection book where i conduct people to wait. As for ‘Helicopter Parents’ all you got to do is kindly ask for some room to work in a friendly way. “Could I ask you to back up please? I need some elbow room. ^.^” then i stick my bony elbows out, or even put my hand out to arms length showing them how far away i would like them to be. Cool thing is that because of an unspoken societal contract people will back up rather then be touched by your hand,
Especially your hand.

Stop feeling like a jerk for asking for something perfectly reasonable- ‘Back up please’. I know face painting is supposed to be fun and not serious, but you have to remember that it’s still work, it’s a work area, and the last thing you need is to accidentally elbow the 2 year old you did not see standing next to you, in the face while reaching for something out of your kit. (it’s bad for business :p)

You know what helps speed everything up? Staff. We call them ‘line managers’ and they are the best thing to have on crazy busy gigs. Here are all the things a line manager can do for you.
– Ask the model what they want before it’s their turn, then tell you quickly when it’s the models turn.
– Pin back hair, and take out clips
– Pre-clean faces
– Take money, donations, or tickets (if applicable)
– Answer questions from those in line
– Help them into the chair
– Help them out of the chair
– Show in mirror
– Direct to exit
– Manage the line by not letting people budge, make sure the line isn’t cutting off a path
– Ending the line, and making sure others don’t line up when it’s over.
Some people even get their line managers to apply the glitter!

Biff here is great with children, and loves glitter.
While it’s best to have your own line manager who has experience, you can also some times get a volunteer from the venue you are painting at and give them a crash course.
Line manager is the ultimate time saver!
How to Blend Acrylics and Shade Faces
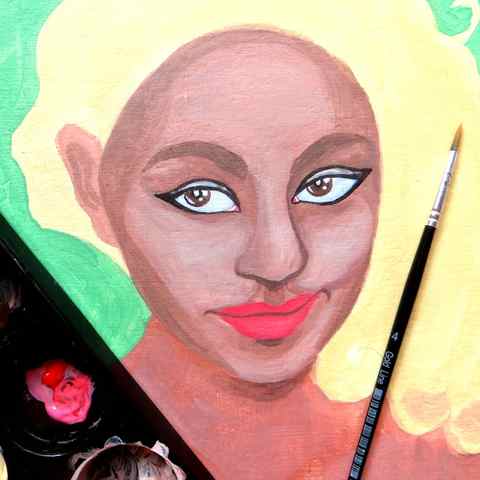
Since acrylics dry fast, I find it hard to blend the darker and lighter skin tones together and I often work in layers instead. Starting with covering the whole face in a mid-tone, I can then add layers of the darker mix for the shadows and the lighter mix for the highlights. I blend them outwards by first laying on the thick color with no water or only a little water on the brush, just the paint. Then I rinse the brush in water or use a different brush and dip it in water to make it wet and blend out the edges while the paint is still wet until there’s no sharp line or edge visible. You can also try blending out the wet paint with a dry, flat or fan brush.
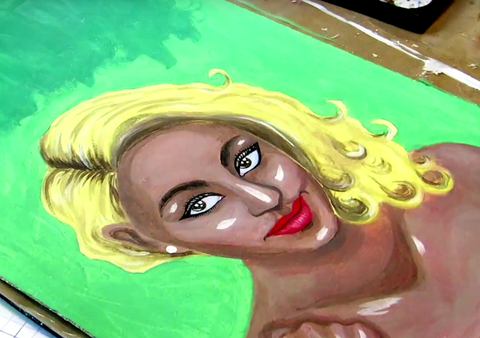 |
| Dabbing on light skin tone mixture for highlights. |
Using too much water to blend out the skin tone might lead to the paint peeling off, when it’s dry. I’ve never had this happen, but if you have that problem, you might want to get a medium to achieve that same transparency to the paint that I’ve done with water here. Matt medium* is transparent acrylic paint so mixing that with a color will make it less opaque and let you blend out the color gradually without using water or using less water.
 |
| Blending out the highlights. |
As for where the shadows and highlights go, you can look at the reference photo or decide on a light source and let that determine, where the light would hit and which areas would be left in shadow. I might color in the eyelids here too, or leave them white if I plan on doing a heavy eye-makeup look later on.
To set the portrait in the background better, I might also add a few strokes of the background colors into the shadows or highlights of the face and blend them out the same way I did with the skin tones to give the face a bit of a colored glow. I also do the same thing with the blush on the cheeks.
How to Paint an Eye
Once I’m pretty happy with the skin tone, I start working on the eyes, eyebrows and lips or mouth in no particular order going back and forth. I might go over the skin again in the process, too. I color in the iris with a flat color and the pupil in black and then add highlights with opaque white acrylic paint. I have a big, 250 ml bottle of white by Plus color* (link leads to a 60 ml paint bottle), because I found I use white a lot. I actually used it a lot more for crafts and stuff before I discovered gesso.
I paint circular highlights and sometimes a white line on the pupil and the iris to make the eyes look more lively. I don’t leave the whites of the eyes completely white, but usually add a transparent blue tone close to the eyelids, but this could be any other color coming from the background or your character. And, of course, I add pink in the corner of the eye. You might even add a bit of a white highlight in the corner of the eye.
I leave the eyelashes for last after the eyes and eye-makeup are done and paint them on individually with the smallest brush I have, which is a synthetic size 1 round brush*.
How to Paint Eyebrows
As for the eyebrows, I color them in with a light version of the tone I want them to be and then add individual hairs over it with a darker tone and a smaller brush.
I fill in the lips with a base color and add highlights and shadows on top of it. I often make the upper lip a bit darker since it’s usually in the shade unless the light is coming from underneath. I add a soft highlight in the middle of the lower lip and add darker lines or white lines on top of it leaving the base color to show through and blending the lines into the base color in the edges. I add shadows in the corners of the mouth and between and under the lips.


