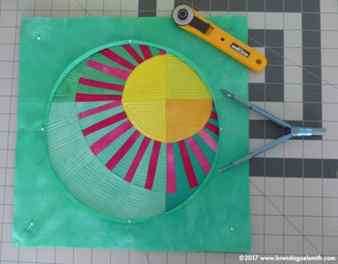
Now that I am happy with this practice piece, I am going to work on my first completion for 2017 – Pigface (12x12in):
Tutorial: How to Attach Textile Art to a Stretched Canvas
This tutorial show one method for attaching your textile art to a stretched canvas in a way that allows for the work to be easily removed later if desired. Experiment and see what works for you. There are many options available.
For a while now I have been wanting to try mounting my small textile art pieces on stretched canvas to make them more user-friendly and approachable for collectors. Helen Conway, Lyric Kinard and others share useful tutorials for wrapping stretched canvases while both Deborah Boschert and Cindy Grisdela outline some glueing methods in their recent books. Others suggested double-sided tape but I wasn’t sure how long it would last. I wanted to keep my options open, so I went looking for a stitching method that allows for the work to be taken off later whilst remaining intact.� I sought help via Facebook and Instagram. Thank you to everyone who responded, especially Lisa Call, Jennifer Corkish and Carolyn Collins who confirmed that stitching is possible and provided encouraging tips.
Tools and materials:
A faced work has a clean edge and can be sized to sit flush with the edge of the canvas. As shown in my list of Alternative Quilt Finishing Tutorials, there are many different ways to face a quilt.
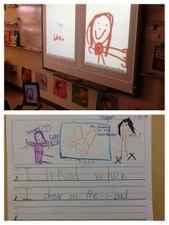
The following photos give a glimpse of my Wholecloth Facing Tutorial:
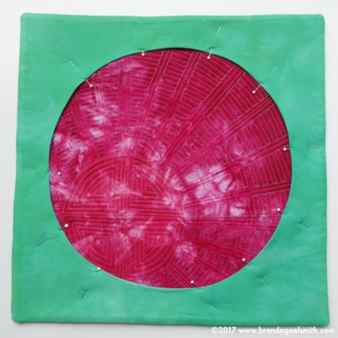
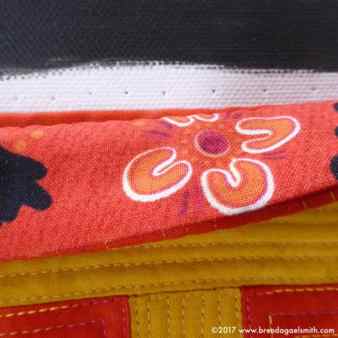
This work already had a hanging sleeve. I left it on in case I ever wish to detach the work, but otherwise I wouldn’t bother. The facing edge is one inch deep. See my Mitred Facing Tutorial.
Preparation of Stretched Canvas
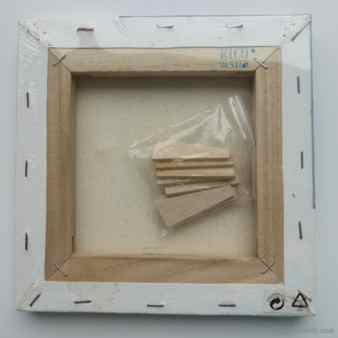
Choose a stretched canvas that is the same size or larger than your textile work.
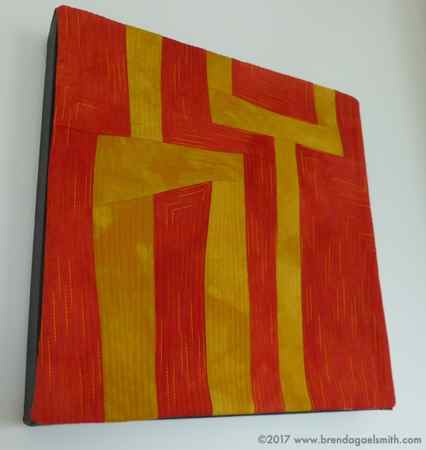
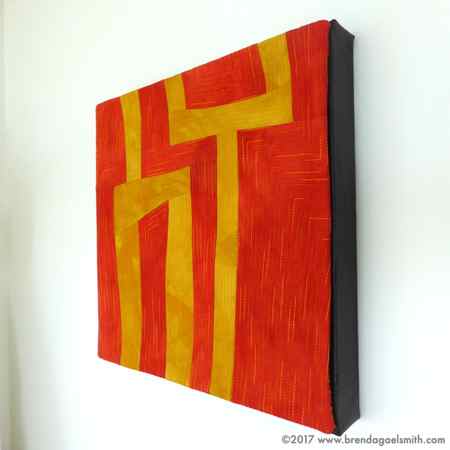
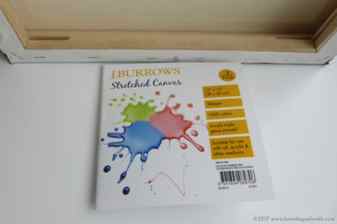
I used a J.Burrows 12x12in 380gsm gesso primed canvas that I picked up on sale at Officeworks recently (2 pack for $5). I am new to canvas shopping but this turned out to be a good choice as the stretcher bars taper in at an angle so that you can almost reach the edge of the canvas easily with your fingertips and a needle. (It’s hard to photograph!)
By contrast, the solid wooden frame on this Rico canvas makes it difficult (impossible?) to stitch within the 1 1/2 in perimeter of the canvas without special tools.
Paint the sides and edges of the top of the canvas with acrylic paint. You don’t need to paint the whole canvas top as it will be covered. (Looking at how the staples have corroded on the back of that Rico frame that is still wrapped in plastic, it may also be desirable to seal the staples for longevity. Does anyone have any practical experience on this? Living by the ocean, everything rusts!)

Using an awl, needle or other sharp device , pierce small holes in the canvas at half-inch or desired intervals around the edge of the canvas. These holes are for coming UP with the needle from the back of the canvas.
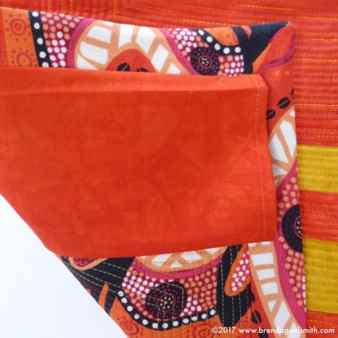
For expediency, my holes are positioned one inch in from the edge of the canvas to match the one inch depth of the facing on the back of my orange textile work (see below). For the green textile work, I marked chalk line at 1 inch from the edge (see above) but you might like to go closer. Alternatively, you may choose to eyeball it as you go but I find the pre-piercing and marking helps me keep things straight.
Approachable canvas paintings for beginners

Learn how to get over the fear of the blank canvas. Explore the benefits of toning your canvas including my 3-step process on how to do it.
4 Benefits of Toning Your Canvas
Provides a starting point
Creates movement
Makes the canvas less intimidating and more approachable
Roller marks can inspire your next move
When I began painting, getting over the fear of the blank canvas was one of my biggest challenges.
For me, the blank canvas carried the expectation that I had to create something worthy of it, a “masterpiece”, and that I had to spend time and energy planning exactly how I was going to give shape to the ideas in my head.
I decided that the best way for me to get over my inhibitions was to tone the canvas right away. This made the canvas less intimidating and more approachable. In my mind, toning the canvas made it “less perfect”. It also created movement, and it took away the burden that I had to know exactly what I was doing before I made my first mark.
Google “Should I tone my canvas?” and you will get a multitude of opinions. My approach is rather unorthodox. For me, toning a canvas has everything to do with movement and beginning the work, more than having to take into account what the painting will look like when it’s finished.
I start by choosing one of either two colors depending on my mood: Yellow ochre for a warmth or Payne’s grey for coolness. 90% of the time, I chose Yellow ochre because I think it’s a beautiful earth color and it lends itself well to my pallet.
Keep in mind that you can tone your canvas with any color. If Yellow ochre doesn’t appeal to you, chose a color that does. We are so much more likely to enjoy the painting process if we work with colors that we like instead of colors we don’t like.
3 Steps to Tone Your Canvas
Chose a color that resonates with you
Squeeze the paint directly onto the canvas (I prefer to place the paint on the lower left side of the canvas)
Use the roller to spread the paint evenly . (Remember to paint the sides of the canvas also.)
There is no need to tone your canvas perfectly flat. Quite often, the lines, bubbles and textures that the roller creates during the toning process can serve as inspiration or insight for your next move.
If choosing a color to tone your canvas feels daunting, keep in mind that the toned canvas is mostly (if not completely) obscured as a result of the multitude of layers I add during my process.
Paint the front as well at the sides of your canvas.
A thin layer of acrylics will be dry in 15 minutes. Additional time may be required for humid climates.
Mix toning color (Yellow ochre) & medium (Modelling paste) to tone and texture at the same time.
Instead of toning the entire canvas, try toning only a few sections instead. I’ve purposefully left entire sections of white canvas in some of my finished pieces.For me, toning is a tool to create movement and a place to start. If you don’t want to tone your canvas at all, you can simply begin.
Politics and Reformations: Histories and Reformations : Essays in Honor of Thomas A. Brady, Jr.
These twenty-three essays, presented by students, colleagues, and friends to Thomas A. Brady, Jr., the Sather Emeritus Professor of History at the University of California at Berkeley, explore the historiographies of the Reformation from the fifteenth century to the present and study the social and cultural history of religion from the sixteenth to eighteenth centuries, especially in Germany but also in Switzerland, the Netherlands, and colonial Mexico.
Contributors include: Dean Bell, Peter Blickle, Christoph Burger, Roger Chickering, Constantin Fasolt, Kaspar von Greyerz, Bernd Hamm, Craig Harline, Joel Harrington, Susan Karant-Nunn, Greta Kroeker, Amy Leonard, Marc Lienhard, Terence McIntosh, Erik Midelfort, Christopher Ocker, Michael Printy, Anne J.Schutte, Julie Tanaka, William B.Taylor, Elaine Tennant, Lee Palmer Wandel, and Ellen Yutzy Glebe.
Publications by Thomas A. Brady, Jr.:
• Edited by Thomas A. Brady, Jr., Heiko A. Oberman, and James D. Tracy, Handbook of European History 1400-1600: Late Middle Ages, Renaissance and Reformation. I: Structures and Assertions, ISBN: 9789004097605
• Edited by Thomas A. Brady, Jr., Heiko A. Oberman, and James D. Tracy, Handbook of European History 1400-1600: Late Middle Ages, Renaissance and Reformation. II: Visions, Programs, Outcomes, ISBN: 9789004097612
• Edited by Thomas A. Brady, Jr., Katherine G. Brady, Susan Karant-Nunn and James D. Tracy, The Work of Heiko A. Oberman, ISBN: 9789004125698
• Protestant Politics: Jacob Sturm (1489-1553) and the German Reformation, ISBN: 9780391038233
• Edited by H.A. Oberman and T.A. Brady, Jr., Itinerarium Italicum: The Profile of the Italian Renaissance in the Mirror of its European Transformations, ISBN: 9789004042599
• Ruling Class, Regime and Reformation at Strasbourg 1520-1555, ISBN: 9789004052857
• Communities, Politics, and Reformation in Early Modern Europe, ISBN: 9789004110014
Editor of Studies in Central European Histories