
There’s no reason to drive yourself crazy trying to plan a Halloween art project when you can have it all in one convenient download. Just print and go! And let the kids do all the work making fun art work that they will be proud to see hung up on your classroom bulletin board. You can check out this “Design A Witch Hat” art project on in my shop.
Halloween Art Project: Design a Witch Hat
I find that a Halloween art project can be a whole lot of coloring, cutting, gluing, and assembling of parts. In other words, it’s a job within a job for us teachers to keep track of. Meanwhile, there’s a pile of papers on your desk that needs grading. I’ve been there. I know!
How about a Halloween art project that your students can create independently, requires no assembly, and looks fabulous on your bulletin board? My spooky witch hat game only needs markers, paper, and small paintbrushes to implement.
If you’re a regular ed teacher, pair this art project when you teach about “which witch is witch?” homophones or when you read the book, “Room on the Broom” to them. The kids will love it! This game is also great for art teachers instructing about the element of art called, “line” as it features many kinds of lines for the designs.
Halloween Art Project
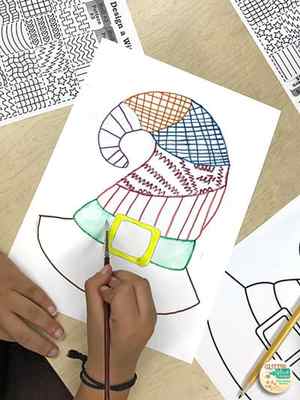
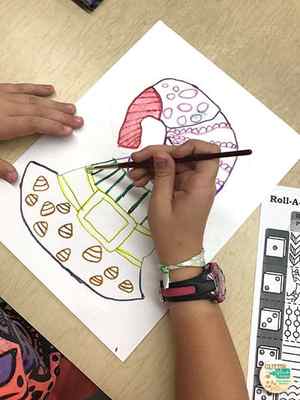
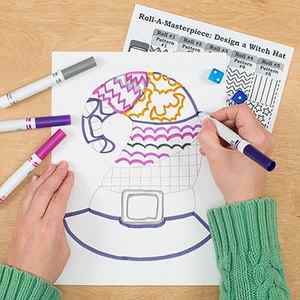
This is a roll-a-dice drawing game in which the students roll to select the parts of the design they’ll use to create their one-of-a-kind witch hat. Three of the designs are Halloween-inspired to add to the fun. The game includes the game board, step-by step photo directions, and a hat tracer.
This is how the game works: they trace the hat, roll for the designs, and draw them in the spaces provided. Next, they outline everything in marker. Then they use a slightly wet brush to “paint” in the parts of the design. Lastly, they cut it out.
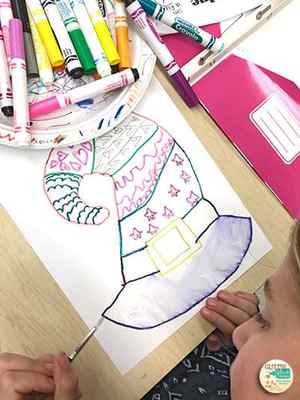
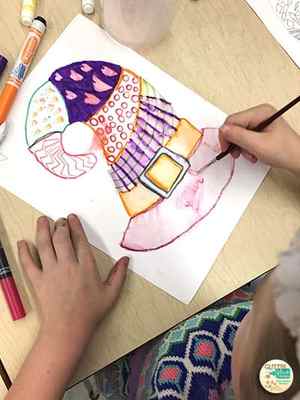
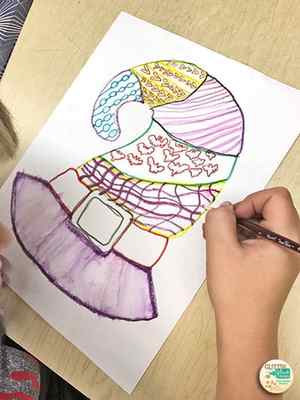
And even though the directions are all the same, each student winds up with a very unique design they can be proud of!
Drawing, Coloring, & Painting Tips
- Draw the shapes large and the lines spread apart. Take the time to explain this to your students. It’s hard to color in teeny tiny shapes.
- When coloring with markers, encourage your students to create thicker marker strokes by using the side of the marker.
- Make sure students know to dab off excess water from their brush. They should have just enough water in the brush to make it damp, not soaking wet.
- Speaking of brushes, select ones that are narrow and pointed. This will prevent the paint from getting into undesirable areas.
I thought my second graders did an awesome job on these witch hats!

Witch Hat Cut Files + Clip Art
Happy haunting, my lovelies! It’s Friday, so it’s time for another freebie! If you’re making invitations for a Halloween party, creating some spooky crafts, or if you just have a wicked streak, you’re definitely going to want to get your hands on these witch hat cut files and clip art!
And make sure you get the candy corn cut files and clip art from last week, and stay tuned all month for fun Halloween-inspired files every Friday!

Table of Contents
Download the Free Witch Hat Cut Files + Clip Art under SVGs C51
This file can be found in my Free Craft Resource Library. The file number is: C51.
Want access to this free file? Join my FREE resource library! All you need is the password to get in, which you can get by filling out the form below!

How to Use These Files
You can cut these files on a Cricut Maker 3, Cricut Maker, Cricut Explore 3, Cricut Explore Air 2, Cricut Joy, Silhouette, Glowforge, or other cutting machine! Here are detailed tutorials that will help you use these SVG files in your crafting:
- How to Upload an SVG to Cricut Design Space
- How to Upload an SVG to Silhouette Studio
- How to Organize Your SVG Files
- Best Blanks for Cricut & Silhouette Projects
- Best Places to Buy Cricut Supplies
- Learn Your Specific Cricut Machine
Iron On Vinyl (also called Heat-Transfer Vinyl or HTV)
- Using Iron On Vinyl
- Layering Iron On Vinyl
- Warm Peel vs Cool Peel Iron On Vinyl
- Weeding Iron On Vinyl
- All About the Cricut EasyPress
- Iron vs. EasyPress vs. HeatPress
Adhesive Vinyl
- How to Use Adhesive Vinyl
- Weeding Adhesive Vinyl
- Layering Adhesive Vinyl
Cardstock
- How to Cut Cardstock and Paper
Other
- How to Use Print then Cut


