Pine, fir, juniper, larch, spruce, and yew trees are all members of the coniferous family.
Basics to drawing Trees
Hi there! I’m Pattyton, an artist and a woodworker. I’ll be teaching you some basics to drawing trees and other details for your next forest background or scene! I’ll start by covering topics like different trees shapes, colouring bark, and adding leaves. Then, we will move onto the mood development by using lighting and weather effects.
There are two main types of trees, Coniferous trees and Deciduous trees.
Conifers are fast growing trees that keep their leaves in the winter. Deciduous trees are trees with broad leaves that shed their leaves in the winter.
When it comes to drawing the two, the main difference is the shape. Since Conifers grow fast, they tend to be a lot straighter when growing, with a thin trunk and lots of branches. These are great for a quick and simple forest background!
When drawing deciduous trees, since they grow slowly, they have a much thicker trunk in a variety of different shapes. They can have a lot more personality and are great for a focal point in an illustration.
Tree Anatomy – Trunk
Both types of trees are still made up of the same parts. All trees starts with roots, the trunk, branches, and leaves! Let’s break it down and start with sketching out some trunks!
Trunks are essentially a long cylinder, so let’s start with two parallel lines to create a basic straight trunk.
To create some irregularity, here are a couple samples to start you off.
A V-shape trunk is very common, where the main trunk splits into two.
A thick trunk is just a wider version of the basic trunk. This is the best trunk for adding other details, such as texture, hollows, or knots.
Crooked trees are what ever you want it to be. Draw a random squiggly line and a parallel line next two it. Just make sure when drawing a crooked trunk that the tree still grows upwards!*
Don’t forget to add a taper to the bottom of the trunk to start off your roots!
Tree Anatomy – Bark Texture
Let’s start with a straight bark texture! By drawing 3 or 4 vertical lines from one edge of the trunk to the other, we define the shape of the trunk!
Alternatively, we can stylize the shape by giving the tree a twist. Using the same method, we will draw 3 or 4 lines, but following the twisted texture.
Combine the two techniques, but first, draw a couple dots on the trunk. We will use the dots as branches or hollows in the tree. When drawing the vertical lines, we will avoid crossing over the dot, and weave around it.
With an HB pencil, lightly sketch a line as the center of the trunk of the tree from the bottom of your drawing space almost to the top.
The border around Figure 2 shows you the rectangular shape of the drawing space used to draw the tree in this tutorial.
Don’t try to draw the line perfectly straight; trees look more natural with a few bends and curves in their trunks.
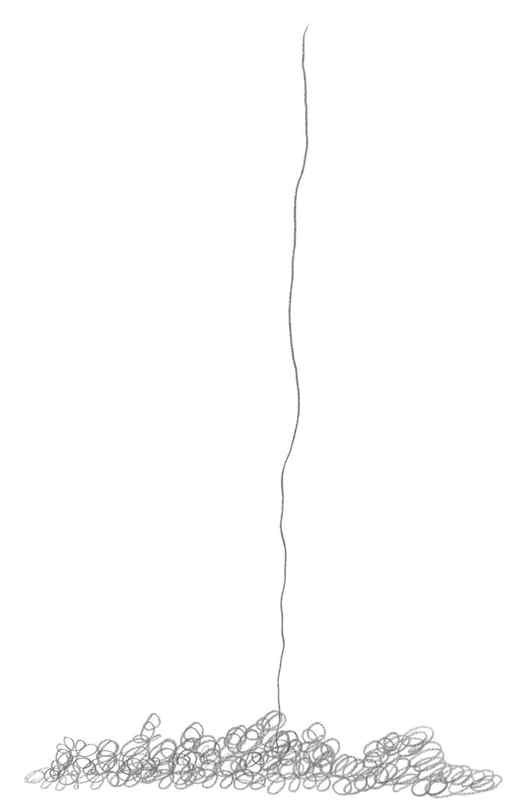
Use squirkles to add the ground or base from which the tree grows.
You can make the ground either bumpy or fairly level by varying the shapes and sizes of the squirkles.
The trunk is very thin at the top and wide at the bottom.

Add a few tiny branches to the top of the tree trunk.
Refer to Figure 5 and the close-up view in Figure 6. Make each branch progressively narrower the farther it extends outward from the trunk.
Keep in mind the old expression: “less is more”! It’s easy to add more branches later if your tree looks too sparse, but erasing branches that are too full or thick is very difficult.
How To Draw Tree Easy Step By Step Tutorial

You don’t have to be an artist to create beautiful drawings like these. In fact, drawing trees is one of the easiest things you can do. Here we are at Tinydale again with another easy drawing idea for kids. In this blog, we will learn How to draw Tree Easy step-by-step guide for Kids? How To Draw A Tree, Drawing Trees, Drawing The Tree, Drawing Trees With Leaves, Drawing Trees With Branches, Drawing Trees With Roots. This is suitable for beginners as well. Teachers are free to use this concept in their Science lesson plans and correlate it with other subjects as well. As this is at the beginner level we will start with how to draw tree without leaves? Now kids must be wondering How to draw evergreen tree? Nothing to worry lets straight away dive into the magic of drawing and colouring:
Before that please don’t forget to
Materials – How to draw a Tree?
This tree drawing for kids is an easy drawing and colouring craft with assembling minimum materials such as:
- Paper
- Pencil
- Colours Crayons/Oil pastels
- Tissue paper
You can use this tree drawing in your flower garden.
Learn how to draw trees step by step using this free online drawing tutorial.
How to draw tree easy step by step
Use this step-by-step tutorial to learn how to draw a tree from start to finish. It’s easy!
We will draw trees and colour them. We will do this amazing easy drawing for kids in 5 easy steps :
Step 1 :
Take a piece of white paper or A4 size paper. Stick the paper using the tapes to avoid movement while easy tree drawing. Draw a tree now.
Step 2 :
How to draw tree with pencil? You can use a circle-shaped object to trace the stem of the tree. Secondly, make the tree branches with a pencil.
Step 3 :
Start drawing the main part of the tree with the circle objects. I used sellotape to make the semicircle as shown in the video tutorial. You can use any circular object. Even you can do a free drawing.
Step 4 :
Firstly Begin to colour the stem using the brown colour. Secondly, start coming down to the roots and try to give the shade of black to give the real feel of soil. You can even use pale yellow to give the wooden look over the stem and do the outline and the marks using a pencil. And your stems and roots are almost ready.
Step 5 :
Here we will be with the main part of the tree. We used three colours such as:
- Dark green
- Light green
- Yellow.
The technique I used is to follow with the colours one after the other in the circular motion. Then gradually you can start blending with the tissue paper. Here your easy tree drawing is ready in 5 simple steps.
5 Useful Tips For Teachers:
- Teachers can use this easy drawing and colouring in their art lessons.
- They can use this craft lesson while doing their germination lesson plan for first graders.
- Start doing this art project and simultaneously play the lovely rhyme which you can check in the video below:
- You can even try doing this art in the poem time session as we did during our A little seed poem.
- Teachers can use lesson plans on plants for kindergarten and correlate and make them more engaging with easy art and craft.

I love trees!

With these art projects, we came up with the beautiful saying to Grow trees! and also an initiative to plant a tree gift. I hope you all will definitely try this simple art project with your little ones with minimum requirements. For details please follow the video above for more clarification on this easy art project. In my next blog, I will try to bring up how to draw tree leaves? I hope you are part of our amazing group ColourCraze and Love Is Play-Based Learning to stay tuned with our latest posts and videos.
Pin it!
Don’t forget to save this easy art for toddlers on Pinterest for later! Be sure you are following along with Tinydale here
You’ll be amazed at how easy it is to create amazing drawings like these. Start drawing now!


