There really isn’t a way to speed up an art process. You can’t just wave a magic wand and get a finished piece. Art takes time and dedication. Find a way to enjoy the process.
How to Draw Faster
wikiHow is a “wiki,” similar to Wikipedia, which means that many of our articles are co-written by multiple authors. To create this article, 41 people, some anonymous, worked to edit and improve it over time.
This article has been viewed 135,825 times.
Are you running a bit low on drawing stamina? If you get bored of drawing easily, then it’s best for you to draw a “simple” picture that is finished quickly. We’ve put together some tips and tricks to help you finish your sketches before your attention span runs out.
Steps
Forget the rules.
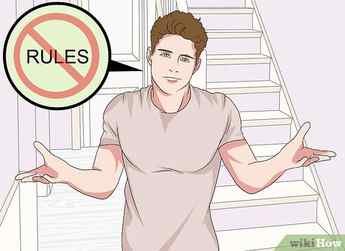
One might assume that drawing or painting has to be done in a certain way. Beginners may try to draw very small and exacting and find it very difficult. For a professional artist it might be whatever gets the job done, whether it is copying, tracing, free hand, whatever.
Advertisement
Go for the end result.
The patron does not buy the technique but the finished product. For quick, more free-form drawing one might try to use very large paper, chalk or high number soft lead pencil and draw using the whole arm and even body in broad sweeping motions. The idea here is to feel the subject of the drawing, attempt to capture that feeling, as a more sweeping essence of lines.
How to Draw Simple Sketches
wikiHow is a “wiki,” similar to Wikipedia, which means that many of our articles are co-written by multiple authors. To create this article, 16 people, some anonymous, worked to edit and improve it over time.
This article has been viewed 119,649 times.
Lack the time to make elaborate, perfectly shaded drawings? If you are just bored and have nothing to do, or like to draw but do not like to make fancy, you should sketch. Sketching is a wonderful way to express your feelings, or create a quick doodle. This WikiHow isn’t a full in-depth guide to drawing because there is definitely no rules to drawing/sketching at all. These are merely tips to make your sketching experience fast, least painful, and fun. I hope you enjoy my guide, and find it useful.
Steps

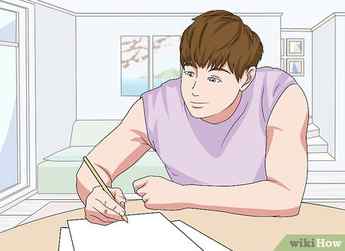
To start off, think of your planned sketch. Visualize it in your mind and if you can, rotate it in your brain, to better understand what you’ll be drawing.
Look for shapes such as circles, squares, triangles, etc. to relate to. This will aid in the shading process, and even help you sketch look better if you understand the basic shape of what you are about to draw.
Advertisement
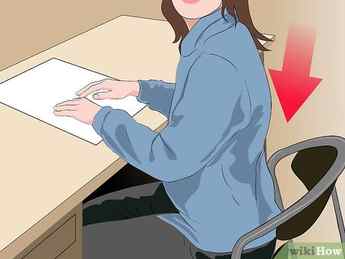
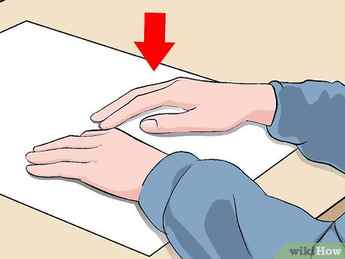
Position yourself comfortably. If you are uncomfortable, your drawing will look worse than what it should, so get a nice chair, fix the lighting and put on some favorite music.
Good hands: How does that help? If your hands are all sticky, wet or cold, your hand will not perform as well as it should.

Position your paper: This goes along with being comfortable, so put your paper at an angle that you feel comfortable with. There’s no set way.

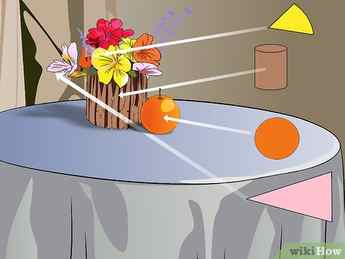
If your item is small, place it in front of you where you can effectively sketch it. If it is something large, such as a car or tree, then get a clip board, sit down by it, and start sketching.
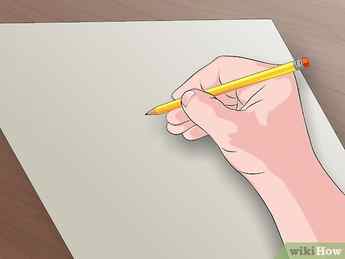
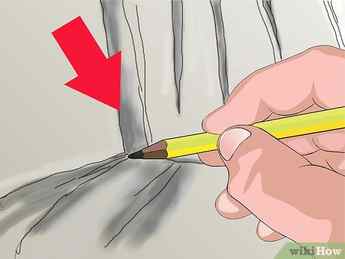
Begin Drawing.
Start from one side of the object, quickly and lightly take your pencil back and forth on the paper to make soft, light strokes. If you make a mistake, then you can easily erase the light lines.

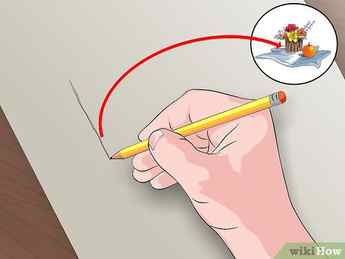
Be sure to constantly look up at your subject and compare the two. Do not do a blind contour (staring at your subject while trying to draw), although this is good for practice drawing, it can deform your drawing terribly.
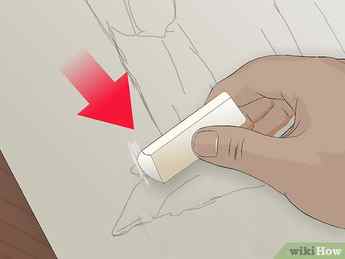
Don’t be afraid to use the eraser. If you think you sketched lines too close or too far apart, erase them. Too many sketch lines on a drawing makes it look like your drawing is twisting. Going over the same line many times can make it dark and hard to erase if you decide it’s wrong.
Apply Finishing touches: When you’re done, take your eraser and remove the sketchy lines if you wish. To add value, on the darker, shaded parts of the object you’re drawing, shade them on your sketch. Go from a very dark, and lighten it gradually to a very light shade.
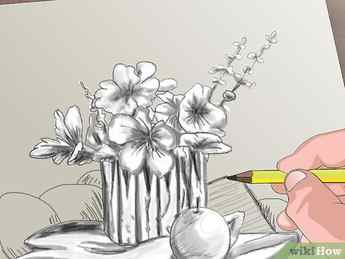
Add more interest, add a poorly sketched (but still alright looking) background. It’ll make your drawing look better, and add some theme to it.

Add Your signature! Traditionally, after a sketch, artists lightly add their signature (Yes, in cursive) to the bottom right corner of their drawing. You can also add something like ’13 to it, too if you’d like.
Advertisement
Community Q&A
Search
Question
What if my drawing still looks bad and I’m too afraid to sketch it again?
Community Answer
What’s there to be afraid of? You’ll never get better if you don’t practice. Keep trying until you get it right!
Thanks! We’re glad this was helpful.
Thank you for your feedback.
As a small thank you, we’d like to offer you a $30 gift card (valid at GoNift.com). Use it to try out great new products and services nationwide without paying full price—wine, food delivery, clothing and more. Enjoy! Claim Your Gift If wikiHow has helped you, please consider a small contribution to support us in helping more readers like you. We’re committed to providing the world with free how-to resources, and even $1 helps us in our mission. Support wikiHow
Question
What is the meaning of basic sketching
Community Answer
It means only using basic shapes. For example, use a circle for the head, then another for the neck, a rectangle for the top of the body, and four others for the legs and arms.
Thanks! We’re glad this was helpful.
Thank you for your feedback.
As a small thank you, we’d like to offer you a $30 gift card (valid at GoNift.com). Use it to try out great new products and services nationwide without paying full price—wine, food delivery, clothing and more. Enjoy! Claim Your Gift If wikiHow has helped you, please consider a small contribution to support us in helping more readers like you. We’re committed to providing the world with free how-to resources, and even $1 helps us in our mission. Support wikiHow
Question
Can I use one pencil to do all my sketches?
Community Answer
Yes, there shouldn’t be any problem with using the same pencil, as long as the pencil is good quality.
Thanks! We’re glad this was helpful.
Thank you for your feedback.
As a small thank you, we’d like to offer you a $30 gift card (valid at GoNift.com). Use it to try out great new products and services nationwide without paying full price—wine, food delivery, clothing and more. Enjoy! Claim Your Gift If wikiHow has helped you, please consider a small contribution to support us in helping more readers like you. We’re committed to providing the world with free how-to resources, and even $1 helps us in our mission. Support wikiHow
Read this: Here’s who’s drawing all those bonkers wikiHow images
Nightmare clips like “Johny Johny Yes Papa” and “Sick Song” might hold the title for most unintentionally unnerving animated content, but the drawings that accompany wikiHow articles aren’t far behind. For years now, visitors to the weirdo how-to site have marveled over and meme’d the colorful images, many of which, with their casual insensitivity and strained approximations of relatable human behavior, resonate like relics from another era or glimpses into an alternate reality.
Watch
The Marvels Binge Club
Share
Subtitles
Share this Video
Invincible creator Robert Kirkman on whether he’d ever work on a Marvel project
Friday 6:36PM
Pauly Shore on that Richard Simmons biopic
Friday 5:19PM
Advertisement
Advertisement
Advertisement
It’s been easy over the years to imagine that some isolated Henry Darger type is behind the drawings—a prolific, virtuosic oddball with a skewed perception of reality. Alas, such is not the case, as an illuminating new piece from OneZero has revealed. Rather, wikiHow’s images are created by a massive group of freelance illustrators, primarily a “core group of artists in the Philippines.” All of this is confirmed by the company’s vice president of operations, Chris Hadley, who tells OneZero that the company’s shift towards commissioning original art began at the beginning of the decade in response to a shift in Google’s search ranking algorithm. Custom images fared better than recycled ones.
Advertisement
As for the secrecy surrounding the images—wikiHow credits them only to a Wikivisual team—a source revealed that the company has freelancers sign NDAs . Hadley also confirmed that the company has sought to keep an air of mystery around the images. “It was new, but we felt like we had something that was really special, so we kind of asked people to keep it a bit of a mystery,” he said. “And, over the years, kind of maintaining the enigma has been part of the fun… that mystery has been a part of why this stuff has gained traction.”
Advertisement
That framing, however, rings a bit hollow when you hear how little these illustrators are being paid for their work. One reported receiving only $1 per image, while another claimed they were paid $.40 cents an image by a third-party broker. Hadley says the company has “paid over $1,000 for some images,” but adds that some fees “can be in the low single dollars for somebody brand new on projects.”
Advertisement
OneZero’s piece, which also offers an intriguing look into the company’s visual style guide, can be read in full here .
Send Great Job, Internet tips to [email protected]


