If the witch doesn’t have an iron to flatten her hat out, it’s going to have wrinkles. So, drawing a witch hat with wrinkles all over it will be a unique idea for sure!
How to Draw a Witch Hat Easy Step by Step | Halloween Special
When it comes to Halloween, there are some classic creatures that always make an appearance. Ghouls, ghosts and witches are all common sights during the spooky season, and often show up in people’s yards. One of the most iconic symbols of Halloween is the witch, with her pointy hat and cackling laugh. If you want to join in on the fun, learn how to draw a witch hat with this step-by-step guide! In this guide, I will show you how to draw a witch hat step-by-step and some easy Halloween drawing ideas. By following these simple instructions, you will be able to create a realistic and impressive hat in no time! So, let’s get started!
Things You will Need to Draw
- Paper – watercolor paper
- Pencil – 6B and 9B
- Eraser – High quality eraser
- Outline Pen – Fine line pen
- Color – Watercolor Marker

Now, I am going to show you the step-by-step tutorial of drawing a witch hat. This will be easy to follow along with, so let’s get started!
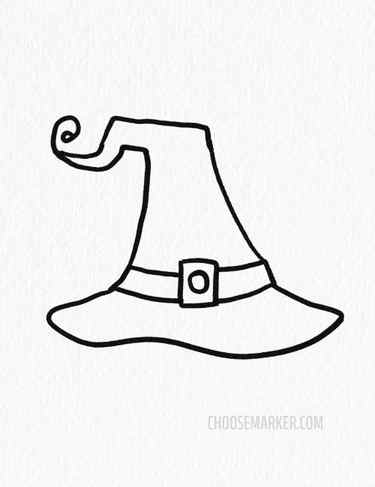
Step-01: First of all, draw the brim of the hat. For this, make an ellipse horizontally. Keep the ellipse as big as you want to see the hat brim.
Step-02: Now, make a two slanted lines going upwards from inside the ellipse. Connect the two lines in a way that makes a pointy corner of the hat.
Step-03: At this stage, you have to complete the basic shape of the hat by connecting the two points of the slanted lines inside the brim.
Step-04: Draw another line similarly above the the line you have connected just now inside the top part of the hat. It will be the belt on the hat.
Step-05: Now, make a button on the belt. For this, drawing two square box will be enough.
Color It: Now it’s time to color the witch hat. I have used deep blue watercolor for the whole hat body, green for the hat belt and yellow for the button.
But you can use any colors you want. Just make sure to color it neatly so that your witch hat drawing looks awesome!
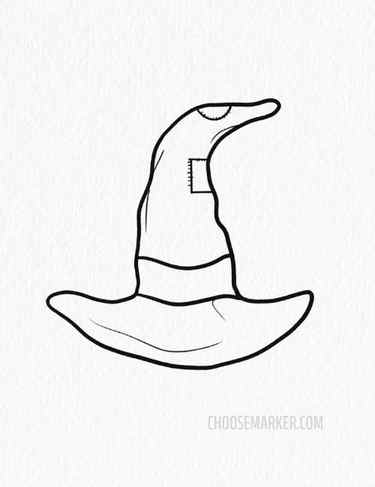
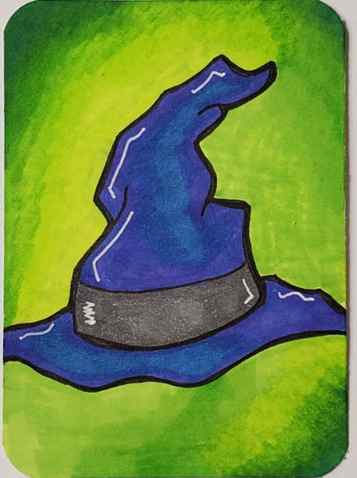
Drawing a Wrinkled Pointy Witch Hat

Step-01: Firstly, you just need to draw some slanted lines which will be the top of witch hat.
Draw two slanted lines both on the left and right side in same height. Keep their height as much as you want to see the top of the hat.
Above the left line, draw another slanted line to make the pointy look. Make sure to draw them lightly so that you can erase them later if needed.
Step-02: From the lower side, connect the two slanted lines to give a cone like shape. And o the right above side, draw a wrinkled pointy corner using curves.
Step-03: Now, draw an ellipse all around the lower portion of hat top to make the brim.
Step-04: On the cone side draw a hat belt with a button horizontal lines and rectangle boxes.
Color It: Finally, it’s time to color the hat. I have used watercolor all over the hat. You can see, I have put black on the top side, blue on the brim, green on the belt and yellow on the belt button.
However, you are always free to use any color combination you want. Don’t forget to outline the whole drawing with a black fine line pen.
How to Draw a Witch Hat Step by Step
Learning how to draw a witch hat is really easy if you break things down into simple steps and shapes. This is helpful for many reasons. First of all, it makes the drawing process less intimidating. The second thing is that you can easily take that first step and make some marks on your blank paper.
Starting with basic shapes also helps you get everything roughed out so you can see the size and placement before investing too much time. It’s a horrible feeling when you’ve put hours into a drawing and get almost finished when you realize something isn’t right.
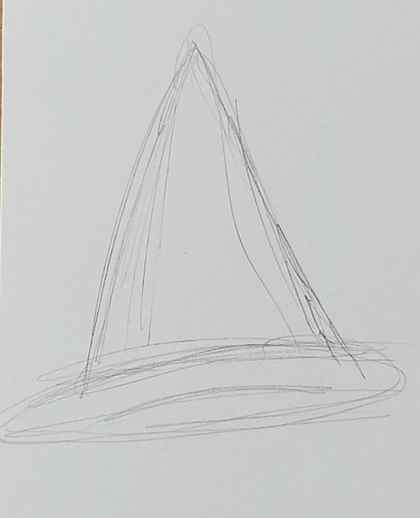
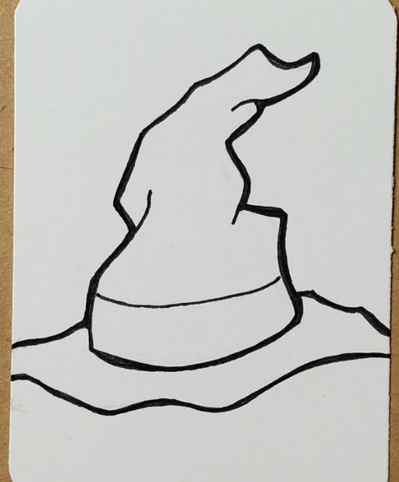
Step 1: Basic Shapes
So for our witch hat drawing the first step is to draw a triangle with a foreshortened (squished) circle on the bottom. Even if you know you want the top of your hat to bend to the side, you can sill draw a regular triangle.
This first step is to help get some basic ideas on paper. It gives you a starting point.
Step 2: Add Details
Then start sketching out the shape of your witch hat. You can make it all one continuous line. Or break it up by adding in some folds and bends like I did here.

There are a lot of different ways to draw each section of your witch hat. Don’t feel like you’re limited in any way by the basic shapes you drew in step 1. They are only there to serve as some basic guidelines.

Next, draw the bottom rim area of the hat. There are a lot of options on how to draw this part as well. I think it looks better to add some curves to the lines. You can make them more or less curved. Just do whatever you think looks good and fits with your artistic style.
You could also add some rips and tears to your drawing if you wanted it to look older or damaged. As I mentioned earlier there are a lot of different ways you could draw your witch hats.
Add a band around the base of the hat as well. Make sure this line is curved and not straight. Drawing it straight won’t look right. You can add a buckle to the band if you want.

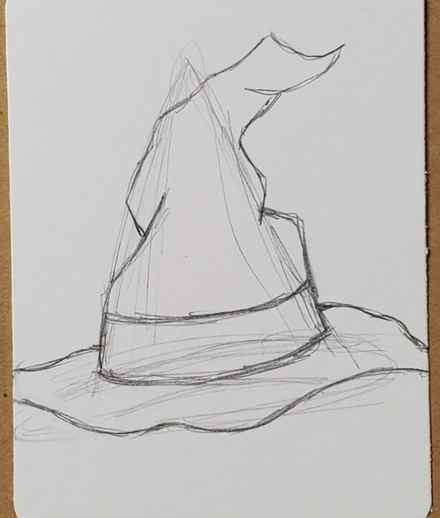
Keep working on your sketch until you’re satisfied with how it looks.
Witch Hat Outline
Step 3: Make Outline
M aking a witch hat outline is really easy. Simply trace over the pencil lines you want to keep with a black pen or marker.
Of course you don’t have to use black. You could try a different color and see how that looks.
You can also change the way your finished drawing looks by changing the thickness of your lines. A wider outline will give a different look than a thin outline.

Or you could go with no outline at all. How you finish your witch hat drawing is entirely up to you.
How to Draw a Witch Hat with Markers
Step 4: Add Color
Learning how to draw a witch hat with markers is really easy. And there’s only a few things you need to keep in mind.
First, if you want to be able to blend your colors together you need to use alcohol based markers. Bic, Sharpie, and Copic for example. As well as many others.
Second, you need to work while the colors are still wet or they won’t mix together. This isn’t a big deal. Just make sure you work on a section at a time.
Third, you need to use colors that are similar to each other if you want to create a smooth transition of color. If your markers are too different they will leave a harder edge.
Regardless of which medium you use, you’ll want to use your colors to add some depth. This can be done by using more than one color. For example, if you want to make your hat purple you can use two or three different purples (light, mid, and dark).
Or, you could use purple and blue. Experiment and try some different color combinations and see which ones you like the best.


