The leaves are changing color and falling from the trees, signaling the arrival of autumn. If you’re like me, you love this time of year and all the beauty that comes with it. One of the best ways to enjoy the season is by capturing its essence in a drawing. Today, I’ll show you how to draw a fall scene with beautiful autumn colors.
How To Draw A Fall Scene
The leaves are changing color and falling from the trees, which can only mean one thing: fall is here! If you’re like me, you love all things fall, from the cool weather to the cozy sweaters to the autumnal decorations. And what better way to celebrate the season than by learning how to draw a fall scene?
Whether you’re a seasoned artist or a total novice, drawing a fall scene is a great way to get into the spirit of the season. And it’s not as difficult as you might think! With a little patience and practice, you’ll be able to create a beautiful fall scene of your very own.
Here’s what you’ll need to get started:
– A piece of paper
– A pencil
– An eraser
– Colored pencils, markers, or crayons (optional)
Now let’s get started!
1. Begin by sketching out the basic outline of your scene. Start with the sky, then add the horizon line and the treeline. If you’re including a body of water in your scene, sketch that in as well.
2. Once you have the basic outline of your scene, it’s time to start adding in the details. Begin with the leaves on the trees. Start with the largest leaves near the bottom of the tree, then add smaller leaves as you work your way up. Remember to vary the size, shape, and color of the leaves to create a realistic effect.
3. Once the leaves are in place, add any other elements you want to include in your scene. This could include acorns, branches, berries, flowers, pumpkins, or anything else you can think of. Again, be sure to vary the size, shape, and color of these elements to create a realistic effect.
4. When you’re happy with the way your scene looks, go over your pencil lines with a pen or marker. Then, add any final touches you want, such as shading or color.
And that’s it! With a little practice, you’ll be able to create beautiful fall scenes of your own in no time. So get out your paper and pencils and get started today!
Gathering the Necessary Drawing Materials
Are you looking to add a touch of autumn to your drawings? If so, learning how to draw a fall scene is a great way to do it! Fall is a beautiful time of year, and with a few simple supplies and some practice, you can learn how to capture its beauty on paper.
Here’s what you’ll need to get started:
-A pencil
-A piece of paper
-An eraser
-A sharpener
-A pen or marker
-Colored pencils or crayons
Now that you have your supplies, let’s get started!
1. Begin by sketching out a basic outline of your scene. This can be done with light pencil strokes so that you can erase them later if needed.
2. Next, start adding in the details of your scene. Begin with the sky, then add in the trees, leaves, and any other elements you’d like to include.
3. Once you’re happy with your drawing, you can go over it with a pen or marker if you’d like. You can also add color using pencils, crayons, or any other medium you’re comfortable with.
4. Finally, erase any pencil lines that you don’t want to keep.
And that’s it! With a little practice, you’ll be able to create beautiful fall scenes that you can be proud of.
Understanding the Elements of a Fall Scene
One of the best things about fall is all of the beautiful colors that come along with it. If you’re an artist, that means you have a whole new palette to work with when painting or drawing fall scenes. But how do you go about capturing all of that beauty on paper or canvas?
Here are a few tips on how to draw a fall scene:
1. Start by sketching out the basic shape of the scene. This can be done with pencil or pen, depending on your preference.
2. Once the outline is complete, begin adding in the details. Think about the colors of the leaves, the sky, and the light.
3. Pay attention to the way the light falls on the objects in the scene. This will help add depth and realism to your drawing.
4. Use shading to bring out the texture of the leaves and other objects.
5. Finally, add any finishing touches, such as highlights or shadows, to complete the picture.
With these tips in mind, you should be able to create a stunning fall scene that captures all of the beauty of the season. So get out your pencils and paints and get to work!
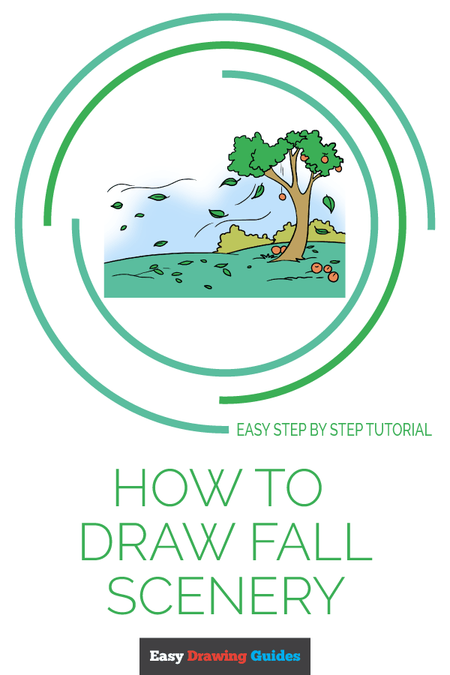
How to Draw a Fall Scenery
Learn how to draw a great looking Fall Scenery with easy, step-by-step drawing instructions, and video tutorial.
By following the simple steps, you too can easily draw a perfect Fall Scenery.

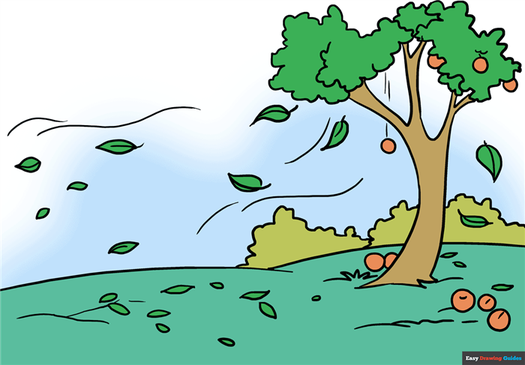
Complete Fall Scenery drawing
In the temperate regions of the world each year, something amazing happens as autumn arrives and the air begins to cool.
Entire forests of trees sense the coming of winter, and they prepare. The trees get ready to hibernate, protecting themselves from the cold.
Green leaves stop producing food for the tree, and their coloration disappears. Yellow, red, orange, and even purple pigments remain, leaving us with beautiful fall colors.
These colors inspire artists and photographers alike.
In Japan, colorful leaves are known as koyo, and the activity of viewing them – called momijigari or “maple tree hunting” – has been popular for centuries.
Many people travel in order to view the fall colors in their favorite places, be they rugged mountains or city parks. If you’d like to do this, don’t forget to pack an umbrella, just in case it starts raining.
Scroll down for a downloadable PDF of this tutorial.
In the United States, the practice of viewing autumn leaves is called leaf peeping. Popular autumn tourist areas include the New England states and the Appalachian Mountains along the Blue Ridge Parkway.
Did you know? Not everyone gets to experience fall leaves. In the world’s tropical regions, trees don’t lose their leaves or change colors. Such trees are called evergreen. This is because there is no cold winter there, only wet and dry seasons.
Would you like to draw a windy autumn scene? All you will need is a pen or a pencil and a sheet of paper. You may also wish to shade your finished drawing.
If you liked this tutorial, see also the following drawing guides: Fall Tree, Cartoon Forest, and Cartoon Tree.
Step by Step Instructions for Drawing a Fall Scenery
How to Draw a Great Looking Fall Scenery for Kids, Beginners, and Adults – Step 1

1. Begin by drawing two long, curved lines to form the horizon.
Easy Fall Scenery Drawing – Step 2

2. Draw two curved lines in a vertical position. These will form the trunk of the tree. Use several shorter curved lines to form the roots of the tree, enclosing it at the bottom.


Easy Fall Scenery Drawing – Step 3

3. Draw a pair of long “U” shaped lines side by side at the top of the tree. These form the tree’s branches. Then, use short, connected, curved lines to draw the cloudlike bunches of leaves. Notice the irregular shapes, as well as how the lines overlap to give the tree depth.
Easy Fall Scenery Drawing – Step 4

4. Draw a number of leaves falling from the tree. For each leaf, draw a curved line to form the stem and central vein. Then, use two curved lines meeting in a point to outline the leaf itself.
MORE DRAWING TUTORIALS:
How to Draw a Camping Scene

How to Draw a Spruce
How to Draw a Flower Garden

Easy Fall Scenery Drawing – Step 5
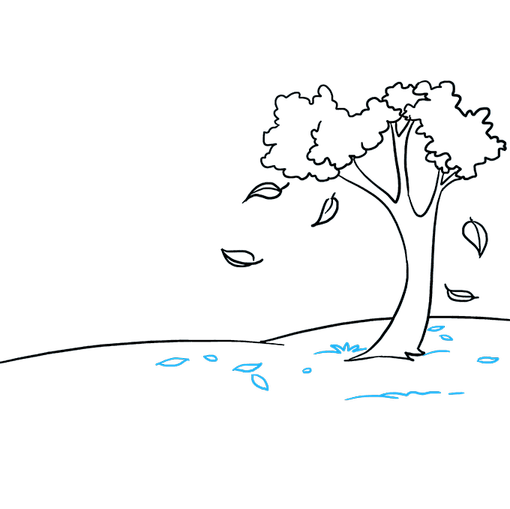
5. Texture the ground. Draw curved lines of different sizes. Near the tree, draw a tuft of grass using short, curved lines that meet in jagged points. Then, draw leaves on the ground. For each leaf, draw two curved lines that meet in points.
Easy Fall Scenery Drawing – Step 6
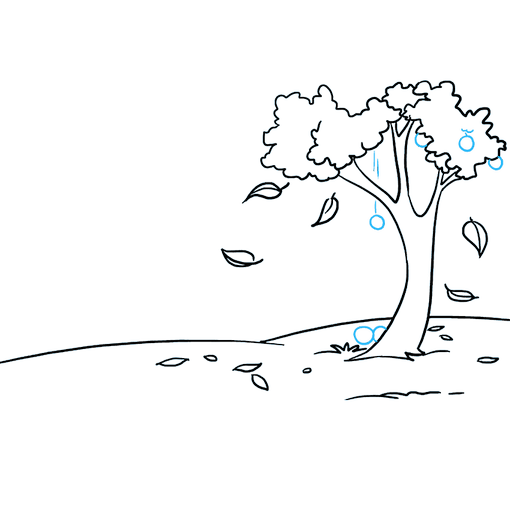
6. Many trees bear fruit in the fall. Draw round, circular fruit, both hanging from the tree and on the ground at its base. Did you notice that one piece of fruit is falling from the tree? Note the vertical lines that indicate its motion.
Easy Fall Scenery Drawing – Step 7
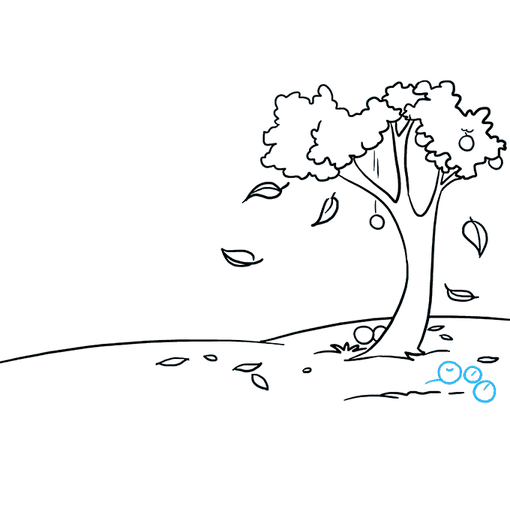
7. Draw more round fruit laying on the ground. You may texture it with short lines.
MORE DRAWING TUTORIALS:
How to Draw a Lily of the Valley
How to Draw a Carrot
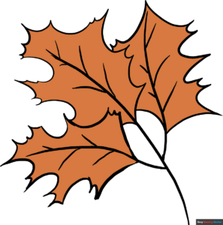
How to Draw Fall Oak Leaves
Add More Details to Your Fall Scenery Picture – Step 8

8. Fill in the background of your scene. Use a series of short, curved lines to enclose cloudlike shrubbery growing in the distance.
Complete the Outline of Your Fall Scenery Drawing – Step 9
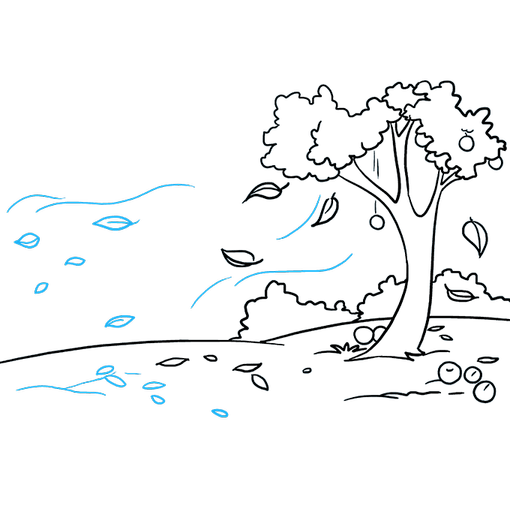
9. Texture the ground with additional curved lines, and draw more pointed fallen leaves. Draw more leaves adrift in the air as well; for each, begin with a line to form the stem, then draw the pointed leaf around it. Finally, draw wavy lines to indicate the motion of the blowing wind.
Color Your Fall Scenery Drawing
10. Color your scene. Is your tree still hanging on to the green of summer, or is it ablaze with the reds, yellows, and oranges of fall?
Learn to draw more fall scenery when you check out our selection of plant drawing guides.
For more great Tree drawing tutorials, see the 21 Best Tree Drawing Tutorials post.
Easy, step by step Fall Scenery drawing tutorial
Click HERE to save the tutorial to Pinterest!
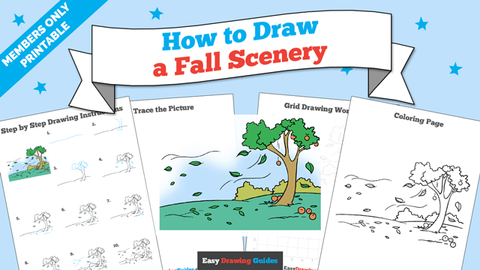
Fall Scenery Drawing Tutorial – Easy & Fun Printable Pages
Join now and get immediate access to thousands of printable drawing instruction and practice pages!

MEMBER TROUBLESHOOTING
Still seeing ads or not being able to download the PDF?
First, check that you’re logged in. You can log in on the member login page.
If you’re still not able to download the PDF, the likely solution is to reload the page.
You can do this by clicking the browser reload button.
It is a circular arrow-shaped icon at the top of the browser window, typically found in the upper-left side (you can also use keyboard shortcuts: Ctrl+R on PC and Command+R on Mac).
Step 3: Sketch some leaves


Here, I’ve sketched some falling leaves around the tree and bench. You can draw many different types of leaves; they don’t have to look like mine! On the right, I’ve attached some different options for the shape of the leaves.
Step 4 (Optional): Draw a person sitting on the bench

It looked a bit lonely in our drawing, so I drew a girl sitting on the bench, enjoying the crisp fall weather and colorful autumn leaves. If you don’t have the time to do this, or it looks too complicated, feel free to skip this step!
Stage 2: Coloring


Here, I’ve attached a step by step process on how I drew the tree’s colors, using red, orange, yellow, and a bit of green. First use a light red for the base color, then the orange, then the yellow to fill in spaces, and green to add highlights near the bottom. After this, I used a darker red to add darker leaves near the top of the tree.


