Looking to upcycle some only jeans? Do so by grabbing a witch hat wreath form and covering it in twine.
Witch Hat Wreath with Dollar Tree Supplies
Learn how to make a witch hat wreath using Dollar Tree supplies like a wire wreath form, deco mesh, and glitter spiders. This is an easy Halloween craft that is great for beginning crafters.
Skills Required: None. Even if you’ve never crafted before, you should be able to make this wreath. You’ll be wrapping pipe cleaners and deco mesh around a wire wreath form shaped like a witch’s hat. Anyone can do it . . plus it’s inexpensive!
There is one thing I definitely get excited about each year when it comes to holiday shopping, and that is hitting up the Dollar Tree for DIY Halloween decor supplies. I love to shop the craft stores too, but Dollar Tree just happens to have some different stuff. And of course, that stuff is at really inexpensive prices.
It just so happens that while browsing the dollar store this year, I noticed they had a witch hat wreath form. I’ve made Halloween deco mesh wreaths before, but never in the shape of a witch’s hat! I knew that this year I was going to make a Halloween wreath. Which was exciting, because it’s been awhile since I’ve made one!

Here’s the great part about this project – it can be completed and up on your door in an afternoon. You’re going to complete this witch wreath in four easy steps:
- Wrap the Hat Top – you’ll use deco mesh in black to wrap the top of the wreath form
- Make the Band – add a mesh band in the color of your choice (I used lime green)
- Create the Wreath Brim – deco mesh and pipe cleaners are added to make a fluffy wreath brim
- Add the Spider – place an embellishment on the wreath near the brim
This is the easiest wreath hat tutorial you’re going to find! It’s simple, it’s inexpensive, and you’ll have it done it a few hours. Also don’t forget to check out the video in this post. It’s a great visual of these easy process. Now let’s walk through the steps below!
Dollar Tree Witch Hat Wreath
Gather These Supplies
- Witch hat wreath frame
- Deco mesh – 3 rolls of black and one roll of green
- Pipe cleaners – 1 package
- Glitter spiders
- Wire cutters – or something to snip the pipe cleaners
- Scissors
- Hot glue gun
- Command strip

These are the items that I started with. The Dollar Tree witch hat wreath form is measured 22.5″ height x 21″ width for your reference. If you can’t find it at the dollar store, Amazon also has them here.
I already had the pipe cleaners on hand which is why I have multiple colors, but honestly it doesn’t matter what color you use because they will be hidden. It’s always nice to match them in case something is seen, but not required. Dollar Tree carries pipe cleaner packs if you need them.
Wrap the Top
Begin your witch hat wreath by cutting several pipe cleaners in half with the wire cutters (or some very strong scissors).


Start at the top of the witch hat wreath form. Wrap a pipe cleaner around the tip and twist.

Bunch the black deco mesh up in your hand and place down on the pipe cleaner. Twist the pipe cleaner around the mesh to secure. You want to make sure it is tight.

Keeping the deco mesh somewhat bunched up in your hand, wrap around the wreath form. You want to overlap the row on top and you wrap, so that the wreath form is well covered.
Continue until you’ve reached the third horizontal wire bar on the wreath form, or wherever you’d like to begin the band with the green mesh. Tie a pipe cleaner to the wreath form, then secure the black mesh by wrapping the pipe cleaner around it tightly.

Trim the ends of the mesh so they aren’t sticking out (or tuck them in).
Make the Band
The next step in your witch hat wreath is to add the band. I used lime green, but you can use any color of your choice.

Tie a pipe cleaner to the wreath frame, then bunch the mesh and add by twisting the pipe cleaner around.

Wrap just like you did with the black mesh above. Continue wrapping about 5 – 6 times or so.

Once you have made your band, bunch the mesh and secure to the form with another pipe cleaner.

Trim the ends with scissors.

Attach the black mesh one more time and wrap down to the wreath brim, just as you did before.

Here’s what the witch wreath is going to look like after all the wrapping. Now you’re ready to begin the brim.
Create the Witch Hat Wreath Brim

Tie a 1/2 pipe cleaner onto one end of the brim and twist.
Add the black mesh to the pipe cleaner and twist around securely.

Bunch up about 9 – 12 inches of mesh in your hand, and you’re going to secure it to the wreath form.
Hold the black mesh down to the form, and use a 1/2 pipe cleaner to twist around and secure.
Use your hands to fluff in between the pipe cleaners and spread the mesh out.
You’re going to continue the steps above across the top of the wreath form and then back across the bottom. THEN you’re going to see how full your witch hat wreath is and how much you like it. If you’d like to add more, continue adding mesh with pipe cleaners, using the same method you’ve been using.
Trim off any ends with scissors.
Add the Spider
Add a spider or other embellishment to your Halloween wreath using wire or a hot glue gun.
Let the embellishment cool if you used a hot glue gun.
Hang it Up
You are ready to hang your witch wreath! It’s SO easy to hang it up on any door using a Command Strip. And obviously you can remove it later.
I love it hanging on my front door!
It’s out front with my Halloween fairy garden. It was quite simple and only took me a few hours! What do you think? I’d love to know in the comments (plus get the printable tutorial below).
Yield: 1 wreath
Witch Hat Wreath
Make a Halloween witch hat wreath using supplies from Dollar Tree! This is easy holiday decor, even if you’ve never crafted before.
Prep Time 15 minutes
Active Time 2 hours 15 minutes
Total Time 2 hours 30 minutes
Difficulty Easy
Estimated Cost $6
Materials
- Witch hat wreath frame
- Deco mesh – 3 rolls of black and 1 roll of lime green
- Pipe cleaners – 1 package
- Glitter spider
- Command strip
Tools
- Wire cutters
- Scissors
- Hot glue gun
Instructions
- Cut several pipe cleaners in half using wire cutters.
- Beginning at the top of the wreath form, add a 1/2 pipe cleaner at the top and twist to tighten.
- Grab the black deco mesh, bunch up, and tighten the pipe cleaner around the bunch and twist.
- Wrap the deco mesh around the top of the wreath form, until you get to the third horizontal wire down.
- Add a pipe cleaner and tie down the mesh the same way you did at the top. Trim the excess off the top and bottom with the scissors.
- Add the green mesh with a pipe cleaner and wrap 5 – 6 times to create a band. Secure the end with a pipe cleaner and trim both ends of the mesh with scissors.
- Continue the black the way that you did in steps 3 – 4 until you get to the brim.
- At one end of the brim, add a pipe cleaner and twist around to secure. Bunch up the deco mesh and secure to the pipe cleaner. Twist.
- Move your hand down about 12″ on the deco mesh and bunch up. Secure close to the first pipe cleaner with another pipe cleaner.
- Continue bunching up lengths of deco mesh and attach to the wreath frame with pipe cleaners. Work your way across the top of the brim and then the bottom.
- Use your hands to fluff the deco mesh and fill out the witch wreath. Add any additional mesh as needed to fill in areas.
- Trim all loose ends with scissors. Add a spider or other embellishment using a hot glue gun.
- Hang with a Command strip making sure to hang on one of the hooks versus the mesh.
Did you make this project?
Please leave a rating or share a photo on Pinterest!
© Amy Anderson
Category: Halloween Crafts
Now that you’ve made a Halloween witch hat wreath, here are some other projects you should try:
- DIY Halloween Wreath with Duck Tape
- This Witch Pumpkin Craft Is Sparkly Good
- Wine Cork Skeleton for Halloween Decorating
- Skeleton Wreath for a Dollar Store Halloween
- Make a Witch Mask with Gauze the Easy Way
- Make a Mesh Halloween Wreath in Three Steps!
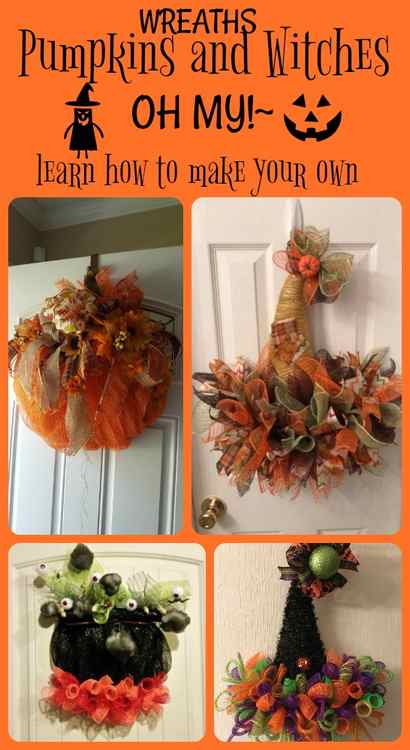
Common Dollar Store Supplies Needed for Crafting Pumpkin and Witch Hat Wreaths

Before you head out shopping, take a look at the list below to get an idea of the supplies you will need to buy to make witch hat wreaths.
- Witch hat wreath forms
- Ribbon in fall/Halloween colors
- Burlap
- Tinsel in Halloween colors
- Twine
- Faux flowers (fall varieties like sunflowers)
- Faux pumpkins (small in size)
- Faux eyeballs
Depending on the wreath you choose to make, you may not need all these items, but try to get as many as you possibly can for the best results.
How to Make a Witch Hat Wreath

Ready to make your witch hat wreath? Below are step-by-step instructions you can follow.
Supplies Needed:
- 1 witch hat wreath form
- Purple mesh
- Orange ribbon
- Black ribbon
- Hot glue gun
- Glue sticks
- Pipe cleaners that match the ribbon and mesh colors
Step 1: Prepare Your Frame
Sometimes the wreath frames at dollar tree come with décor already on them. Remove all of this leaving you with the plain frame.
Step 2: Wrap Ribbon
Take your black ribbon and wrap it around the pointy part of the hat. You could also alternate black and orange ribbon here, or use any other Halloween color of ribbon you want. Use hot glue to hold it in place.
Step 3: Cut the Ribbon and Mesh
Cut your ribbon and purple mesh into a variety of pieces. You will use these to make the bow and bottom of the hat.
Step 4: Scrunch
Scrunch your purple mesh and use pipe cleaners to hold it into poof shapes. Additionally, make a bow with your orange and black ribbon and use a pipe cleaner to hold it in shape.
Step 5: Add the Mesh
Using more pipe cleaners, attach the purple mesh poofs to the base of the witch’s hat.
Step 6: Add the Bow
Using hot glue, attach the bow above the mesh on the hat.
Step 7: Make a Hanger
If your wreath form doesn’t have a built-in hanger, use a length of ribbon, hot glued, to make one.
How to Decorate Your Dollar Tree Witch Hat Wreath
Sometimes the basic wreath can be a bit boring. Use the following steps to jazz up your dollar tree witches hat wreath.
Supplies Needed:
- Faux flowers
- Faux pumpkins
- Ribbon in Halloween colors
- Hot glue
- Glue sticks
- Construction paper
- Halloween mesh
Step 1: Find Your Accent Piece
Every witch’s hat needs an accent. Whether this is a funky ribbon around the center or a faux pumpkin or flower, choose one and set it near the ribbon band.
Step 2: Select a Ribbon
If your witch’s hat wreath doesn’t already have one, select a contrasting ribbon to go around the base of the hat. It should go well with your accent piece.
Step 3:Add to the Bottom
Next, add to the base of your hat. You can hang ribbon, bunch mesh, or use construction paper to add witch legs. You can also add all three if you wish.
Step 4: Choose Something for the Top
Don’t leave the top of your hat bare. Select a nice ribbon to make a bow for the tip of your hat. You can also use a tulle poof.
Step 5: Glue Everything in Place
Once you have laid everything out and decide it all goes well together, use the hot glue gun to glue everything in place.
Let it dry completely, then you are free to hang your decorated witch hat wreath.