By vreinkymov Follow
How to make a snow globe
Create a magical Christmas snow globe with our fun and easy tutorial. Find out how to make a snow globe following our video or step-by-step instructions.
- Share on Facebook
- Share on Twitter
- Share on Pinterest
- Share on Whatsapp
- Share on Tumblr
- Email to a friend

This competition is now closed
Published: October 6, 2021 at 5:08 pm
How to make a snow globe video tutorial
- Christmas figurines – resin or ceramic (ensure they are waterproof)
- Glycerin, Amazon
- Washi tape, Etsy
- Gold card, Amazon
If you can’t get enough of festive crafts, you’re in luck we have plenty more where this came from, and in all of our sectors of crafting. Why not try this fun guide on how to make a Christmas stocking or this how to make a Christmas wreath tutorial to spruce up your Christmas decor. If you want to get the little ones involved and need some inspiration take a look at these Christmas crafts for kids, jam-packed with tonnes of fun craft ideas. Not sure what you want to do next? Find out what’s hot this year in our Christmas trends round-up.
How to make a snow globe step-by-step guide (with pictures)
Advertisement
You Will Need
- Glass jars
- Water
- Glycerine
- Glitter
- jar lid
- small figurines
- super glue
- Coloured card
- washi tape to decorate
- Scissors
Total time:
24hrs for glue to dry
Step 1
Soak your jars in warm soapy water to remove any labels and residue. If you have a stubborn label, try using nail varnish remover, or white spirit to remove any remaining.
Step 2
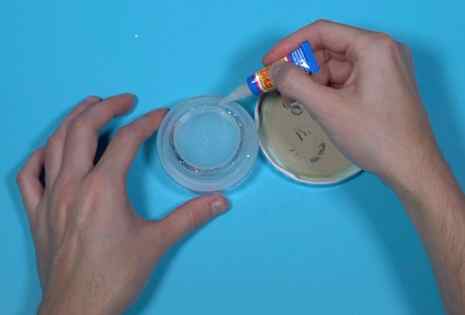
Remove the lid of your jar. Super glue another lid (we used a coffee jar top) to the main jar lid to create some height, this is where your figurines will stand.
Step 3
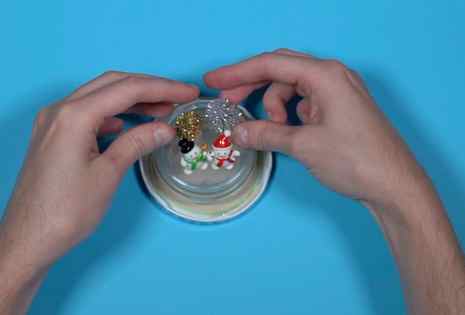
Arrange your figurines on the lid to work out where you would like them to go and ensuring they fit inside the jar.
Once you have done this glue your figures using super glue onto the lid.
Leave everything to dry for 24hours.
Step 4
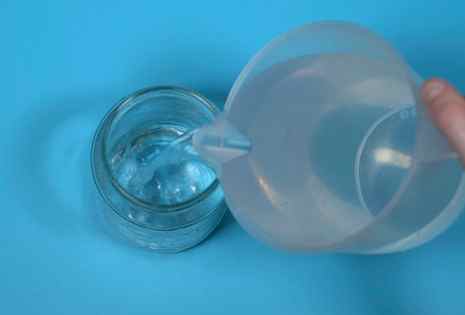
Take your jar and fill with tap water until almost full, leave an inch or two as space for your figurines to take up.
Step 5
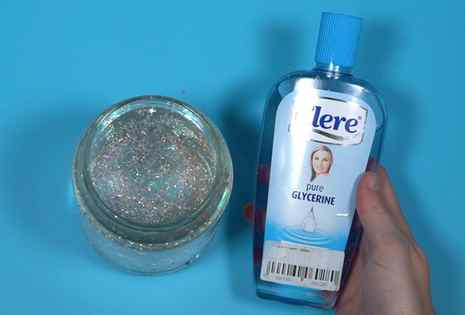
Add your glitter, we added gold and silver plus some bigger stars. You can use anything you have handy.
Top tip: If your glitter clumps together, keep stirring it and lift the clumps to the surface using a spoon and they will separate.

Step 6
Once your glitter is combined, add one tablespoon of glycerin to the water and stir well. We also tried baby oil but found this made the water misty so we don’t recommend this. Glycerin works best.
Top tip: Glycerin will help the glitter to move more slowly in the water.
Step 7
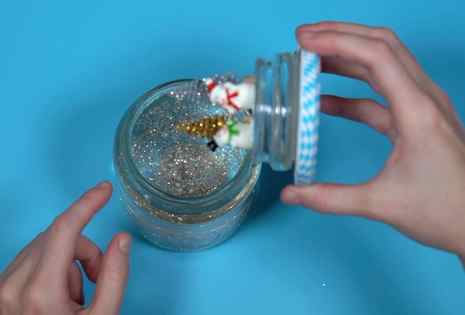
Once mixed thoroughly, you can screw the lid of the jar back on. Make sure it is fitted tightly and is not leaking. Once this is done you can decorate the lid. We used a circle of gold card to cover the top of the lid and then wrapped around the edges using silver washi tape.

Step 8
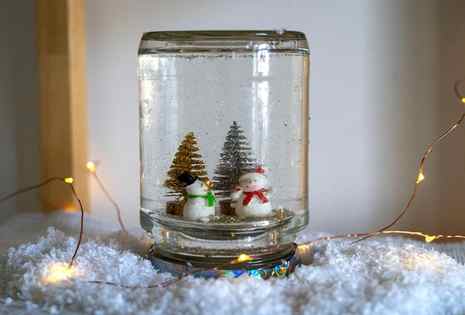
That’s it! You are done, get shaking! The glitter should fly around and create a gorgeous festive scene you won’t be able to take your eyes off. Now you’ve made one for yourself, they would also make lovely gifts, so why not make one for a loved one?
Advertisement
We hope you are feeling extra festive now you’ve found out how to make a snow globe with our fun tutorial. If you want to keep the festive feeling then try some of our other Christmas crafts, we think you might like these 51 eco-friendly Christmas crafts packed full of earth-friendly fun. If you want to try something a bit different take a look at this guide on how to make a fabric advent calendar, these make lovely gifts for the little ones that can be used every year. Spice up your Christmas decor with these lovely crochet Christmas decorations, whether you are new to crochet or a dab hand, these will appeal to all creators. Looking for a stylish Christmas decoration, try this macrame star.
- Share on Facebook
- Share on Twitter
- Share on Pinterest
- Share on Whatsapp
- Share on Tumblr
- Email to a friend
Authors
Katie Dolan
Digital Assistant, Gathered
Katie Dolan edits our needlework sections, focusing on our embroidery and cross stitch articles, as well as making videos for our arts and crafts projects. Katie runs her jewellery business, Ophelia Jewellery Art, on Etsy, where she sells beautiful resin-pressed flower earrings. She has a wide range of craft interests including embroidery – she particularly loves all things pop culture and a less traditional approach – The Simpsons and Rick & Morty are among her favourites to embroider. She has recently completed a silversmith workshop and hopes to expand her jewellery business with these new skills. When she’s not crafting, she’s usually fuelling her Harry Potter addiction with a Sunday film marathon and a couple of butter beers!
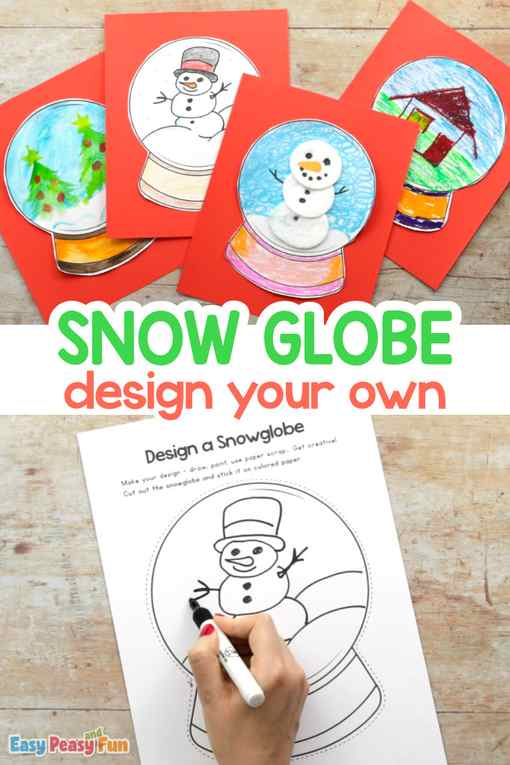
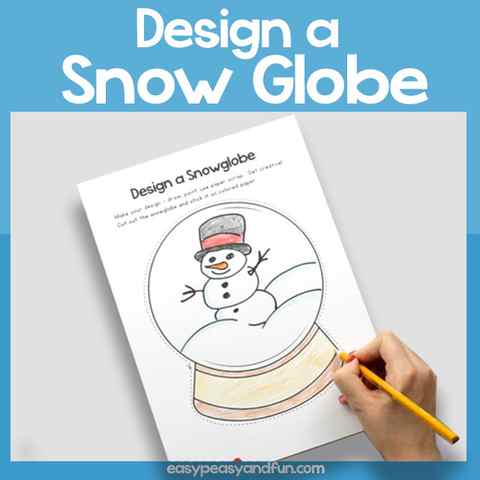
How to Make This Design a Snow Globe Template
What you need:
- Design a Snow Globe Template
- Scissors
- Crayons, coloring pens, paper… any material really
- Glue
Step by Step Tutorial
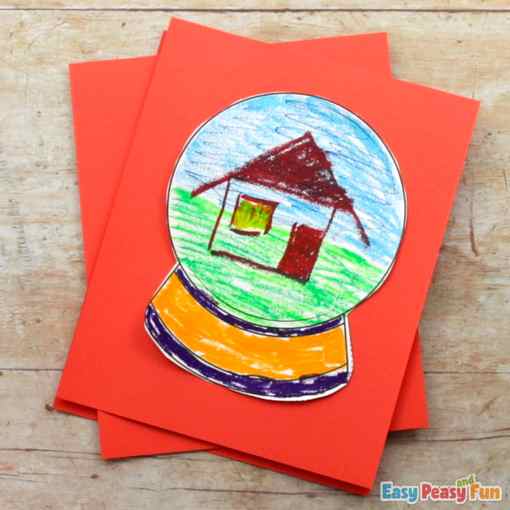
Designing a snow globe is one of those fun activities you get to do when the weather finally turns cold. Whenever you decide to start this craft, you just need to print out the template to get started.

Next, you are going to draw your design inside of the snow globe. How fun is that?! Now is your chance to get creative.

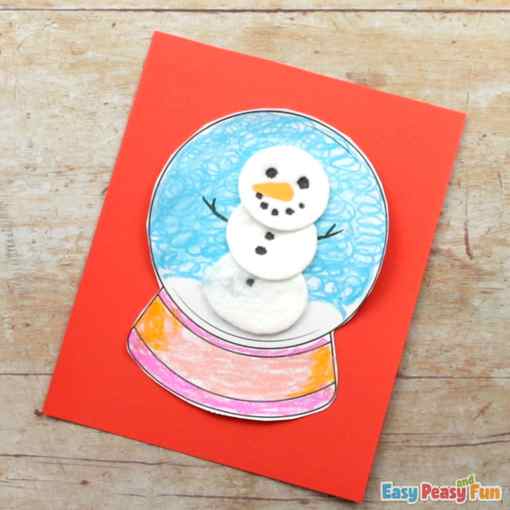
Go ahead and color your design. This example snow globe has a cute top hat!

Next, the snow globe design is going to be cut out.

Once it’s cut out, you are going to choose a piece of paper to glue it to.

The example is using orange construction paper, but you can choose any color.

Here is another snow globe design that you can check out!
If you are feeling festive with Christmas trees, then why not give this idea a try.
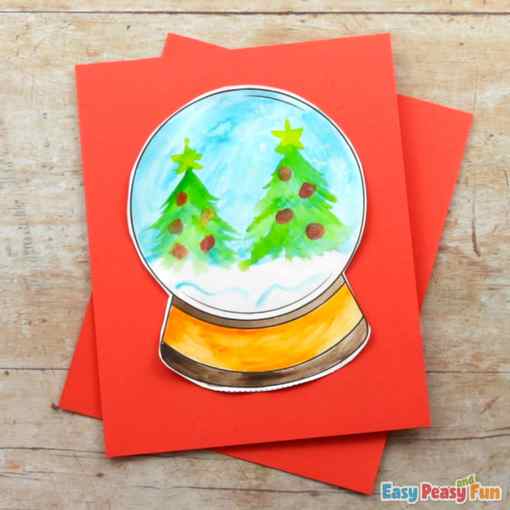
This snow globe craft is so fun and it’s ideal for many different ages. You can’t go wrong doing this craft with the kids in your life.
These design a snow globe template cards also make great holiday cards. People love receiving holiday cards in the mail! How will you decorate your snow globes?
Get the Design a Snow Globe Template Here
Want instant access to all of our printable crafts, activities, and resources?
With thousands of crafts, activities, worksheets, coloring pages, and drawing tutorials to print, you will always have just the resource you need at your disposal. Perfect for parents and teachers alike!
Step 1: Round a Square
- Draw an ‘X’ from the square’s corner to corner.
- Add a center-point dent using a center punch tool or carbide scribing tool.
- Draw as large a circle as the square permits with a compass.
- Draw tangent lines at each corner.
- Saw off each corner.
Add Tip Ask Question Comment Download
Step 2: Center the Faceplate
- Trace the face plate edge onto the wood.
- Trace the mounting holes for the face plate.
- Drill shallow holes for the mounting screws.
- Screw the mounting plate onto the wood.
Add Tip Ask Question Comment Download
Sand the wood down in steps. As pictured, I used the following grits in order 80, 120, 220, and finally a coat of 1/3 bees wax, 1/3 walnut oil, and 1/3 mineral oil. This leaves a dull finish, but brings out details in the wood.
Add Tip Ask Question Comment Download