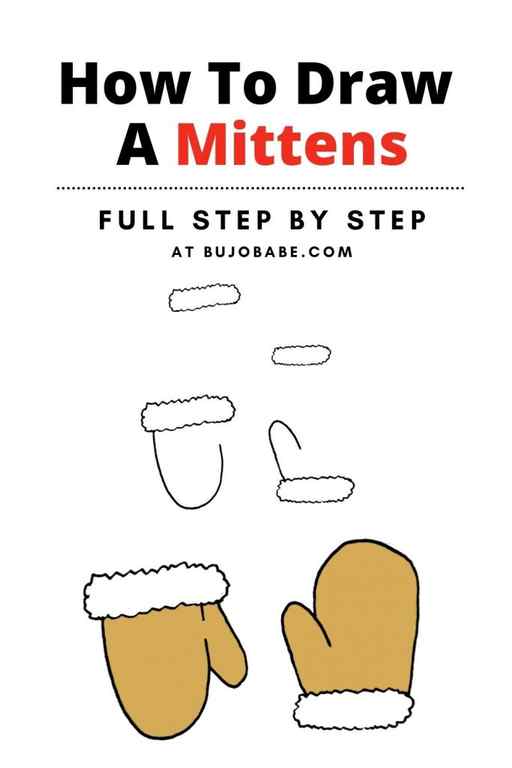
That’s it! You can easily draw mittens in a few minutes by following this 4 step guide. I would definitely encourage you to color your mittens.
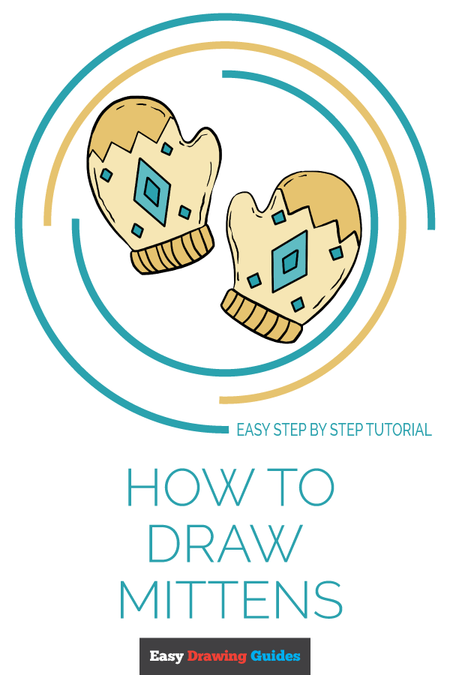
How To Draw Mittens (Easy Step By Step Tutorial)

it’s wintertime in my part of the world right now and I’ve been digging out the mittens because I can’t handle the cold. This got me thinking that I should put together a guide on drawing mittens. And so, in today’s article, I’m going to share my steps on how to draw mittens.
Just like their appearance, mittens are fairly easy to draw.
There aren’t many curves or tricky perspective elements that need to be considered which makes this perfect for beginners.
With that being said, I think you could draw mittens that look cute and adorable within a few minutes at most. That’s how easy and simple this guide will be.
Let’s get into it, shall we?
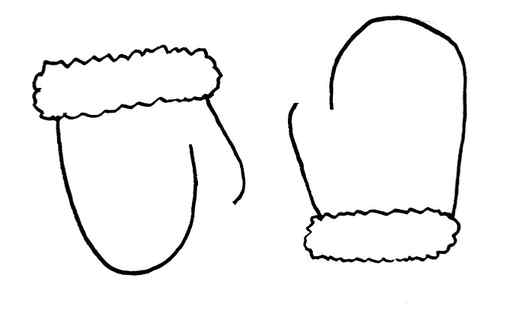
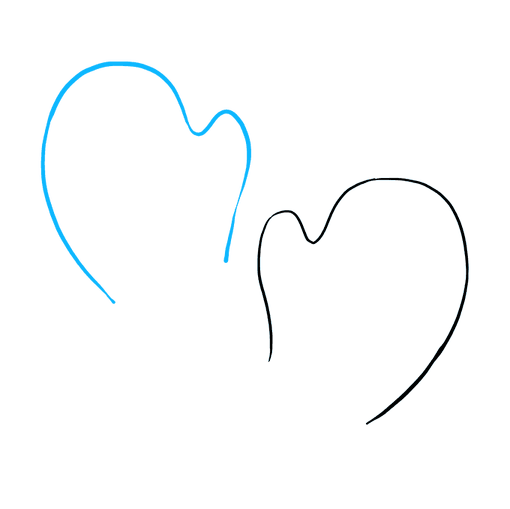
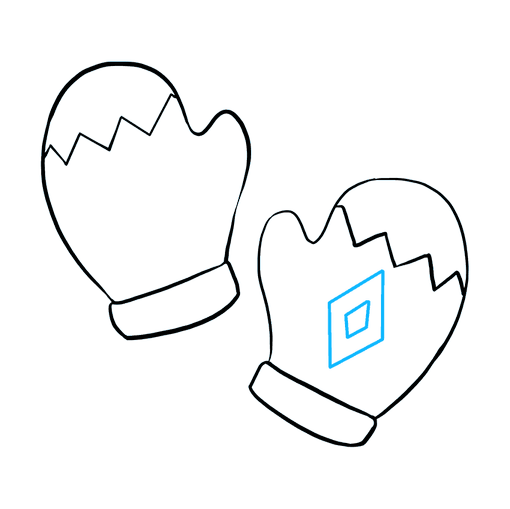
Reference
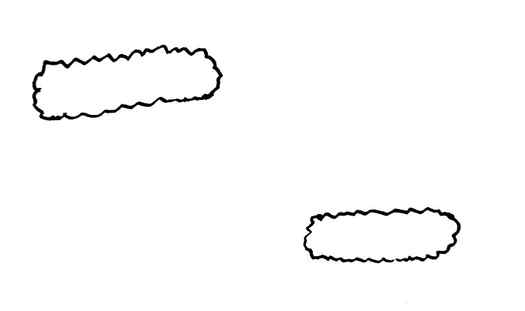
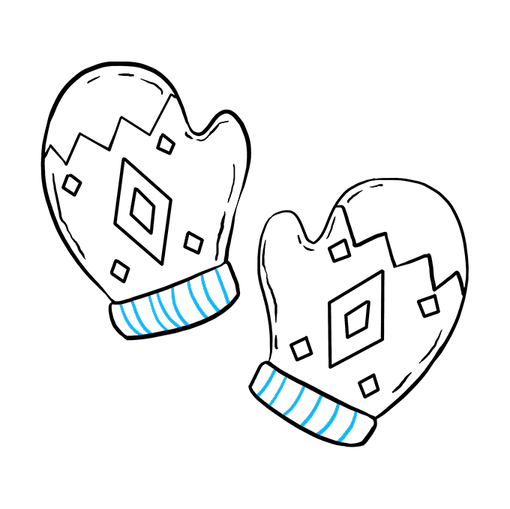
For this tutorial, we will be using this reference image of mittens. As you can tell, we will have one jagged rectangular shape that makes up the width of your mittens. It will be a great place to start and probably the only part of this drawing that requires any effort.
Thereafter, we’ll move onto drawing the surface area that covers most of the hand or the thumb. You could begin with either and the end product will not be affected at all. Keep in mind that one glove faces down whereas the other face up. You can tell this be the positioning of the thumb as well, especially on the right mitten.
Steps For Drawing Mittens
Step 1
Let’s begin this tutorial by drawing the fluffy like base of your mittens. This will make up the width of your entire drawing.
As you can tell, it’s very jagged and each curve is very sharp.
Think of it as drawing a cloud with 10 times the amount of rugged curves and not much variation in the thickness of the overall shape of the rectangle.
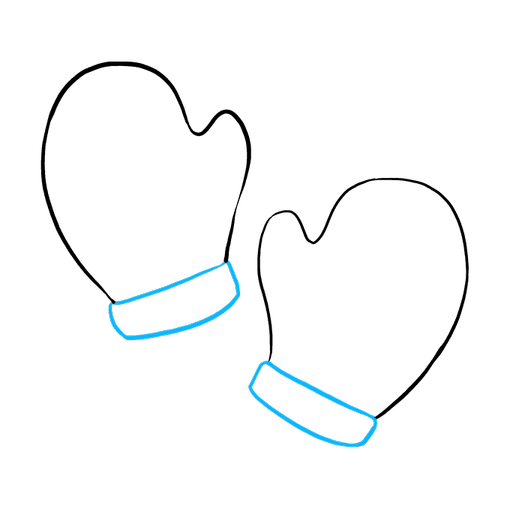
Step 2
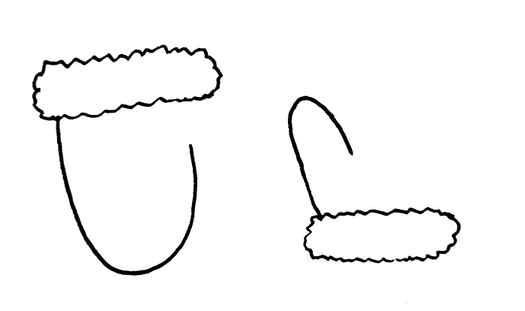
The reason why your rectangle shapes were opposite each other and spread apart is because each mitten is facing the opposite direction.
As such, you can start with different parts of the mitten. Both of these lines curve and turn around back into the rectangle.
The only difference is that the thumb is smaller in size so you’ll begin to curve your line relatively quickly.
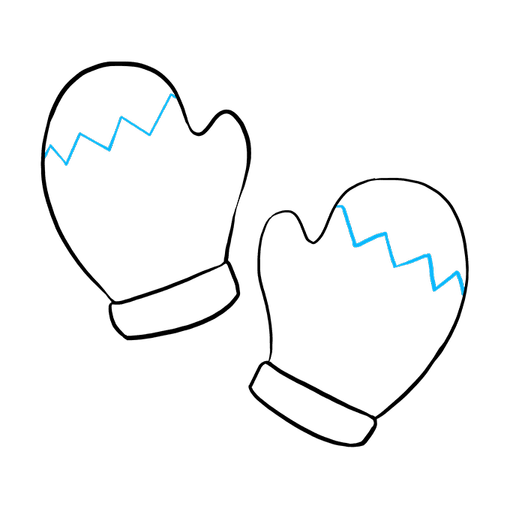
Step 3
In this image, I erased the portion of the thumb from the right mitt to illustrate what it would look like if you started with just the large portion of your mitten.
Either way, complete both sides up until this point.
Step 4
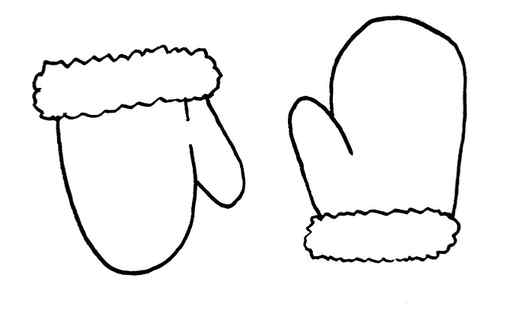
Finally, connect your thumb with the rest of your mitten by drawing a line straight through. This line should be slightly curved.
Given that one mitten is the right side up while the other is not, we can see that the line for the thumb would either stop as soon as it connects with the adjoining line or it would extend beyond.
How to draw a Mitten Step by Step
How to draw a Mitten with this how-to video and step-by-step drawing instructions. I promise that the lesson will be very simple and interesting.

Please see Mitten drawing tutorial in the video below
This is a simple tutorial that shows in detail how to draw a mouse. This is a great drawing object with which you will once again exercise your creative skills.
This figure shows a regular, standard-shaped glove. The top is rounded, has a thumb on the side, and has a fur border on the bottom of the glove. Such a glove will warm your hands in the cold season. It is a convenient and practical winter accessory.
In this tutorial, you will use circular and wavy lines. This is very easy to do even for a beginner. You can paint the gloves the same color or use any other color of your choice. You can also show your creative imagination and draw an ornament on the gloves. It will turn out very nice!
Mitten Drawing Step by Step
Step 1. Draw the bottom part of the feather border.
At this stage, use free-form wavy lines.
Step 2. Add the top part of the fur trim.
Describe wavy lines to create a closed path.
Step 3. Describe the texture of the fur.
Sketch uneven thin lines.
Step 4. From the feather trim, draw a smooth curve.
From the feather trim, draw a smooth curve.
Step 5. Start drawing the upper part of the glove.
From the thumb, draw a straight line.
Step 6. Add the rest of the gloves.
Draw a smooth circle to create a closed contour.
Step 7. Correct the inaccuracies.
Compare your drawing with my example and correct inaccuracies if necessary.
Step 8. Color the gloves.
You will need a bright red.
How to Draw Mittens
Learn how to draw a great looking Mittens with easy, step-by-step drawing instructions, and video tutorial.
By following the simple steps, you too can easily draw a perfect Mittens.

Complete Mittens drawing
“Three little kittens they lost their mittens
And they began to cry,
Oh, mother dear, we sadly fear
Our mittens we have lost
What! Lost your mittens, you naughty kittens!
Then you shall have no pie.”
– Folk nursery rhyme by Eliza Lee Cabot Follen, 1833
Mittens are a staple of both wintertime and childhood imagery. Mittens are a type of glove that group four of the fingers together in a single pocket, separating only the thumb in an individual sheath.
Mittens aren’t just for children, however. The earliest known mittens discovered by archaeologists date to around 1,000 A.D. They hailed from Latvia, a small European country, and are still part of Latvia’s “national costume” – a style of dress intended to express the cultural identity of the region.
Scroll down for a downloadable PDF of this tutorial.
Mittens are often seen in art and popular culture.
For example, you might glimpse mittens in hand in one of painter Norman Rockwell’s winter scenes.
The popular Shopkins collectible toy line features two mitten-inspired characters, Hug ‘n’ Snug Mittens and Molly Mitten.
And what of those kittens who lost their mittens? Well, as the story goes, they found their mittens and even washed them to make their mother happy. And then they ate their pie. This nursery rhyme has been featured on Barney and Friends and many other children’s television programs.
Would you like to draw a pair of cozy, warm mittens? This easy, step-by-step drawing tutorial is here to show you how.
All you will need is a pencil, pen, or marker and a sheet of paper. You may also wish to use markers, crayons, colored pencils, or paints to shade your finished drawing.
If you liked this tutorial, see also the following drawing guides: Dream Catcher, Monster Truck, and Sugar Skull.
Step by Step Instructions for Drawing Mittens
How to Draw a Great Looking Mittens for Kids, Beginners, and Adults – Step 1

1. Begin by drawing a long curved line. The line should have two upward facing lobes – one small lobe and one large lobe. This outlines the thumb and fingers of the first mitten.
Easy Mittens Drawing – Step 2
2. Draw a second long curved line, again with two lobes – one large and one small. This forms the thumb and fingers of the second mitten.


Easy Mittens Drawing – Step 3
3. Connect the ends of each mitten using a slightly curved line, fully enclosing the shape. Then, use this line as the basis for a curved rectangle with rounded corners. This shape forms the hem or wrist of the mittens.
Easy Mittens Drawing – Step 4
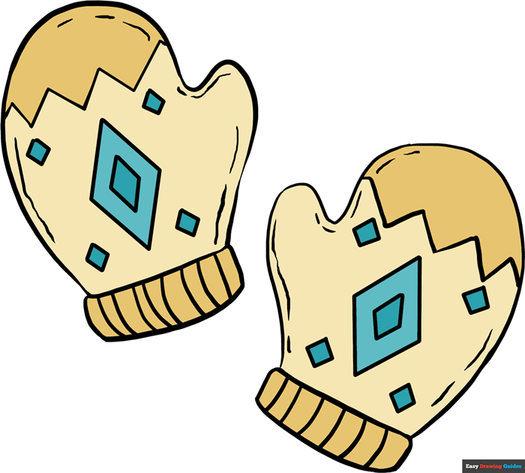
4. Decorate your mittens with fun patterns. First, draw a zigzag line across the fingers of each mitten.
MORE DRAWING TUTORIALS:
How to Draw a Thumbs up Sign

How to Draw a Jacket
How to Draw Jeans
Easy Mittens Drawing – Step 5
5. Draw a large diamond in the center of one mitten. Then, draw a smaller diamond within the first diamond.
Easy Mittens Drawing – Step 6

6. Draw a large diamond in the center of the second mitten. Then, draw a small diamond within the large diamond.
Easy Mittens Drawing – Step 7

7. Draw four small diamonds around the large diamond on the first mitten.
MORE DRAWING TUTORIALS:
How to Draw a Hoodie
How to Draw a Top Hat
How to Draw a Shirt
Add More Details to Your Mittens Picture – Step 8
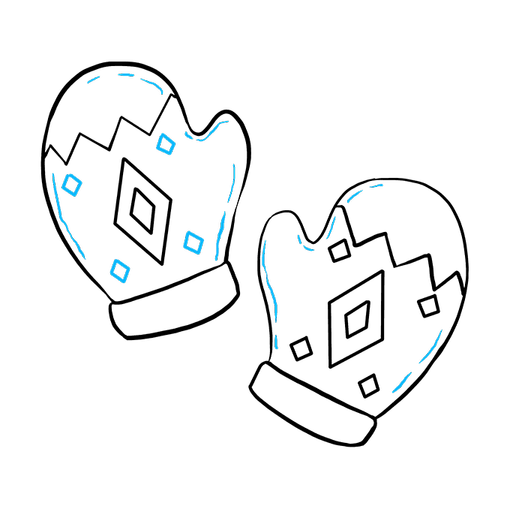
8. Draw four small diamonds around the large diamond on the second mitten. Then, texture your mittens and give them dimension. Do so by tracing curved lines of various lengths just inside the outline of each mitten.
Complete the Outline of Your Mittens Drawing – Step 9
9. Rib the hems of each mitten with short curved lines.
Color Your Mittens Drawing
Color your mittens. Perhaps you can visit our object drawing guides and draw a scarf to match!
Who will wear your mittens? Visit our selection of people drawing guides to design your very own hand-drawn friend.
Easy, step by step Mittens drawing tutorial
Click HERE to save the tutorial to Pinterest!
Mittens Drawing Tutorial – Easy & Fun Printable Pages
Join now and get immediate access to thousands of printable drawing instruction and practice pages!
MEMBER TROUBLESHOOTING
Still seeing ads or not being able to download the PDF?
First, check that you’re logged in. You can log in on the member login page.
If you’re still not able to download the PDF, the likely solution is to reload the page.
You can do this by clicking the browser reload button.
It is a circular arrow-shaped icon at the top of the browser window, typically found in the upper-left side (you can also use keyboard shortcuts: Ctrl+R on PC and Command+R on Mac).