This tutorial shows an easy way to to create a drawing of an ice cream with a waffle cone. By taking it’s most characteristic shapes and adding just a little bit of details you can create a peace of art that is simple but that also look good.
How to Draw an Ice Cream Cone!
Hi! Welcome to another fun tutorial! In ten easy steps, we are going to learn how to draw a super yummy sweet treat: an ice cream cone.
Ice cream is a popular dessert around the world, but it is most popular in the United States, New Zealand, Australia, and Norway. There are so many flavors, making it really versatile and yummy for lots of different people with different taste buds. Of course, vanilla and chocolate are some classic flavors, but we also love cookies ‘n cream, strawberry, rocky road, and mint chocolate chip. There’s even pistachio flavored ice cream! What’s your favorite flavor?
Although you can eat it in either a cup or a cone, many people choose to eat it in a cone because you can even eat it at the end! Cones are normally made from flour and sugar, making a perfect complement to the sweet ice cream.
Get in a comfy spot, pick out your favorite drawing materials and let’s get moving with this tutorial. Happy drawing!
How to Draw an Ice Cream Cone — Let’s get started!
- a piece of paper
- a pencil for the guiding lines and sketching
- an eraser
- a black sharpie or a pen for the outlines
- markers or colored pencils for coloring
- our printable drawing guide (Join my Email List below to get this Tutorial)
Get the FREE Printable Drawing Guide

Here are my RECOMMENDED Art Supplies!
- Crayola Coloring Set (140 Pieces – Mega Value!)
- 24 Colored Crayon Set
- A4 Printer Paper
- Crayola Coloring Pencils
- HP Home Printer with Instant Ink!
Time needed:
Step 1 – Draw the sprinkles.
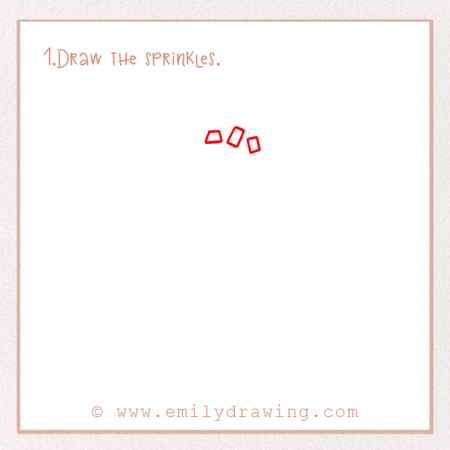
Oftentimes, ice cream cones have sprinkles on them. These are little pops of flavors at the top of the scoop! Let’s start our artwork by drawing some sprinkles. Near the top of the page, placed at the center, draw three small rectangles. No need to make them perfect—check out the photo!
Step 2 – Add more sprinkles.
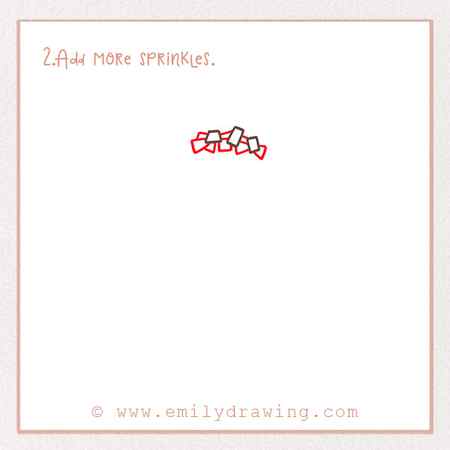
Sprinkles are yummy, so let’s add some more of them! Fill in the gaps around the first three with more little rectangles. Try your best to create some perspective here by letting some rectangles get a bit cut off by others. Refer to the photo. Good job! Let’s move onto the rest of the ice cream cone.
Step 3 – Start drawing the ice cream scoop!

If you’ve ever had an ice cream cone on a hot day, you’ll know that it can get a little bit messy as it starts to melt! Let’s draw the top of the scoop of ice cream, complete with some little drips.
Below the sprinkles, draw a super squiggly line. Connect the edges back up to the sprinkles with some curves. Let the squiggles be a little funky, rather than completely uniform. Check out the photo!
Step 4 – Draw the rest of the scoop!
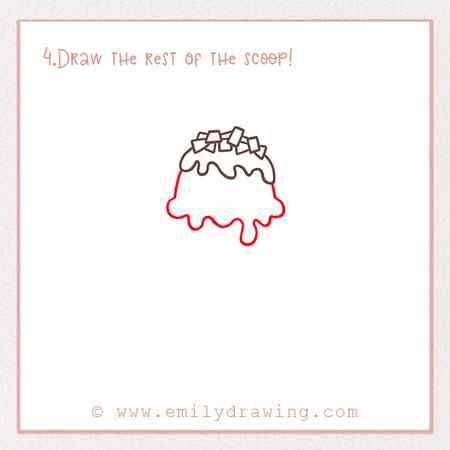
Let’s finish drawing the ice cream scoop. A few inches below the squiggle from the last step, draw another one, this time making the squiggles a bit bigger and even more varied. Like the last time, connect it to the shape above. Check out the photo!
Step 5 – Add a smiling face!
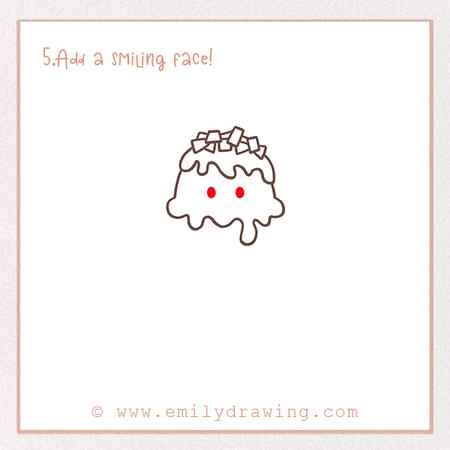
Like many of the tutorials on our site, this drawing will have a cute little smiling face to add some personality and friendliness. Let’s start by adding the eyes.
Near the middle of the scoop, draw two dots a few centimeters apart for the eyes. Good job!
Step 6 – Finish the face!
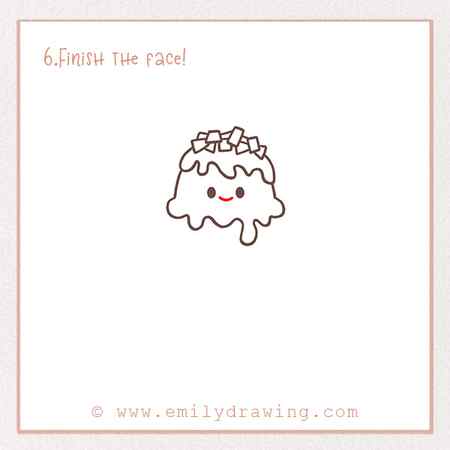
Of course, we need to actually draw a smile. Centered underneath the eyes, draw a small upwards curve for the smile. Now it looks super happy.
Step 7 – Draw the ice cream cone.
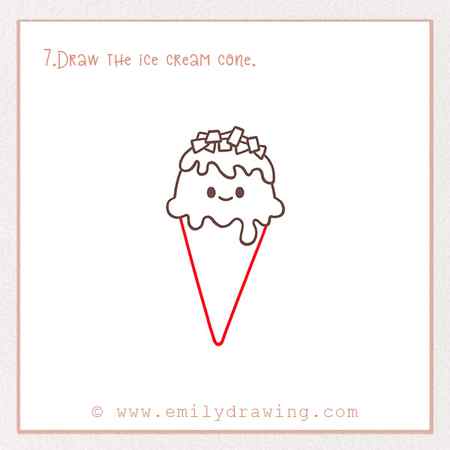
Our ice cream is going to be sitting in a cone, so you can hold it really easily. Have you ever had one? They’re delicious! Fun fact: although ice cream has been around for quite some time, ice cream served in cones wasn’t invented until around 1904 at a World’s Fair in the United States. Vendors came up with the idea so that people could enjoy ice cream easily as they walked around the fair.
So, underneath the scoop of ice cream, draw two slanting lines converging into a point near the bottom of the page. They should each be fairly long and symmetrical—look at the photo!
Step 8 – Draw markings on the ice cream cone.
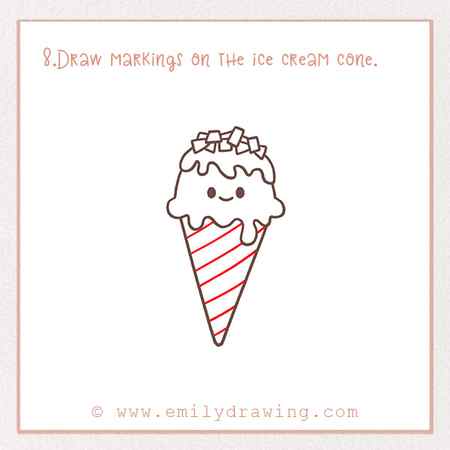
Ice cream cones often have a checkered pattern, kind of like a waffle—in fact, they are sometimes called waffle cones. Let’s start to draw the pattern now.
On the cone, draw a bunch of stripes. They should be slanted and evenly spaced apart. Check out the photo! Good job.
Step 9 – Add more detail to the markings.

This step is very similar to the last one. We are just going to finish the pattern.
You’re basically going to do the exact same thing (draw several slanting stripes) but in the opposite direction. This forms the checkered waffled pattern we mentioned earlier!
Good job! You’re almost done—just one more fun step.
Step 10 – Color in your ice cream cone!
Last but not least, color, color, color! Ice cream can be any color because of all the different flavors! Maybe think of your favorite flavor and draw your ice cream according to that. Have fun with it!
Pin it now, Draw later!

You’re all done! Thanks for following along with our tutorial. What flavor is your ice cream cone?
We had a good time and we hope you did too! Browse the site for more 10-step drawing projects… let us know in the comments if you have any ideas!
Step 1 – Draw the Ice Cream Scoop
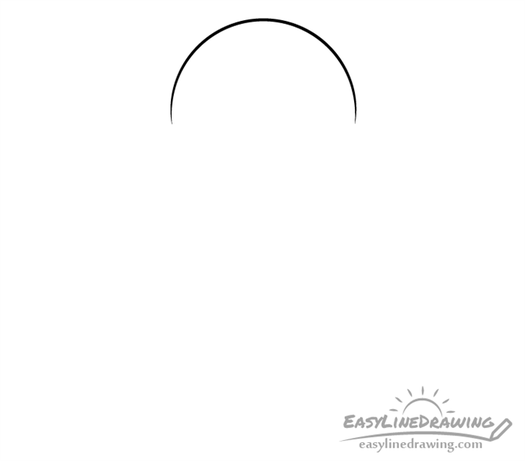
You will want to first draw the larger shapes of the ice cream before moving on to the smaller details. Begin by outlining the upper portion of the scoop that will sit on top of the cone. Make it’s shape close to that of a half-circle.
Step 2 – Draw the Bottom of the Scoop
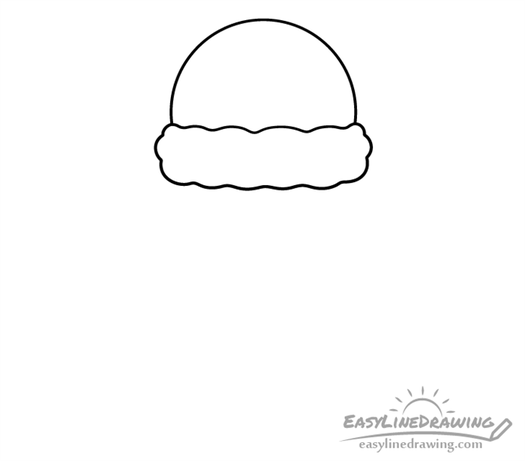
At the bottom of the scoop add the “rim” that tends to be created when the ice cream is squashed into the cone by the scoop. Give this part a wavy/uneven outline as shown in the example.
Step 3 – Draw the Cone
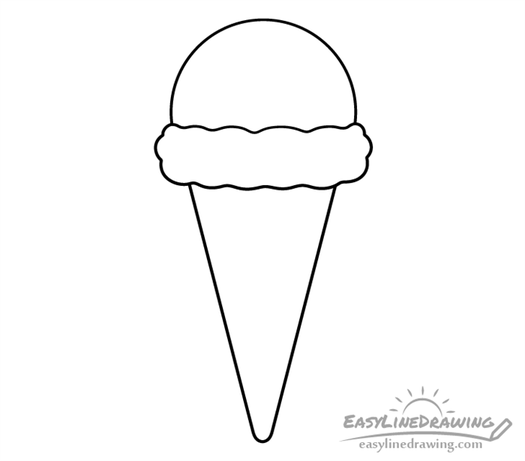
Below the scoop of ice cream draw the cone. In this example it will be a waffle one. Draw the cone wider at the top and narrower as it goes down with a rounded tip at the very bottom.
Once you have the cone in place you should have a basic outline drawing of the ice cream. Confirm that you are happy with the way it looks before moving on to the next step (make corrections if needed).