If you are using an inkjet printer, be very careful not to touch the image as it may smudge!
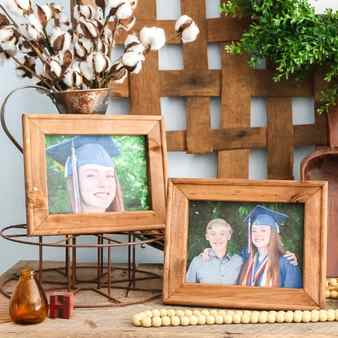
How to Transfer a Photo to Canvas
This post and photos may contain Amazon or other affiliate links. If you purchase something through any link, I may receive a small commission at no extra charge to you. Any supplies used may be given to me free of charge, however, all projects and opinions are my own.

You can transfer a photo to canvas in minutes right in your own home. Make your own framed canvas art with our tutorial and just a few dollars. After all, a quick, easy, and inexpensive project makes my heart flutter! Ready to dive in and make your own? Just follow along below.
Want to iron-on a design instead? Try our tutorial for making a reverse canvas here.
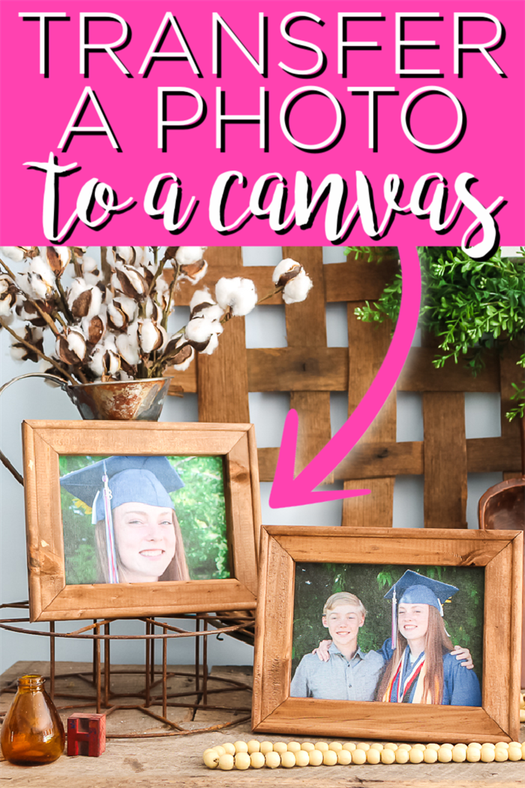
Table of Contents
Supplies needed:
- Canvases (remember that if you only have a standard printer your picture itself cannot be any larger than 8 1/2 x 11)
- T-shirt transfers or printable heat transfer vinyl
- Staple gun and staples
- Screwdriver
- Pliers
- Craft knife
- Wood stain
- Rag
- Paintbrush
- Printer and ink

How to Transfer a Photo to Canvas
Now that you have your supplies, it is time to make some gorgeous art for your home. You can actually watch me make this project in the video below if you prefer more visual instruciton.
Be sure to make a few of these now and get the method down. Then stock up on canvases for the holidays. You will have a stack of inexpensive gifts in no time at all.

Did you know that you could transfer a photo to canvas? Well, you can! And the process is so easy that anyone can do it! Pick up some t-shirt transfers and try this one for yourself. You will be so glad that you did!

Check out the video tutorial or skip to written tutorial below!
*Some resources in article are affiliate links. Full disclosure here.

Label sheets( Peel off the labels and ONLY use the glossy backing paper!) a printer, Mod Podge or acrylic gel (see comparison below)
Can I use either inkjet or laser printer?
Both inkjet and laser printer will work nicely. Laser printer works a little better for this technique with a bit more clarity and details in the transfer.

Which medium is better for image transfer: Mod Podge or acrylic gel?
Below is a side by side test I did with gel medium on the left, and Mod podge on the right.
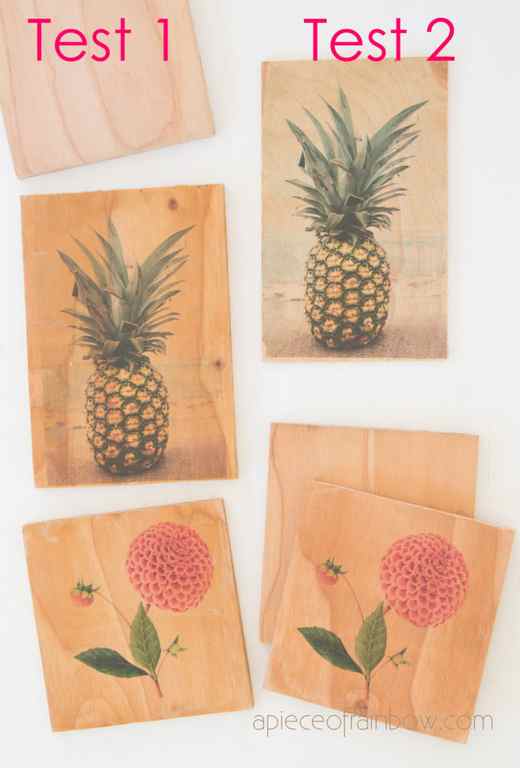
I got great results with both. However, Mod Podge dries much faster, and it’s easier to find, so Mod Podge wins! I used the gloss Mod Podge, but the matte Mod Podge will work great too!

Step 1. Switch on your scanner
Check to ensure that all the power sources are on
Check there are no loose cables
Check the USB is connected to the right port
If you are having trouble, check your user manual for step-by-step instructions
Navigate to your scanner on your computer
If you are using Windows you can use the search bar in the start menu to locate it
Once you have located it you can run the scanner by double clicking the program icon or name
Give it a few seconds to open the application

Step 3. Setting up your scanner to get the best images
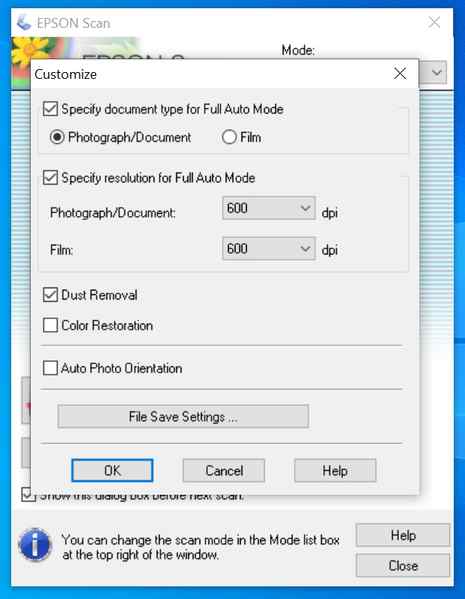
- Check the glass surface is clean
- Place your picture in the corner of the glass surface, use the arrows or grids to align the photo correctly and to ensure it’s straight.
- Photo or Film – you may be asked to select what type of document you are scanning. If you have a hard copy photography you would need to select the Photograph option
- Change the scanning resolution to between 500 and 800 dpi if possible, when you have a small image such as a 6”x4”. For larger images 300dpi will be sufficient
- The resolution helps with the sharpness of an image so the higher dpi you select the more details will show from the image.
- Dust removal may be an option that is available on your scanner and this helps remove dust particles that may show on your photograph
- Colour Restoration may be another option that is available to you. This can help you transform old faded images into true to life colour. Really helping bringing old photos back to life.
- If you get an option, select RGB format, rather than CMYK format.
- If your software has the preview function, use a ‘marquee’ tool to select your photo by clicking a dragging the box over the picture.
![]()
- Once you are happy with your settings and position of the photo on the scanner
- You can click ‘Scan’ to start scanning your photo
Step 5. Save the picture as a .JPG file.
- Now you have scanned you photo and the quality is good, you can now upload your image on our website.
- Select the product you would like whether you want us to print on canvas, poster and frame it.
- Select your specifications to personalise it your requirements
- Put your feet up and leave our team to work our magic on your custom photo print.
- The above instructions are guidelines only as scanners vary in operation.
Here is an old photo that needed scanning in to print to canvas.
![]()
Here we convert old photos to digital copies, just like this one! Our photo restoration service also helped repair this damaged picture to its former glory.
![]()
Get in touch with our super friendly team to see how we can help get your old photos returned to their former glory and printed on canvas or framed!