The first step in blending colors is to understand the color wheel and color theory. The color wheel is a visual representation of the primary, secondary, and tertiary colors, and how they relate to each other. Understanding how colors interact with each other, and how they can be mixed to create new hues, is essential for blending colors in screen printing.
How to Blend Colors in Procreate
When starting a painting in Procreate, the concept of blending colors isn’t immediately apparent when starting a painting. However, there are various methods in blending that can be really simple to more advanced which will result in helping your artwork achieve the goal of visual depth.
In this tutorial, you will learn three techniques to blend colors together. We’ll show you how to create unique color transitions and smooth transitional values by blending colors together.
Before we learn about the benefits of color blending, we’ll quickly introduce the concept of lost versus found edges because it’s important to learn about it. A very experienced artist will use these principles to create the illusion of depth.
A realistic painting usually has a combination of blurred and sharp edges, which helps give the painting a lot more visual variety. This can be greatly beneficial if we were to create transitional values, especially if you want to define soft-form shadows vs. hard-cast shadows.
Overall, understanding blending and when to use it can be a greatly beneficial tool in picking the right areas to highlight.

Now let’s jump into the steps.
Table of Contents
- Method 1: Smudge Tool
- Method 2: Painting with Values
- Method 3: Opacity Slider
- Final Thoughts
Method 1: Smudge Tool
The easiest way to blend colors/values together is listed as a preset in the Painting Applications tab.
Step 1: Select two different colors, and paint them directly next to each other.
Step 2: In your Painting Applications tab, select the Smudge icon to activate the tool.
Pick a brush that you would like the tool to adapt to. Both the Smudge tool and Erase tool have access to your Brush Library, so you will have endless variations on how you would like the tool to behave.
Tip: Try picking a brush that has a bit of a tapered edge so that the blending transitions will be smoother.

Step 3: Start blending the two colors together until you achieve a nice color transition.

Conversely, the smudge tool can also be used to soften the edges of the paint to blend in with the background more.
With the smudge tool still selected, start to paint on the other edges and pull the tool towards the background to achieve a nice blended effect.

This is a really great way to help your paintings have areas that lose focus, and allow other areas to stand out more.
Method 2: Painting with Values
This method is best if you prefer direct painting in which you would like to create more deliberate brush strokes. This is a better method if you prefer not to make transitions too soft/airbrushed looking.
Step 1: Create a new Layer and prepare a 10-value chart.
Step 2: Within the Color Slider, we will be painting 10 color swatches with one value transitioning to the next.
Try to keep the swatches relatively simple and monochrome, as our goal is to create a gradient effect.

Step 3: Once you have painted your swatches, use the Color Picker tool to select a transition value between the two values that we have selected.
If you have not assigned a shortcut to the Color Picker, please go to the Gestures tab, and assign a Gesture.

Step 4: After finding a tone between the two values, carefully start to paint in between those two values to create a seamless transition.
Start to paint in between the other values until you start to create a gradient.

This method can be especially useful if you prefer thinking of this along the lines of dry media. When using traditional media such as Pastel, Charcoal, or Pencil, we determine the strength of the values, in how much pressure we are applying to the tool.
Choosing the Right Colors for Blending
The next step is to choose the colors that you want to blend. The most common method of blending colors is to use a program such as Adobe Illustrator or Photoshop to separate the colors into individual layers. Each layer represents a different color, and can be adjusted to achieve the desired blend.
When blending colors, it’s important to pay attention to the value of the colors. The value of a color refers to how light or dark it is. Blending colors with different values can create a more dynamic and interesting print, as it adds depth and dimension to the final image.
Using Transparent Inks for a Subtle Blend
Another important aspect to consider when blending colors is the use of transparent inks. Transparent inks are inks that are partially transparent, allowing the underlying colors to show through. This can create a more interesting and subtle blend of colors, as the underlying colors can interact with the transparent inks to create new hues and shades.
Another important aspect to consider when blending colors in screen printing is the use of halftone dots. Halftone dots are small dots of varying sizes and spacing that are used to create the illusion of a continuous tone image. By adjusting the size and spacing of the halftone dots, you can create a gradual blend of colors, rather than a sharp transition between colors. This can help to create a more natural and subtle blend of colors and can add depth and dimension to the final image.
Overprinting for a Wide Range of Hues and Shades
Another technique that can be used to blend colors is overprinting. This is a technique where two or more layers of ink are printed over each other, creating a new color where the inks overlap. This technique can be used to create a wide range of new hues and shades and can add depth and interest to the final print.
It’s also important to pay attention to the texture of the fabric, as it can affect how the colors blend together. For example, printing on a fabric with a rough texture can result in a more mottled and uneven print, while printing on a smooth fabric can result in a more even and consistent print. It’s important to keep this in mind when choosing the type of fabric and when adjusting the colors and halftone dots to achieve the desired blend.
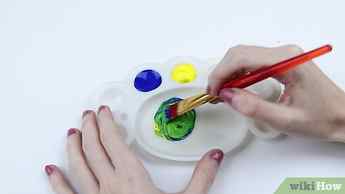
Blending two colors
Spread the first color as a solid area of color or as widely-spaced, not overly dark hatching.
Then overlay the second color the same way.
Work together with your finger, in a circular motion: the pigments will mix to create an intermediate shade.
That little extra
To optimize your chances of obtaining the shades you need, practice on an extra piece of paper with the same color and grain.

Creating a two-tone gradation
Apply the first layer of color, drawing hatching from left to right. Gradually increase the density of the pastel, by, for example, drawing the hatching closer together.
Spread the second color in the opposite direction: apply the least pigment where the first color is most intense.
Blend the two colors using the tips of your fingers, always working in the same direction: never go backwards! The result will depend on the direction in which you blend the colors. From light to dark: this will give you a more luminous gradation; from dark to light: the overall tone will darken.