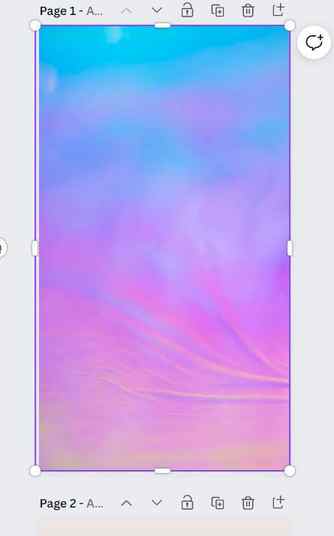
Currently, your design looks like a gradient repeated multiple times instead of a continuous gradient.
How To Make A Gradient In Canva (Ultimate Guide)

When it comes to using color in graphic design, there’s nothing like a gradient to spice things up. There are tons of software that make it easy to create gradients, but how easy is it to make a gradient in Canva? Actually, easier than you might think.
Below I will cover how to find the perfect gradient with Canva and how to find a gradient you can customize. I will show you how to create a transparent gradient through the Elements Tab and make one manually. I’ll show you how to form a gradient text with letter frames and give you a quick way to create a gradient border around your entire design.
How To Create A Basic Gradient In Canva
Unlike other graphic design software, Canva only allows you to use premade gradient layers with your designs. Thankfully, it’s not hard to find one of these gradients that will work great with your project.

To find one of these premade gradients, click on the Elements Tab, and in the Search Bar, type “Gradient.”

You now have all of the gradient elements available in Canva at your fingertips. Now you need to select some options to make this easier. First, click on the Filters Button to open the Filters Menu.
- Under Orientation, select the option that best matches the size and shape of your design.
- For Animation, click Static. The Animated option is for video.
- For the Cut-out option, just leave it blank. This option isn’t beneficial for gradients.
- Under the Price option, click on Free unless you are a paid subscriber to Canva.
- When you are finished selecting your options, click on Apply Filters.


Once you click on Apply Filters, you will have fewer gradients to pick from, but the gradients left are more tailor-made for your project.
However, the first thirty or so gradients will be in different shapes and most likely not relevant to you. Scroll down to the gradients that will fit the size of your canvas.


You should now have tons of gradients available to you that will work with your design. Click on the gradient of your choice, and it will show up on your canvas.
You also need to make your gradient fill the entire canvas. To do this, use the Corner Handles on each corner of the gradient to stretch it over the entire canvas.


Now that your gradient is stretched over your entire canvas, you can also rotate it if you wish. Click and hold on the Rotate Button and move your mouse to where you’d like to rotate your gradient.

Your gradient is now the right size and rotated to where you’d like it to be. Now you need to move this gradient layer behind the other visible elements of your design.
With your gradient selected, click on the Position Button to see your options. Click on Backward as many times as you need to. Alternatively, you can press Control + [ (Win) or Command + [ (Mac) to move your gradient one layer back.
If you know that you need your gradient to become your background, you can click on To Back to send the gradient back as far as it can go. Alternatively, you can press Control + Alt + [ (Win) or Command + Option + [ (Mac).


With your gradient exactly where it needs to be, there’s one last thing to do, adjust the Transparency.
With your gradient selected, click on the Transparency Icon. You will be presented with a slider that will allow you to adjust the visibility of your gradient to your liking.


Adding gradients to your designs can be quick and easy using the premade elements in Canva. Try out as many as you need to find the perfect gradient.


How To Customize A Gradient’s Color
The gradients in Canva come in two groups: gradients where you can customize the colors and gradients where you can’t.
Below, I will show you how to find gradients where you can customize what colors are blended together.

To start your search for a customizable gradient, click on the Elements Tab and type “Gradient” in the Search Bar.
To better our chances of finding a customizable gradient, click the Filters Button to open the Filters Menu and select Square.
There are far more square gradients that are customizable than either vertical or horizontal ones.

To find a customizable gradient, keep clicking different gradients in the Elements Tab until you see Color Options available.

Once you find a gradient with Color Options available, click on each color block to change its color.

After customizing your gradient, resize it to the size of your design’s canvas.
Position your gradient where you would like it to be with the Position Button.


With your gradient in the right position, adjust the visibility of your gradient with the Transparency Slider.


How To Create A Transparent Gradient In Canva
Sometimes your design needs a gradient that fades into another color, and sometimes you need a gradient that just fades away.
Below I’ll show you how to create a transparent gradient with a premade element and make one manually.
– Using The Elements Tab

To find a premade transparent gradient, go to the Elements Tab and type in “Transparent Gradient.” Click on the one that works best with your project, and it will be added to your canvas.

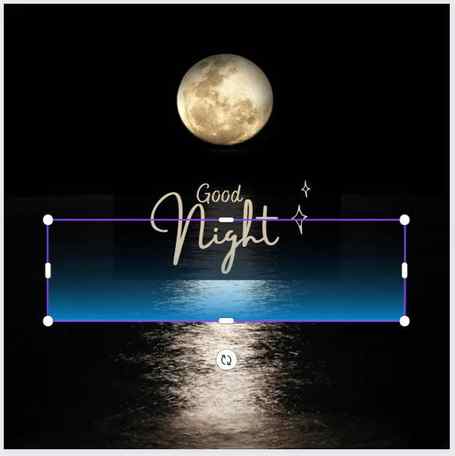
After adding your gradient, click and drag it to where you need it to be and use the Handles around the gradient to pull it to where it needs to be to achieve the desired effect.


– The Manual Way
The key to making this work is finding a gradient that allows you to customize the colors. Type in “Gradient” in the Elements Tab and click as many gradients as you need until you find one that gives you the option to customize the colors.
Once you find a customizable gradient, you can change one color to whatever you would like, but the other color needs to match your background to give the illusion of one color bleeding into the background.


With the colors all set to go, resize your gradient to fit the canvas as best as possible and then duplicate it with the Duplicate Button or by pressing Control + D (Win) or Command + D (Mac).
Position the second gradient to fill the rest of the canvas. Click on one gradient, hold the Shift Key and click on the other gradient and then press Control + G (Win) or Command + G (Mac) to group them.


With both gradients grouped, you can then adjust the Transparency or the first color.

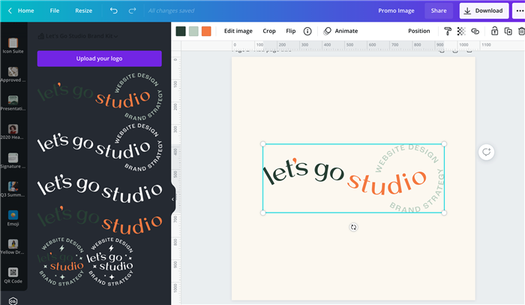
How to Change the Color of Graphics, Elements, and Your Logo on Canva
You might have noticed that a LOT of the graphics in Canva are COLOR CHANGEABLE! This means that you can easily brand a lot of the elements to your own color palette so that they easily fit into your company’s brand and style.

But, what if you want to upload a pack of graphics from Creative Market, or you want your LOGO to be color changeable?
The answer is in the file type: SVG.
An SVG is a Scalable Vector Graphic. It’s a format that you’re probably not used to if you’re not a designer, and if you ARE a designer, you might be more used to an EPS or PDF or AI. But I’m here to tell you that SVG is the way to be, and is the graphics format that Canva likes best!
How Do I Change the Color of My Own Graphics in Canva
Video tutorial here, but text below. I highly, highly recommend the video because it shows you my EXACT process!
I use Creative Market graphics in the video above, as it’s my preferred platform for supporting creators and getting awesome graphics!
This is really best shown in the video above, but I’ll explain how to change the color of graphics on Canva:
- First, you’ll need vector files. Whether that is Adobe Illustrator (AI) or EPS, you need to have a format that is editable in a graphics program.
- Files that are NOT editable are PNG, JPG, and sometimes PDFs. These are raster formats and are pixel based, so we can’t change them!
- ALWAYS CHECK your Creative Market “wishlist” to make sure they’re providing a vector (SVG, EPS) file!!
- This is important: SVG files cannot have fonts or strokes or transparency effects.
How Do I Make My Logo Color Editable on Canva
You have AWESOME logo files from your designer but you really want to mix it up. Maybe you want a logo in your alternate logo palette, or you just want a white logo. At the end of the day, being able to edit the colors of your logo on Canva is something that I think we should all have a right to do.
You will follow the steps above, and request a vector file from your designer: or an SVG file! Please remember that SVG files cannot have fonts or strokes or transparency effects.
Okay…I’ve followed your steps, and still: nothing. What gives?
The steps to checking that your SVG files are good for Canva:
- SVGs cannot be typography. Make sure your fonts are outlined.
- SVGs cannot have strokes. Those also need to be outlined!
- SVGs cannot have transparency effects (overlay, multiply, screen, etc). You will have to upload without those effects.
- Canva gives you a limited amount of colors. Make sure your graphic has a maximum of 5 colors.
- Ask a designer, or book a Power Hour with me! I can untangle and work on a lot of logo issues.
If you don’t have access to any of this, and you just want to make your logo white, check out this blog post here on making your logo white WITHOUT the need for vector formats!
Why Do I NEED to Change the Colors of Graphics and My Logo In Canva?
A simple reason: brand strength & consistency. If you’re not changing the colors of templates, graphics, and fonts, you’re missing out on a key factor in brand recognition. Your brand is so much more than a logo: it’s your colors, fonts, and graphics as well. A brand is the sum of all of its parts, and a logo does not factor in more or less than the others!
When you can change assets that you like, you open up a whole world of brand customization. It’s a small tip but goes a LONG way in really improving the look of your feed and beyond.
Comment below if this tip helped you!
How to Make a Gradient Background in Canva: Your Step-by-Step Guide
Creating a gradient effect on Canva might seem tricky, but with the right steps, it becomes a simple process. So, let’s learn how to make a gradient background in Canva.
Step 1: Open Canva and Create a New Design
The first thing you’ll need to do is open Canva and create a new design. You can choose any design format you like, such as a poster, flyer, social media post, or even a blog graphic. Once you’ve selected your design format, you’ll be taken to the Canva dashboard where you’ll see a blank canvas ready to be edited.
Step 2: Choose Your Colors
Next, you’ll need to choose the colors you want to use for your gradient. Canva allows you to select up to three colors for your gradient effect. To do this, click on the “Background” tab in the sidebar on the left-hand side of the page. Then click on the color option and either select one of the pre-set colors or input a color of your own using the color wheel.
Step 3: Apply Your Gradient Effect
Once you’ve chosen your colors, it’s time to apply the gradient effect! Go back to the “Background” tab and click on the “Gradient” option. You’ll see a few different gradient options to choose from, such as linear, radial, or angled. Play around with these different options by clicking on each one to see how it affects your design. You can also adjust the angle of your gradient by clicking and dragging the line icon in the center of the design.
Step 4: Customize Your Gradient
To customize your gradient even further, you can adjust the opacity of each color by clicking on the circular icon located at the bottom of each color selection. This will allow you to make one color more dominant than the others, or to create a softer, more subtle gradient effect. Additionally, you can adjust the brightness and contrast of the entire gradient by clicking on the “Adjust” tab in the sidebar.
Step 5: Save and Export Your Design
Once you’re happy with your gradient background, save your design in Canva by clicking on the “Save” icon in the top right corner of the toolbar. You can also export your design as a PNG or JPG file by clicking on the “Download” icon and selecting the file format you prefer.
Tying it All Together: Design Tips for Using Gradients in Canva
Using gradients in Canva is more than just knowing how to make a gradient background in Canva. Here are some tips to help you use gradients effectively in your designs:
- Balancing Colors: Choose colors that work well together for your gradient. Opposing colors can create a striking contrast, while adjacent colors can lead to a smooth transition.
- Text Visibility: Ensure your text is visible against the gradient background. If required, use a text background or shadow to enhance visibility.
- Simplicity: Gradients are a powerful tool, but avoid overuse. Maintain simplicity in your design for a more professional look.
Conclusion
Gradients, with their beautiful color transitions, can add depth, focus, and visual appeal to your designs. Knowing how to make a gradient background in Canva allows you to experiment with your creativity and make your designs stand out. So, go ahead, let your creative juices flow, and paint your Canva canvas with the colors of the gradient!
Can I create a gradient effect with more than two colors in Canva?
Canva’s built-in gradient backgrounds often include more than two colors. However, if you’re creating your gradient using an external tool, the number of colors you can use depends on the tool itself.
Is it possible to change the direction of the gradient in Canva?
The direction of the gradient in Canva’s pre-made gradient backgrounds is fixed. If you want a gradient in a different direction, you would need to create and import a gradient image.
How do I maintain the readability of text on a gradient background in Canva?
To ensure readability, you can use a solid color overlay on your text, add a text background, or use drop shadows. Choosing contrasting colors for your text and background can also help.
Can I use gradient backgrounds in Canva for free?
Canva offers a mix of free and premium gradient backgrounds. Be sure to check the licensing requirements for each element you use.