Yellow. This color is usually very vibrant in nature usually existing in the form of light, like in the brighter parts of the sky around the sun, or where direct light is hitting objects, and then also in certain types of flora. Yellow is usually a great color to hit with some brightness and saturation wherever it appears. I usually prefer to shift the color yellow in skies slightly more towards orange.
Color Theory and Landscape Photography
Color. When it comes to landscape photography, color has the power to both take a good image to great, or take that same image, and absolutely ruin it. Sometimes it is a very thin line to balance on, but absolute ruin can be avoided with a little knowledge of color theory. Color theory is a technique used primarily in the varying fields of the world of art and design, and plays a major role for creating effective color palettes for those particular fields. Color theory is an important component of delivering a message, or otherwise, just making a combination of colors look great together, simply put. Color theory is not something that is typically referred to when it comes to landscape photography, but it can have extremely useful application. If we consider color theory while in the act of creating landscape photographs, we can find guidance for how to approach and manage color for better looking images.
So what is color theory? Color Theory is the technique of combining specific colors in a way that are harmonious, or in other words, just look great together! A great analogy to further explain this is that of a guitar chord. A chord is created by pressing the fingers down on the strings of a guitar in certain places. Each string then will ring with a certain note, and when all of the strings are strummed together, those individual notes play at the same time and they create a chord. If the fingers are put in the right place on the strings, and the proper notes are created on each individual string, the chord will sound beautiful and harmonious. If one or more fingers press strings in the wrong place, the chord will not sound right. It will not be harmonious. This is because certain frequencies of the sound waves work together due to mathematical relationships. Color is the same way. A color is just a specific wavelength of visible light, and when the colors that are harmonious to each other are combined in the correct way, they look beautiful together. You can think of it as a ‘color chord.’
Types of Color Harmonies
The core of color theory is the act of arranging color into harmonies, of which there are several types. These are most commonly known as analogous, monochromatic, complementary, split complementary, triadic, and quadratic. I have found analagous, complementary, split complementary and monochromatic to be the most useful when it comes to landscape photography as they tend to be more flexible and versatile than triadic or quadratic. Below is an explanation and example of each of these color harmonies.
Analagous – An analogous color harmony are a group of colors that lie directly adjacent to each other on the color wheel. This group of colors can have a limited spread of just 2 colors, or can spread further, along as much as half of the entire color wheel, although at this point or further, it will start to lose its identity as an analogous harmony.

Complementary – This color harmony is comprised of two colors that lie directly across from each other on the color wheel. The spread of color on either side can be increased to a degree to include more color on either end. A common complementary color scheme found in nature is that of a warm cool combination. Cool blue-ish tones mixed with warm orangey tones.

Split complementary – By taking two colors that lie directly adjacent to one of the colors in a complementary color harmony, you get a split complementary harmony. A more difficult harmony to utilize, but can be useful in certain situations.


Monochromatic – This is comprised of one color, with varying values, meaning varying degrees of brightness, or varying degrees of saturation. Most typically this color harmony is what a black and white image would be.


Triadic – Combining any three colors equally spaced from each other on the color wheel. This harmony is very similar to a split complementary and in the context of a landscape photograph, where a ‘single’ color in an image can often span over a slight range of that color, sometimes the color harmony identity in the image can be blurry.

Quadratic – Combining four colors that have a rectangular spatial relationship on the color wheel. This is often also referred to as a double complementary because it is the combination of two complementary color harmonies.


Diad – Combining two colors that are seperated by two hues of color along the color wheel constitutes a diadic color harmony. This harmony has some flexibility since it is difficult to quantify what exactly makes up a single hue of color’.


Something to note with the combination of only two colors is that there are many combinations of two colors that work well together, and they follow no mathematical rules or relationships. For instance, pink and blue is a fantastic color combination, but they are not complementary to each other, nor do they lie particularly close to each other on color wheel. If your scene only consists of two colors, there are not really any guidelines to help determine if they work well together. The best tool in this case is just your own eye.
At this point it should be stated that strict adherence to color harmonies in landscape photography is not entirely necessary. Finding perfect color harmonies in nature is rarely easy, or even possible. Nature is chaotic, and the color we find in it is presented to us, we don’t create it. In rare instances we may find perfectly balanced combinations of color in nature that fit within the color harmonies mentioned above. Sometimes we can also take measures to make a color palette more harmonious in field with decisions such as wether to combine our landscape with a colorful sky, or with a simple blue sky with white clouds, or wether or not to include colorful objects such as flowers, etc.. I personally generally do not let color influence what I photograph in nature as I know that in processing I have a certain level of control for highlighting the colors that do work well together, and managing the other colors in a way that make them less of a focus. Again, strict adherence to color harmonies with landscape scenes is not entirely necessary, but it certainly helps to understand color theory and use it avoid blatant distractions to color palettes, or to make modifications to colors in order to get the color palette of an image to be more harmonious. When making modifications to colors with processing, it’s important to keep in mind the ‘context of nature’, or in other words, keeping a color within the realm of believability. This will be discussed in more detail later.
Managing Brightness and Saturation of Colors
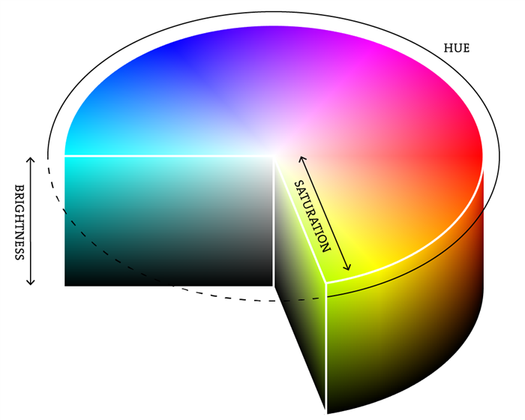
A single color can itself vary in two different ways. Brightness and Saturation. Differing amounts of brightness and saturation will create versions of a single color that exist between black and white. By looking at the three dimensional version of a color wheel(shown below, click to enlarge), we can see that the top represents variations in saturation, where the middle of the circle is completely white where there is no color saturation. At any point on the top if you begin to remove brightness, moving down on the Y-axis, the color becomes darker and eventually becomes black. The second image shows a typical color picker in photoshop, which represents taking a slice out of the pie for any particular hue. Left to right movement represents changes in saturation, where as up and down represents brightness. (A combination of these variations of a single color are what would make a monochromatic color harmony, as described previously.)

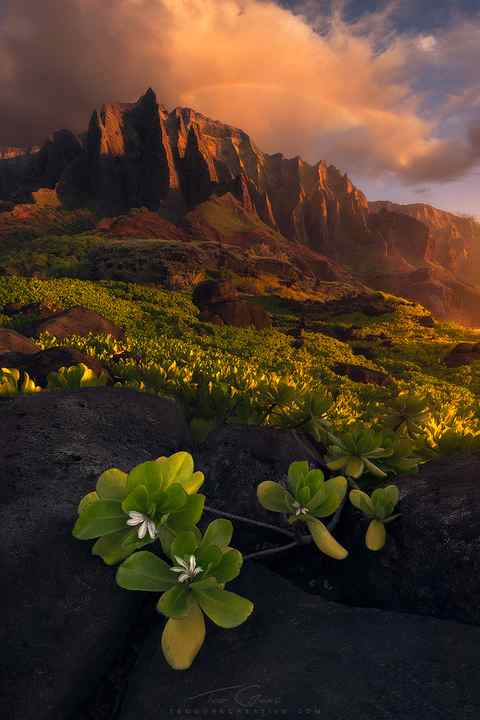
This is important to note with colors in landscape images, especially in post processing, where you have control of how a color can be presented. Colors with full brightness and varying levels of saturation will feel light, airy, and colorful, whereas colors with decreasing saturation and brightness will feel dark, and eventually more ‘dingy’ or ‘muddy’ as they become less saturated. You can see how this is the case in the lower left of the orange in the photoshop color picker. Each color has a place, and being able to decipher when a certain color should be bright and light, or dark and dingy is a difficult skill to acquire. Less experienced color users tend to think that making every color their brightest and most saturated is the best choice. When this happens, the image becomes loud, noisy, usually not harmonious due to too many colors, and many viewers will label the image as over-processed. I’ve found a more tasteful approach that gives a dramatic result is targeting brightness and saturation to very specific areas of color generally around highlights in the scene. Generally anything receiving direct light is obviously brighter, and can also handle more saturation. Vibrant colored water, colorful flora, lit up clouds, the golden colors around the sun are all good examples of objects in landscape scenes that receive brightness and saturation well. If you were to sample most of the colors in my images, you would find that generally, the colors are not very saturated. The saturation is applied in a very calculated way to specific colors that serve the composition and the color harmony, which ultimately gives the illusion of a very colorful and vibrant image.

A technique I use often in regards to saturation is not punching the saturation overall of the entire object, but rather making targeted increases in saturation to specific areas of an object, usually in correspondence to light direction. For instance with the image to the right, of some clouds around Fitz Roy receiving direct sunrise light, rather than hitting the entire area of clouds and mountain receiving the light with a ton of brightness and saturation, it is instead done sparingly, and more targeted to different areas of the object. As a result this creates the illusion of everything being very saturated, but not overdone, and it also increases the depth and dimension of the objects.

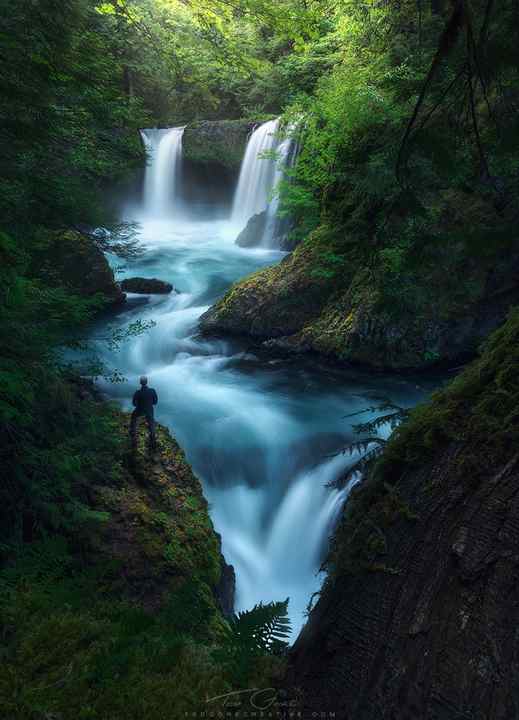
Another example is in the second image to the right of Elowah Falls. Notice that the greens generally are darker and less saturated except in certain spots corresponding to the presence of light as opposed to just blasting all of the green foliage with brightness and saturation. Again this creates more depth and dimension, and is also used in shaping the light in the scene overall.
When making alterations to brightness and saturation with colors always keep an eye on the RGB histogram to ensure that you don’t blow out a color channel. I do sometimes allow small amounts of a certain color to blow out for the effect, but letting a large area of color blow out is not a good idea.

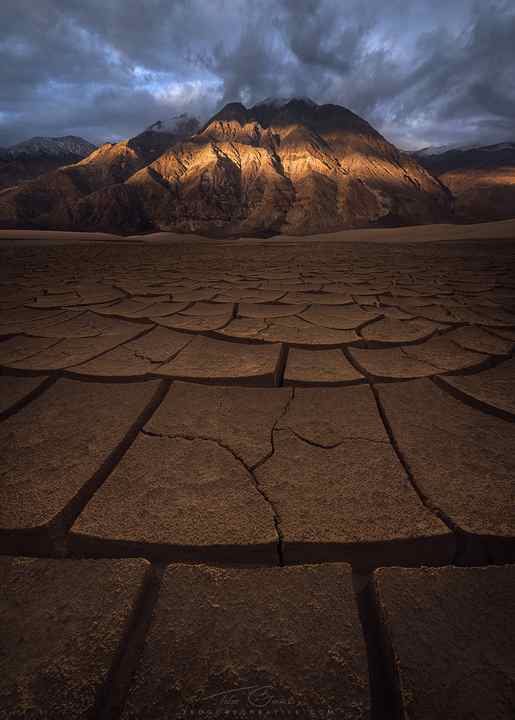
When working with color harmonies and brightness and saturation of the colors in your scene, you want to pay attention to the dominant colors. These will be the main colors that comprise the harmony, and usually the colors of the primary subjects of the image. It works well to focus your efforts of increasing saturation and brightness to these objects/colors as that is where you want the attention of your viewer to go. As an example, the image to the left of the Kofa mountains, cholla cactus, and yellow flowers is utilizing an analogous color harmony from yellows to reddish orange colors. The scene also has green of the brush and small bits of blue sky in it, but these colors, which are not part of the analogous harmony, are intentionally left darker and less saturated. The real saturation and brightness is carefully applied to areas that are receiving more light and is utilized again to create more depth and dimension on those particular objects.
Paint Color Match of TED Talk Red

70% of Orders Ship within 2 Business Days.
For guaranteed shipment within 1 business day, select ‘Expedited Production Fee’ during checkout.
Satisfaction Guaranteed
If you’re not satisfied with your paint color we’ll give you a do-over for free! Click here for details.
Copy below code in your post
- Red Paint Colors |
- Paint Color Matches of Cool Products We All Love
Explore Colors Related to Paint Color Match of TED Talk Red
Click arrows, drag the slider or enter the value to explore colors.

Paint Color Match of TED Talk Red
Close
*MyPerfectColor uses Kelly Moore or proprietary paints to create or match any color imaginable. MyPerfectColor has matched the colors on this page based on the color specifications of the original. Select a color to see MyPerfectColor’s duplication of the colors you desire. Please note that since the paint used to match this color is unique to MyPerfectColor, the finish of the paint may vary from the original. Please note that, other than Kelly Moore, RAL, and Pantone, MyPerfectColor is not offering the actual branded color or paint product for sale and has no affiliation with the color-referenced brands. MyPerfectColor reference to any trademark is for color comparison only. On-screen and printed color representations may vary from actual paint colors. The actual paint color will also vary depending on the specific paint product, application method, gloss level, film variance, surface substrate, age and light source. Please note on small batch size orders, the potential variation of colors is increased.
Explore Color
- Paint Color Matches By Material Type
- Paint Color Matches By Brand
- RGB, HTML and CMYK Color Code Matches
- Metallic and Pearlescent Spray Paints
- Custom Spray Paint
- Touch Up Paint
- Color Matching Services
- Paint for Prototyping
- Our Customers
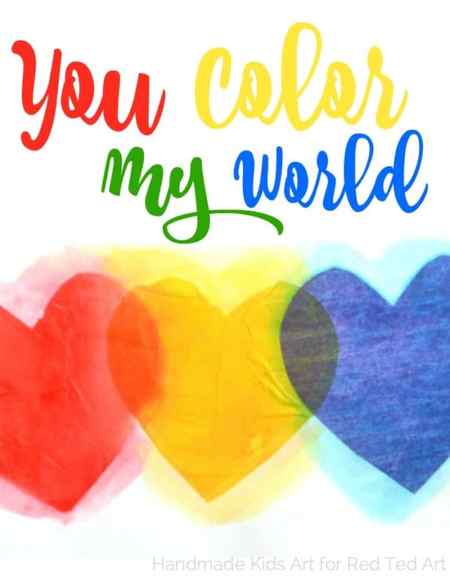
For Color Mixing, we start with our Primary Colors
The primary colors, red, yellow and blue, are “special” colors because all the colors of the rainbow are made from these 3 colors.
Red + Yellow = Orange
Yellow + Blue = Green
Blue + Red = Purple
Color Mixing Tissue Paper Hearts – Materials:
- Red, Yellow, and Blue Bleeding Tissue Paper,
- Pencil,
- Glue mixed with water,
- Paint Brush,
- White card stock paper or free “Color My World” printable (optional)
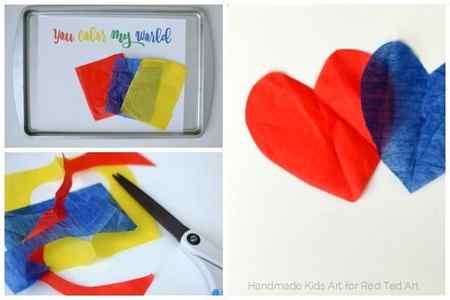
Easy Color Mixing Tissue Paper Hearts How To:

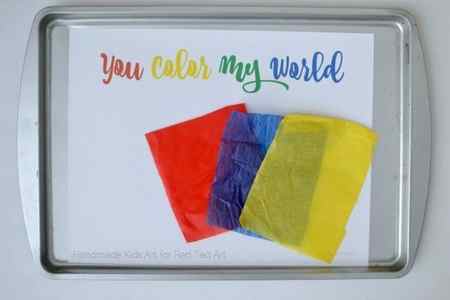
Step 1: Print out the free printable on white card stock paper or use a white sheet of paper as your canvas.
Step 2: Cut a 4” x 4” square of each color of tissue paper.
Step 3: Stack all three squares on top of each other and fold in half.
Step 4: Draw a half heart along the folded side and cut out the heart shape from all 3 colors.
Step 5: Place the red heart on your paper. Use a paintbrush to cover the heart with a mixture of glue and water.
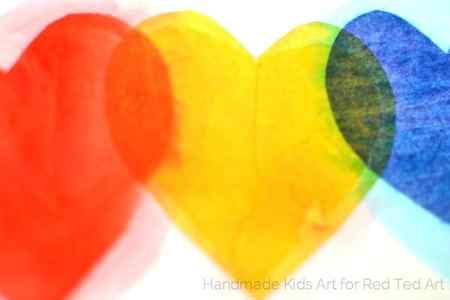
Next place the yellow heart so that it overlaps on top of the red heart. Observe what happens where the two colors overlap.
Ask your child to explain what they see. What happens when the yellow heart overlaps with the red heart?
Continue the activity by overlapping the blue heart over the yellow heart. Once again ask your child what they observe.
Questions to Ask:
- “What happens when the blue heart overlapped with the yellow?”
- “What do you think would happen if you overlapped the red and blue hearts?”
Material Tip: We used bleeding tissue paper for this activity. When water is placed on top of the tissue paper the color expands around it. Bleeding tissue paper is a fun way to play and experience color mixing. You may use regular tissue paper for this activity, but you will not get the same color spreading results.
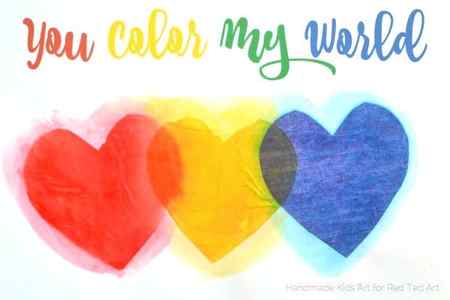
We framed our heart artwork as a keepsake for Grandma and Grandpa, but you also could make a smaller version and turn it into a Valentine’s Day card.
Here are 3 more fun and easy STEAM activities that you can try today:
Jamie is a certified Art Instructor and a mother of three. Her website, Hand Made Kids Art, focuses on quick, easy and inspiring STEAM activities to grow creative kids. It doesn’t matter if you only have 5 minutes or 20 minutes, you can find time to create art with your children. You can follow along with her STEAM-filled adventures at Hand Made Kids Art, Pinterest, Facebook, Instagram, and Twitter.
Fancy some more Valentine’s Day Science Ideas? Take a look at these easy to do and implement projects! LOVE:

Nurturing Little Thinkers! Great STEAM Ideas for Valentine’s Day!