First, leave the lid on for a few minutes while the candle burns. Then make a small hole where the lid has blackened.
How to make spooky Halloween Jack-o’-lanterns
It’s that time of year again, when old dress-up clothes resurface, cobwebs are strewn over house facades and sales for pumpkins perfect for carving into jack-o-lanterns skyrocket.
Making jack-o-lanterns is a tradition that dates back to 19th century Ireland, where hollowed out root vegetables such as turnips and pumpkins were transformed into lanterns to ward of evil spirits. With the celebration of Halloween in continuing to grow in popularity in Australia, carving pumpkin varieties which takes place annually on October 31.
Learn how to make a pumpkin jack-o’-lantern with our step by step guide.
What you will need to make a halloween jack-o-lantern
- Sharp, serrated knife and paring knife
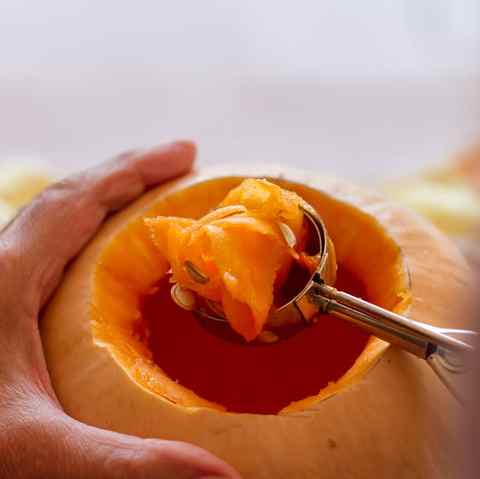
- Melon-baller or spoon
- Chalk
- Battery-operated tea-light candles
- One large carving pumpkin
You can either buy carving pumpkins in supermarkets, or grow your own. The Seed Collection sell a number of heirloom pumpkin varieties suitable for Jack-o-lantern carving, including the Jack-o’-lantern (Cucuurbita maxima), Big Max (Cucurbita maxima) and Spookie (Cucurbita pepo).
How to carve a jack-o-lantern pumpkin
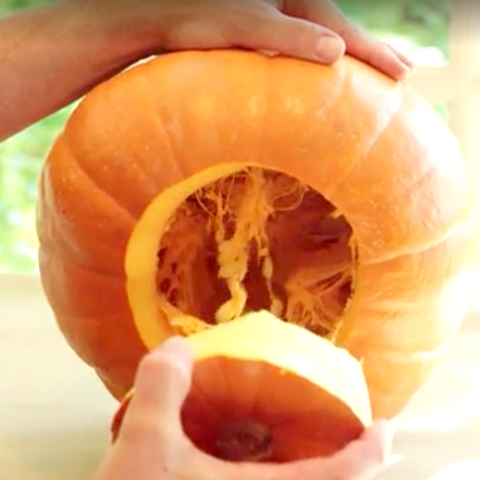
- Start by cutting around the stalk, inserting the knife at an oblique angle, to create a removable cap. Ensure the hole is big enough to allow you to reach inside the pumpkin.
- Using a melon-baller or spoon, remove the seeds and flesh from the walls of the pumpkin.
- Decide what sort of face you want to create. The classic jack-o’-lantern has a big, gape-toothed grin and triangular eyes and nose.
- Turn the pumpkin around until you find its ‘face’ – the surface that looks most like a head.
- Use the chalk to draw the features straight onto the pumpkin skin.
To prevent the jack-o’-lanterns from drying out and rotting, spray the interior and cut surfaces with vegetable oil. Photo: Bekir Dönmez on Unsplash
Step 1. Begin with the right pumpkin.
Choose one that’s fresh, with a sturdy stem, no bruises and a flat bottom so it won’t roll while you carve.
Step 2. Start cutting from the bottom, not the top.
Michael Natiello, pumpkin carving pro and creative director for The Great Jack-o’-Lantern Blaze, says cutting your “lid” from the bottom of the pumpkin helps prevent the sides from caving in later.
This way, it won’t drop inside the pumpkin when you put it back on top, like it would with a straight up-and-down cut. A boning knife should work well for this.
Step 4. Scoop out all the pulp (and then some).
OSORIOartist // Getty Images
You can buy a special “claw” for pumpkin gutting, but an ice cream scoop will do just fine. Thin the inner wall of the “face” area to be 1¼-inch thick, so it will be easier to pierce the shell.