Thoroughly mix everything together (I just use my hands) for about 5 minutes until each grain of sugar is moistened and the consistency is like beach sand. To test that it’s ready, form a tight clump with your hands and make an indentation with your thumb. If your thumbprint remains and the clump doesn’t fall apart, the mixture is ready. If it’s sticky and clumps very easily, you probably added too much water. It’s not too hard to get the right consistency, but it’s important because if it’s too moist it will stick to the mold, and if it’s too dry the skull will fall apart once the mold is removed.
How to Make Sugar Skulls
Learn how to make sugar skulls, a popular symbol of the Mexican holiday Day of the Dead (Día de Muertos in Spanish).

Traditionally, sugar skulls are made in Mexico in the weeks leading up to the Day of the Dead, a meaningful celebration that occurs from the evening of October 1 through November 2. It is a time for honoring and celebrating our loved ones who have passed away. Sugar skulls are given as colorful gifts to the living or placed on altars as offerings for the deceased.
As the Day of the Dead continues to spread around the world, more and more people are learning to make sugar skulls because it’s a fun and educational way to connect to the spirit of Día de Muertos.
Sugar skulls are traditionally made from melted sugar, but this recipe is a lot easier and safer, especially for kids. These skulls are made with simple ingredients and don’t require any baking or complicated techniques.
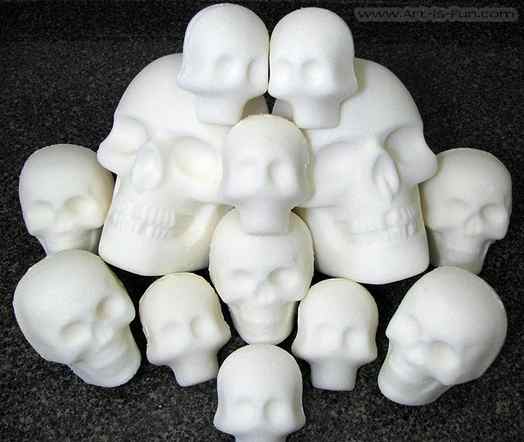
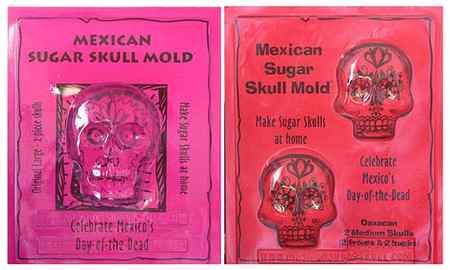
This article focuses on how to make the medium and large sugar skulls shown above. If you’d like to make the life-size sugar skulls like the two largest ones seen in the photo below, visit our Making Sugar Skulls page.
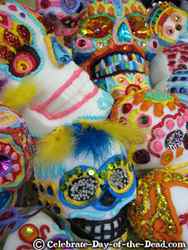
To learn how to turn your white sugar skulls into the colorful skulls seen on the right, visit our How to Decorate Sugar Skulls page.
Are sugar skulls meant to be eaten?
No, sugar skulls are intended as decorative items only. Although they’re made from edible ingredients, they are super-hard when finished. Even if you didn’t break your teeth trying to eat them, they wouldn’t have much flavor and they’re not sanitary because they tend to get handled a lot. Plus, they’re full of sugar, which simply isn’t healthy!
What you’ll need
- Fine Granulated Sugar
- Powdered/Icing Sugar (for the royal icing)
- Water
- Meringue Powder
- Sugar Skull Molds
- Some cardboard panels or flat plates
Meringue Powder
The products below are linked to on Amazon. As an Amazon Associate I earn from qualifying purchases.
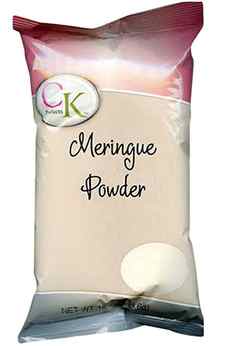
Meringue Powder is made mostly from dried egg whites and acts as a binder. Without meringue powder to help harden the sugar, your skulls will fall apart. You can find meringue powder in baking supply stores, and even supermarkets, but not all brands work for sugar skulls. I use and recommend CK Products Meringue Powder which is concentrated enough to harden even the largest sugar skulls.
Sugar Skull Molds
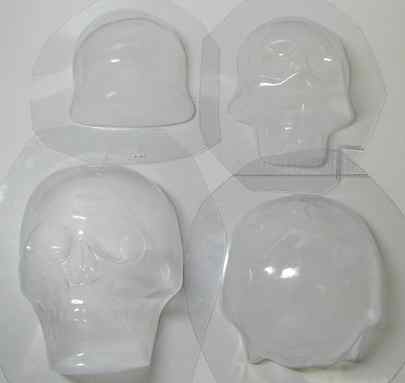
Molds are available in a variety of shapes and sizes. For this demo I made sugar skulls using the Large and Medium plastic sugar skull molds shown below. You can also get a set of Altar Sugar Skull molds and a set of Mini Sugar Skull molds among others.
The life-size skulls seen at the top of the page are made using an entirely different mold. Check out our page on how to make life-size sugar skulls for more info.
The medium and large molds I’m using for this recipe come in two parts, front and back, which you will glue together to form a complete skull. You can also make flat-backed sugar skulls by using only the front part of the mold.
Measurements
When combining ingredients to make sugar skulls there is one guiding principle: for every cup of sugar, you should add 1 teaspoon of meringue powder and 1 teaspoon of water. Large skulls require about 2 cups of sugar and medium skulls require 1 cup. Adjust your measurements according to how many skulls you’d like to make.
If you’re making a lot of skulls, you can use 1/2 cup of meringue powder and 7 tablespoons of water for every 10 pounds of sugar.
How to Make Sugar Skulls (Calavera de Azúcar)

Mix the sugar, meringue powder and water together until all the granules of sugar are wet. Pick up a handful of the mixture and squeeze in your hand. If it holds together, its ready. If it falls apart, it will need a tiny bit more water.

Fill your skull mold with the wet sugar, pressing down on the sugar, compacting it as you go. Fill both the front and back skull cavities with the sugar. Scrape off the excess sugar.

Cut a piece of parchment paper and a piece of cardboard just a bit bigger than your mold. Set the parchment paper down on top of the mold. Set the cardboard on top of the paper. Grab onto the mold and cardboard, and carefully flip the whole thing upside down. Set it on the counter, then carefully lift the mold up off the sugar skulls. The mold should pop right off. If the sugar sticks, it’s too wet. Scrape it out of the mold, clean the mold, and add some more dry sugar to the mixture and try molding it again. If your sugar skulls do not hold together, the mixtures needs more water.

Your sugar skulls now need to dry. Midway through the drying cycle you need to carefully flip them over so the back sides can dry out at well. They should be ready to decorate in 12-24 hours.
Make royal icing. Beat together powdered sugar, meringue powder, and water until its shiny and will hold stiff peaks.
Once your skulls are dried, spread a thin layer of royal icing on the flat part of the back side of each skull. Press the front and back sides together. Use your finger to wipe off the icing that oozes out from in between the two pieces. Allow the skulls to dry for at least an hour.

After your skulls are dry, they are ready to decorate. Color small bowls full of royal icing using food coloring. If you wont be using the icing right away, be sure to cover each bowl with plastic wrap.

Pipe royal icing onto the skulls. Any simple or elaborate designs. Get as creative as youd like and use lots of bright colors on each skull for a dramatic appearance.

Allow your sugar skulls to dry for several hours before using them as decorations for your Day of the Dead event.
Nutrition Information
No nutrition information available for this recipe
- Day of the Dead (Dia de los Muertos) is celebrated in Mexico on November 2nd each year. People gather to honor their deceased family and friends, and it’s tradition to handcraft brightly colored sugar skulls to place on altars and graves during the festive celebrations. Each skull is decorated using colored royal icing, although they can be decorated with beads, feathers, foils, and gems as well. This year we’re hosting a Day of the Dead party, so I wanted to make some traditional sugar skulls! It’s best to make sugar skulls on a nice sunny day or in a temperature and humidity controlled kitchen. If it’s raining or humid outside and you can feel the dampness inside, then your skulls won’t dry out well or hold together. If you do find yourself making them on such a day, you can use your oven to dry the skulls. Bring the oven to 150 degrees F then turn it off and wait five minutes. The temperature will begin to fall; you can then put the skulls into the oven with the door cracked open. After 15 minutes, shut the door and allow the skulls to dry completely in the oven. The basic ratio of ingredients to make the skulls is 1 cup of sugar to 1 teaspoon meringue powder to 1 teaspoon of water. The Mexican Sugar Skull claims that meringue powder you buy in craft stores doesn’t work as well as professional grade meringue powder because it’s not as potent. I only had the store-bought kind so I just bumped up the amount a bit and hoped for the best. I’m happy to report that my skulls dried and hardened perfectly! The amount of ingredients you will need will depend on the size of your skull molds. I used a Wilton 3-D skeleton mold and mixed up 6 cups of sugar with 7 1/2 teaspoons meringue powder and 6 teaspoons of water.
- Start by mixing the sugar, meringue powder and water together until all the granules of sugar are wet and feel like wet sand. I found it easiest to mix my ingredients in a food processor. That way the sugar crystals became super fine and will pack into the molds really well. I poured the sugar and meringue powder in and pulsed it for about 30 seconds before adding the water. I stopped pulsing the mixture when it started looking like wet sand, then scraped the bottom of the bowl then pulsed it again a few seconds. If you don’t have a food processor, you can just mix everything together. Be sure to mix it really well though, so you don’t end up with sugar crystals that aren’t saturated with water. After filling your molds your sugar skulls need to dry. Midway through the drying cycle you need to carefully flip them over so the backsides can dry out at well. Small skulls should be dried for about 8-12 hours. Medium skulls will take 12-24 hours. Really large skulls require some of the sugar be scooped out, leaving an inch wall around the outside. To do this, allow the tops of the skulls to dry for 24 hours. Then turn them upside down and use a spoon to scoop out some of the soft sugar. You can reuse this sugar to make more skulls if you want. When the skulls are fully dry and ready to be decorated you can pipe the royal icing onto them. You can use pastry bags fitted with a coupler and pastry tip, or just fitted with a tip. You can also just fill a pastry bag or zip top bag with icing and then snip off the tip of the bag. Pro tip: I had more control over my piping when I added pastry tips to my bags. Pipe royal icing onto the skulls. Any simple or elaborate designs can be added, including a spider web. Get as creative as you’d like and use lots of bright colors on each skull for a dramatic appearance. You’ll love having these beautiful, colorful sugar skulls as decorations for any Day of the Dead event!