Foreground Trees
How to draw a Winter Landscape
How do you paint a winter landscape? There are easy ways to make a real masterpiece!
Painting is a great activity for long winter evenings. It will get your baby in a calm mood and have them ready to sleep. And what should you draw when there is snow and blizzards outside the window? Picturesque winter landscapes, of course.
You will need:
- White thick paper;
- Gouache, brush, jar of water;
- Cotton swabs;
- Palette.
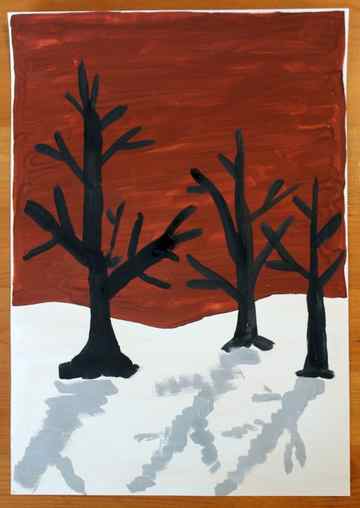
- Create a sketch – draw a horizon line with a simple pencil, outline the moon and trees.
- Paint the sky with brown / blue / purple gouache, paint snow drifts with white paint, trees with black. Leave to dry.
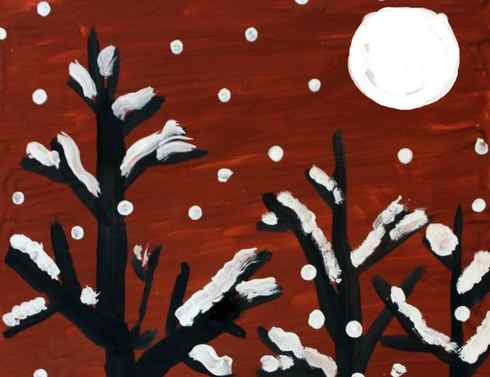
- Draw in white gouache a moon in the corner of the paper, and snow on the branches.
- Make snowflakes with a cotton swab: lower the stick with paint on the sheet strictly vertically so that the snowflakes are perfectly round.
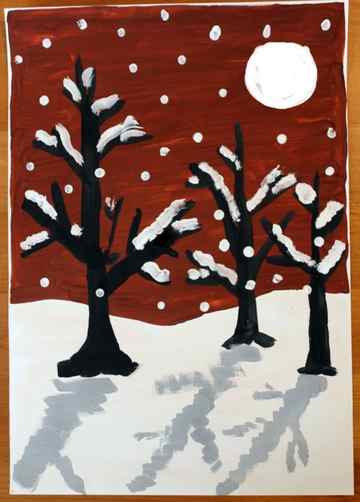
- Draw shadows coming from the trees. To do this, mix white and black gouache to make a gray color (if you do not have a palette, you can use a thick sheet of paper instead). If the moon in the picture is located in the upper right corner, then the shadows from the trees should be drawn going towards the left side.
While drawing, conduct a small educational experiment with shadows with your child. Turn off the lights in the room and turn on a small flashlight. Shine a flashlight at different objects from different angles and watch the shadows move.
Take a picture of your toddler while drawing. Write about whether they liked your hands-on experiment with shadows.
Easy Winter Landscape for Second and Third Grade
Here is a super easy lesson that incorporates many art principals. It takes one 45-minute art class to complete this project if you use small sheets of paper. I used half-sheets of colored construction paper (12″ x 9″). If you have more time, use full sheets (12″ x 18″) and the results will be even better.
You will need:
– 12″ x 9″ colored paper
– Tray of white, black, light gray and dark gray tempera paint
Snow and Background Trees

Draw a line across the top third of the paper and fill the space below it with white paint. This is the layer of “snow”.
Using the lightest gray paint, paint a winter tree: thick tree trunk and spindly branches. These trees are in the background and therefore are the lightest color. Start at the snow line and paint towards the top of the paper. Paint right off the top.
Mid-Ground Trees

Using the medium gray, paint the middle-ground trees. Begin painting in the center of the snow. Paint as many as you would like and make sure the tree branches extend off the top of the paper and over the background tree branches.

Foreground Trees
Using the black paint, paint the trees closest to you. These trees are near the bottom of the paper. Extend the branches off to the side and top of the paper. Kids at this age want to stop painting the branches before they go off the edge and will often resist painting over the other branches. Help them see that the tangle of colors and branches is a good thing! Add a snowman if you have time and if you are really in a good mood, let them splatter white paint for snow! Enjoy
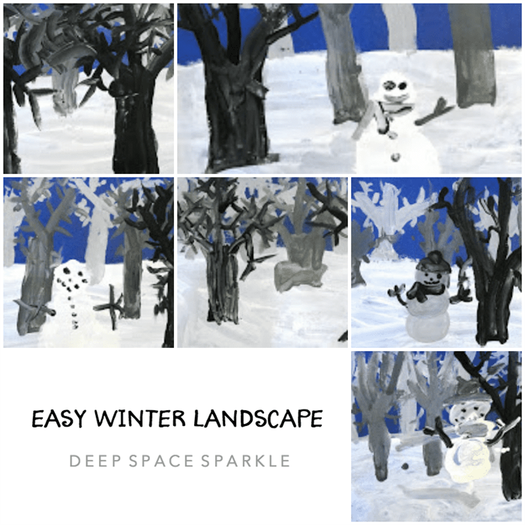
Second and Third Grade Winter Trees…
Want more lesson ideas for the holidays? Download this free lesson guide by clicking the yellow button below and I’ll send you my 5 Non-Religious Projects for the Holidays!
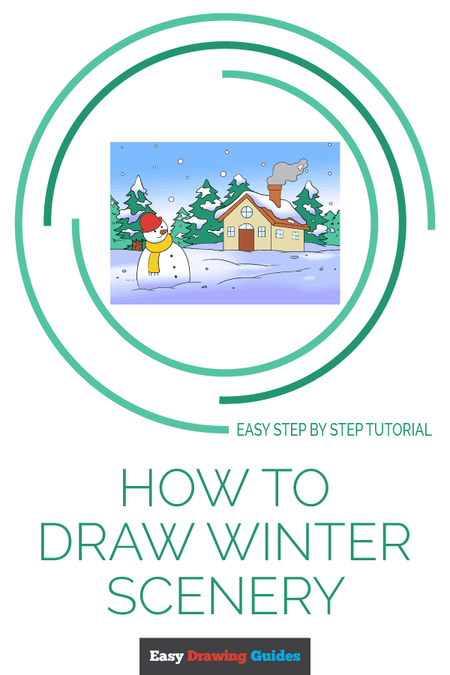
How to Draw a Winter Scenery
Learn how to draw a great looking Winter Scenery with easy, step-by-step drawing instructions, and video tutorial.
By following the simple steps, you too can easily draw a perfect Winter Scenery.
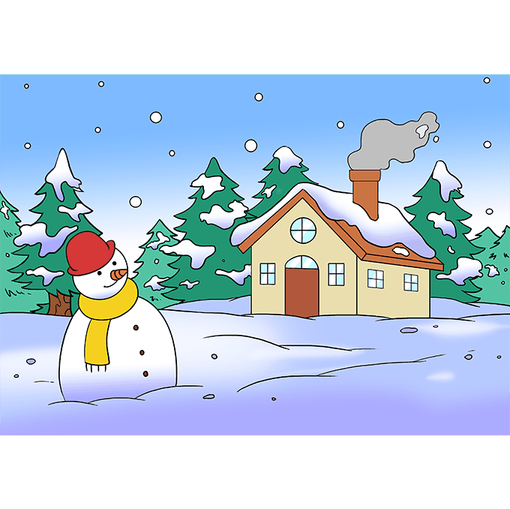
Complete Winter Scenery drawing
“Sleigh bells ring
Are you listening?
In the lane
Snow is glistening.
A beautiful sight,
We’re happy tonight
Walking in a winter wonderland.”
– “Winter Wonderland,” 1934
Scenes of peaceful winter landscape, and the glimmer of new fallen snow, are a common theme in both the visual and literary arts.
In Lois Lowry’s The Giver, just such a scene was the first memory given to young Jonas – and played a role in the book’s final chapter.
Scroll down for a downloadable PDF of this tutorial.
In the famous poem by Robert Frost, “Stopping by Woods on a Snowy Everning,” the scene is captured in these words:
“Whose woods these are I think I know. He will not see me stopping here to watch his woods fill up with snow. Between the woods and frozen lake, the darkest evening of the year.“
Would you like to draw a winter wonderland? Doing so is easier than ever with the help of this simple, step-by-step drawing tutorial.
You will need only a pencil, a sheet of paper, and a good eraser. You may also wish to use colored pencils or other tools to shade your finished drawing.
If you liked this tutorial, see also the following drawing guides: Christmas Tree, Santa Claus, and Cartoon Reindeer.
Step by Step Instructions for Drawing a Winter Landscape

How to Draw a Great Looking Winter Scenery for Kids, Beginners, and Adults – Step 1

1. Begin by sketching in the horizon line. Use short and long strokes, allowing the lines to overlap slightly. This will give the ground the uneven texture of snow drifts.
Easy Winter Scenery Drawing – Step 2

2. Draw a three dimensional house. Begin by drawing three straight, vertical lines. Then, connect the lines using straight lines, allowing the new lines to extend beyond the edges of the house. This will form the eaves of the roof. Draw a second set of straight lines parallel to the previous, and connect them using short, straight lines. Finally, use two straight lines to enclose the rectangular shape of the roof.


Easy Winter Scenery Drawing – Step 3

3. Add detail to the house. Draw two straight, parallel lines extending from the roof, and top it with a small rectangle to form the chimney. Draw a rectangle to form the door, then add an arch atop it using a curved line. Draw a short, vertical line through the arch. Then, draw a circle above the door and small squares along the walls to form windows. Draw a set of perpendicular lines across each window.
Easy Winter Scenery Drawing – Step 4

4. Draw a snowman in the foreground. Give him a firm foundation using curved, overlapping lines. This indicates the snow drift on the ground. Draw a small circle for the head; beneath it, enclose a small and large rounded shape to form the scarf and lower section of the body.
MORE DRAWING TUTORIALS:
How to Draw a Candy Cane

How to Draw the Grinch

How to Draw an Elf
Easy Winter Scenery Drawing – Step 5
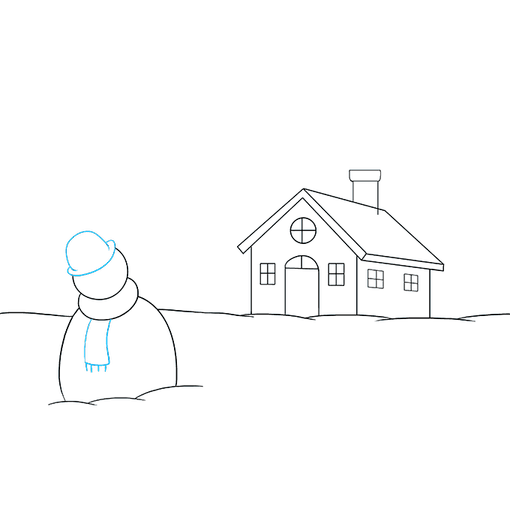
5. Every snowman needs a top hat; enclose one using two curved lines. Erase guide lines as necessary. Then, draw a rounded rectangle beneath the snowman’s middle. Extend short lines from the rectangle, giving it the fringe of a scarf.
Easy Winter Scenery Drawing – Step 6
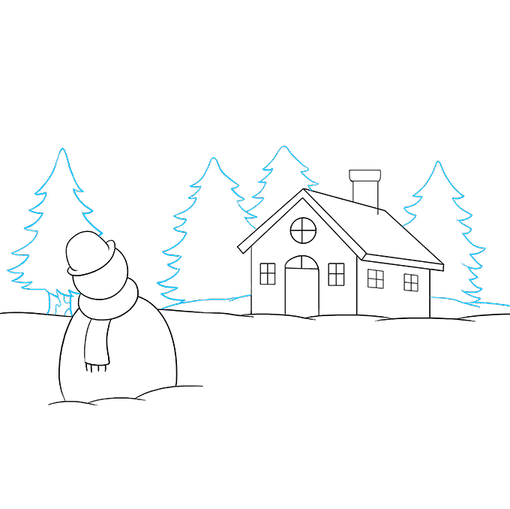
6. Draw pine trees in the background. Begin by using curved lines to form a hill. Use short, curved lines connected at dull points to form the trees. For the nearest tree, draw a trunk using two curved lines.
Easy Winter Scenery Drawing – Step 7

7. Draw snow covering the trees and house. Do so by enclosing irregular shapes, using curved lines.
MORE DRAWING TUTORIALS:
How to Draw a Snowflake
How to Draw a Penguin

How to Draw a Polar Bear Cub

Add More Details to Your Winter Scenery Picture – Step 8

8. Erase guide lines from the clinging snow.
Complete the Outline of Your Winter Scenery Drawing – Step 9
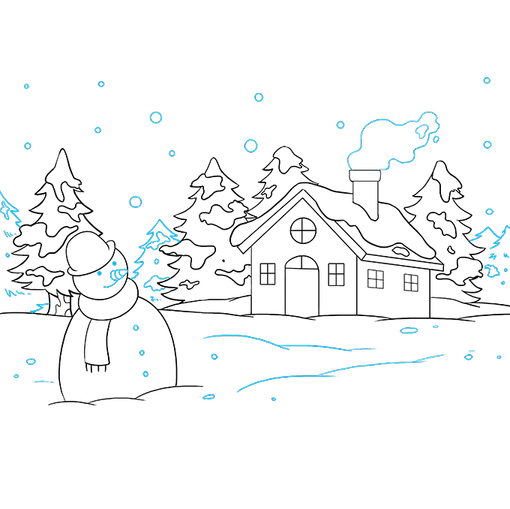
9. Draw additional trees in the background, again using short, curved lines. Enclose an irregular shape above the chimney to indicate smoke. Detail the snowman – add small circles to his body to form buttons, dots for eyes, a curved line for a mouth, and a triangle ringed with curved lines to display his carrot nose. Use curved lines to add more drifting snow, and circles of various sizes to indicate falling snowflakes.
Color Your Winter Scenery Drawing
10. Color your wintery landscape.
For more great Landscape drawing tutorials, see the 31 Easy Landscape Art Projects for Kids post.
Easy, step by step Winter Scenery drawing tutorial
Click HERE to save the tutorial to Pinterest!
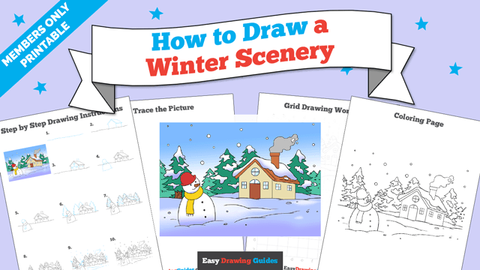
Winter Scenery Drawing Tutorial – Easy & Fun Printable Pages
Join now and get immediate access to thousands of printable drawing instruction and practice pages!

MEMBER TROUBLESHOOTING
Still seeing ads or not being able to download the PDF?
First, check that you’re logged in. You can log in on the member login page.
If you’re still not able to download the PDF, the likely solution is to reload the page.
You can do this by clicking the browser reload button.
It is a circular arrow-shaped icon at the top of the browser window, typically found in the upper-left side (you can also use keyboard shortcuts: Ctrl+R on PC and Command+R on Mac).