All of the free art lessons on EasyDrawingTutorials.com are good drawing tutorials for beginners and experienced artists alike. The online tutorials are easy to follow; they teach you the how to draw basics while showing you how to draw fun cartoon characters step by step. Each cartoon character has a video drawing tutorial option, as well as step-by-step photos and written text to follow.
How to Draw Bugs Bunny
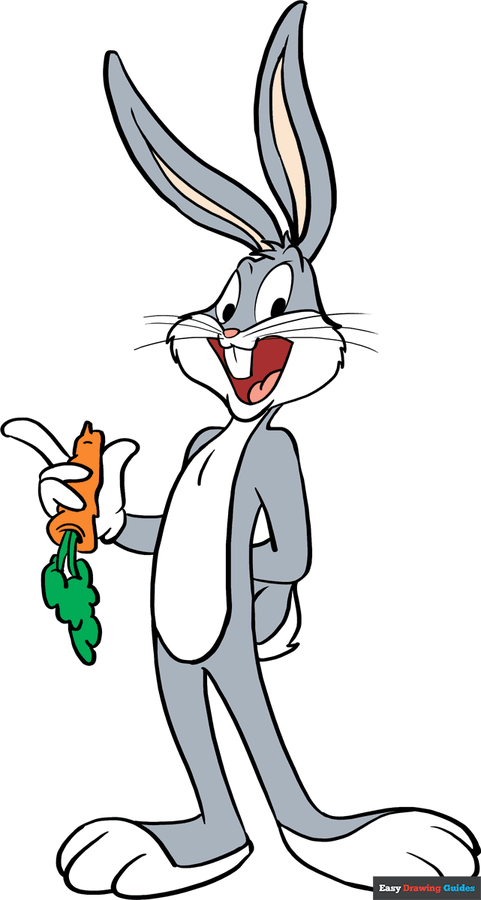
Learn how to draw a great looking Bugs Bunny with easy, step-by-step drawing instructions, and video tutorial.
By following the simple steps, you too can easily draw a perfect Bugs Bunny.

Complete Bugs Bunny drawing
“What’s up, Doc?”
– Bugs Bunny
Bugs Bunny may be one of the most recognizable cartoon characters of all time, second only to Disney’s Mickey Mouse. The character was named after his animator and creator, Ben “Bugs” Hardaway. He first made it to the screen in 1938.
Bugs is often seen alongside other Looney Tunes characters such as Daffy Duck, Porky Pig, the Tasmanian Devil, Elmer Fudd, and Yosemite Sam.
He often wreaks havoc on the plans of his fellow characters, earning him the nickname of “rascally rabbit,” or, as Elmer Fudd says, “that ‘wascally wabbit.'”
Scroll down for a downloadable PDF of this tutorial.
Nearly a century after his creation, Bugs Bunny is still on the big screen. Space Jam 2, the “long-awaited sequel” to the 1996 augmented reality film that paired Bugs Bunny with basketball star Michael Jordan, was released in 2021. This time, Bugs and the rest of the crew will appear alongside LeBron James.
Would you like to draw the comical Bugs Bunny? This easy, step-by-step cartoon character drawing guide is here to help.
All you will need is a pencil, pen, or marker and a sheet of paper. You may also wish to use crayons or colored pencils in shades of grey, orange, and green to color Bugs and his tasty carrot.
If you liked this tutorial, see also the following drawing guides: Mickey Mouse, Stitch from Lilo and Stitch, and Minnie Mouse.
Step-by-Step Instructions for Drawing Bugs Bunny
How to Draw a Great Looking Bugs Bunny for Kids, Beginners, and Adults – Step 1
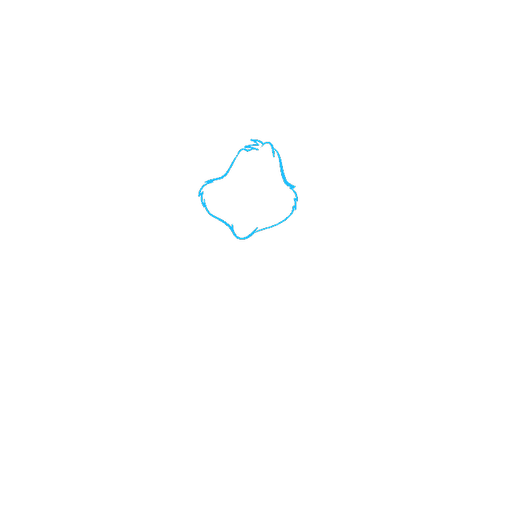
1. Begin by sketching Bugs Bunny’s head. His head is a curved diamond shape, the rounded “corners” indicating his forehead, cheeks, and chin. Use a series of short, connected lines to sketch the face, giving it a furry appearance.
Easy Bugs Bunny Drawing – Step 2

2. Extend a long, curved line from below the head and double it back upon itself. This is Bugs’ belly. Contour the chest using a short line.


Easy Bugs Bunny Drawing – Step 3
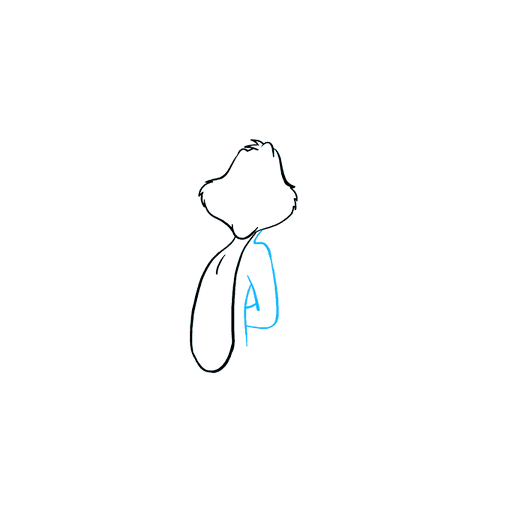
3. Use curved lines to sketch the neck, arm, and side of the torso.
Easy Bugs Bunny Drawing – Step 4
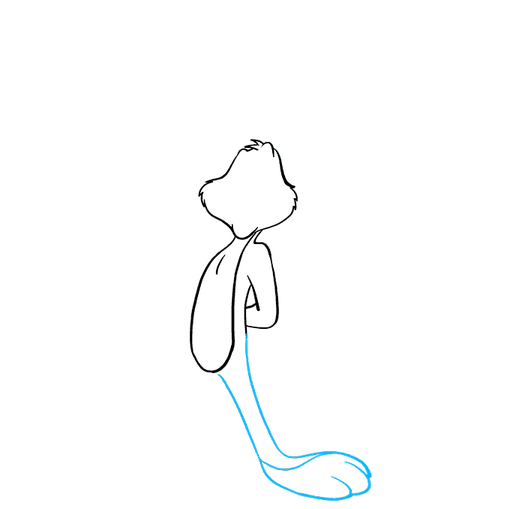
4. Draw the foot by extending a long, curved line from the torso and doubling it back upon itself. Note the overlapping curved lines that indicate the toes. Draw a curved line across the top of the foot, distinguishing it from the rest of the leg.
MORE DRAWING TUTORIALS:
How to Draw Princess Zelda

How to Draw Shrek
How to Draw Optimus Prime from Transformers
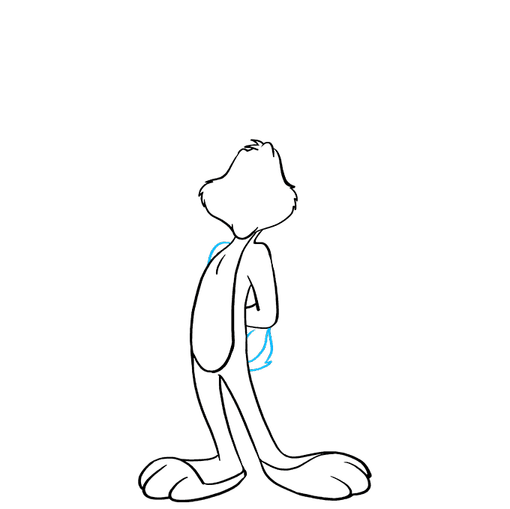
Easy Bugs Bunny Drawing – Step 5

5. Extend another long, curved line from the belly, and double it back upon itself to meet the top of the leg. This forms the remaining leg. Note again the overlapping lines that indicate the toes, and the curved line across the top of the foot.
Easy Bugs Bunny Drawing – Step 6
6. Use curved lines to draw Bugs’ far shoulder and his fluffy tail. Draw a line down the side of the tail, indicating its grey top and white bottom.
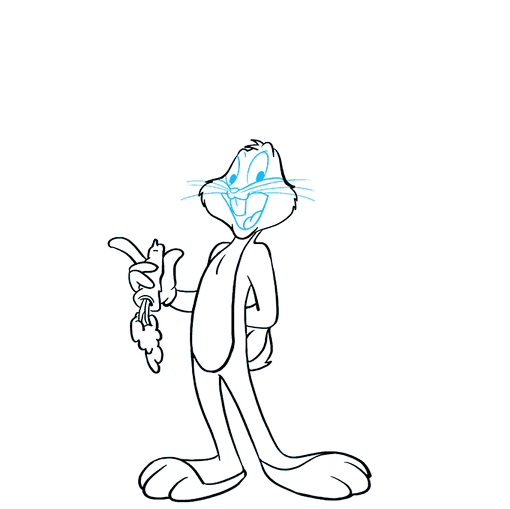
Easy Bugs Bunny Drawing – Step 7
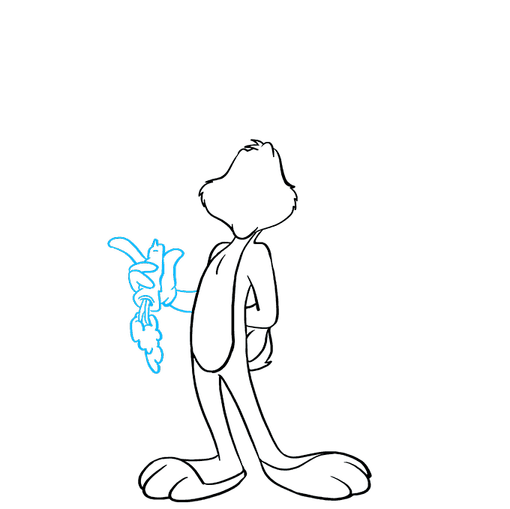
7. Extend a pair of curved lines from the body to form the arm. Then, use additional curved and “U” shaped lines to draw the hand and the carrot it is holding. Notice the small, connected “U” shaped lines that enclose the greenery dangling from the top of the carrot.
MORE DRAWING TUTORIALS:
How to Draw Snow White
How to Draw Steven Universe
How to Draw Freddy Fazbear from Five Nights at Freddy’s
Add More Details to Your Bugs Bunny Picture – Step 8
8. Detail Bugs Bunny’s face. Enclose large ovals to form the eyes, with a small shaded circle inside each to indicate the pupil. Use curved lines to outline the nose, open mouth, buck teeth, and tongue. Finally, draw a number of curved lines extending from each side of the nose to indicate the whiskers.
Complete the Outline of Your Bugs Bunny Drawing – Step 9
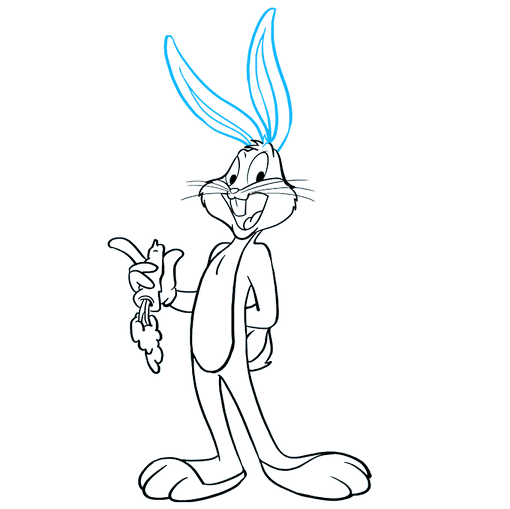
9. Draw Bugs Bunny’s long ears. For each ear, extend two curved lines upward from the head and allow them to meet at a gentle point. Draw the inner ear by extending two more curved lines from the head, parallel to the outside lines. Allow these to meet at a sharp point.
Color Your Bugs Bunny Drawing
Color Bugs Bunny. He is typically grey in color with a white muzzle, belly, underside of the tail, hands, and feet.
Easy, step by step Bugs Bunny drawing tutorial
Click HERE to save the tutorial to Pinterest!
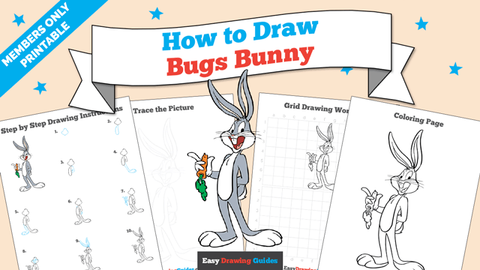
Bugs Bunny Drawing Tutorial – Easy & Fun Printable Pages
Join now and get immediate access to thousands of printable drawing instruction and practice pages!

MEMBER TROUBLESHOOTING
Still seeing ads or not being able to download the PDF?
First, check that you’re logged in. You can log in on the member login page.
If you’re still not able to download the PDF, the likely solution is to reload the page.
You can do this by clicking the browser reload button.
It is a circular arrow-shaped icon at the top of the browser window, typically found in the upper-left side (you can also use keyboard shortcuts: Ctrl+R on PC and Command+R on Mac).
Simple method to draw bugs bunny
Use the step-by-step drawing instructions below to learn how to draw Bugs Bunny. Stay tooned for more tutorials!
- Liking us on Facebook>>
- Subscribing on YouTube.com>>
- Visit How2DrawAnimals.com for free animal drawing tutorials>>
All of the free art lessons on EasyDrawingTutorials.com are good drawing tutorials for beginners and experienced artists alike. The online tutorials are easy to follow; they teach you the how to draw basics while showing you how to draw fun cartoon characters step by step. Each cartoon character has a video drawing tutorial option, as well as step-by-step photos and written text to follow.
To draw Bugs Bunny step by step, follow along with the video tutorial below and pause the video after each step to go at your own pace. You may find it easier to follow the step-by-step drawings below. The new lines in each step are shown in red, and each step is explained in the text below the photo, so you’ll know exactly what to draw in each step. You may want to open the video in a new tab and use both drawing methods! Take your time and draw at your own pace.
Below you can watch a NEW step-by-step tutorial with NARRATED steps:
The following is an older video tutorial:
Intro: Start off with a pencil sketch. In the beginning stages, don’t press down too hard. Use light, smooth strokes for sketching so that it’s easy to erase if you make a mistake.
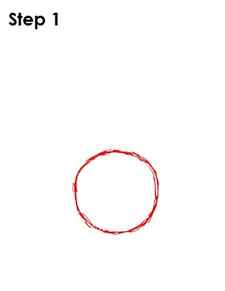
Step 1: To draw Bugs Bunny, start with a circle on the page. This will be Bugs Bunny’s head. Draw the circle on the bottom half of the paper and don’t make it too big because you need room for Bugs Bunny’s long ears.
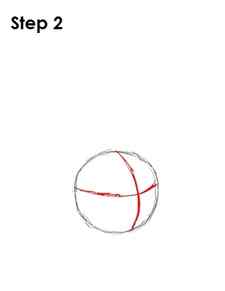
Step 2: Next draw two intersecting lines across the circle, a vertical one and a horizontal one. When drawing the lines, bend them so that they follow the contour shape of a sphere. These will be construction lines that will help you place Bugs Bunny’s features later on.
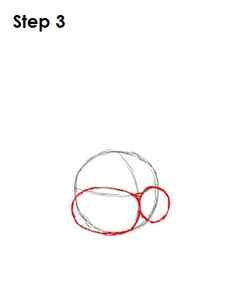
Step 3: Where the line intersect draw an upside down triangle. This will be Bugs Bunny’s nose. Don’t make the triangle too big because Bugs Bunny has a small nose. Starting at the upper left corner of a triangle, draw a large oval. Its left side should extend past the outside circle. Draw a smaller circle starting on the opposite side of Bugs Bunny’s nose, and this circle should extend to the outside of the original circle. These will be this Looney Tunes character’s cheeks.

Step 4: Starting from the top of the left cheek and slightly inside the original circle, draw an upside-down U that curves around the top of the original circle and ends at the top of the right cheek circle. This will be Bugs Bunny’s head.
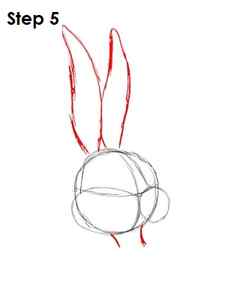
Step 5: On the top of the upside-down U (his head), roughly draw two feather shapes that are the length of about one and a half times the size of the original circle. These will be Bugs Bunny’s ears. Draw two small lines at the bottom of the main circle to create this cartoon character’s neck.
Front-View Bugs
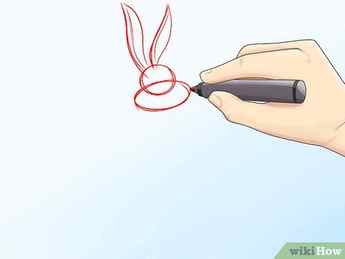
Sketch a circle and an oval for Bugs Bunny’s head. Draw two long and pointy ovals above the head for the ears, and another if you want him to appear sad.
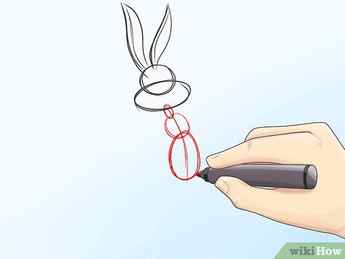
Draw the line of action. Draw a small oval for the neck and an overlapping circle and oval for the body. These shapes are technically round, but Bugs Bunny is fairly wiry, so make them vertical and oblong as depicted here.
Advertisement
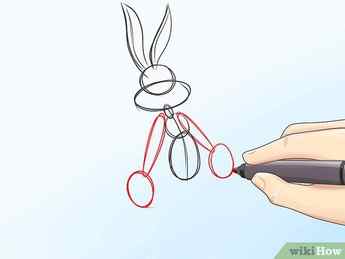
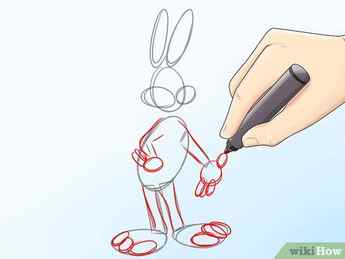
For each arm, draw two long, thin ovals. Add a circle for each of his hands.
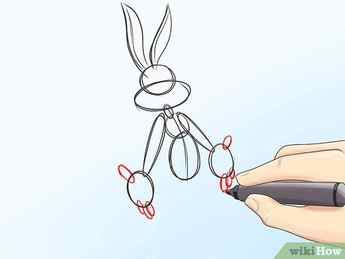
Connect ovals to each circle for the fingers. They should be a bit thicker than you’d expect, because Bugs wears gloves that cover up his fingers (you’ll add on that part later).
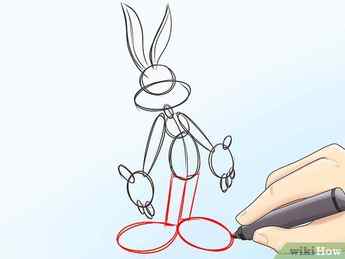
For the legs, draw a rectangle for each leg. Draw an oblong oval for the feet.
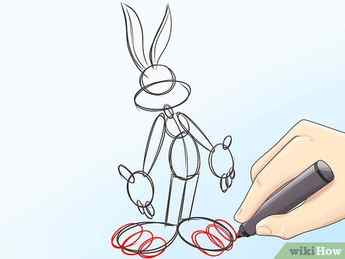
Draw three ovals on each foot for the toes. (This step can be difficult to get right, but they don’t have to be perfect, and you can always go back and try to fix them.)
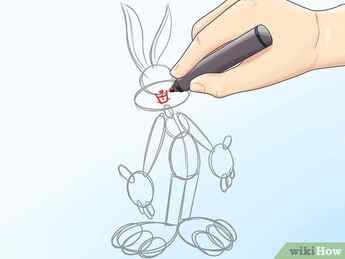
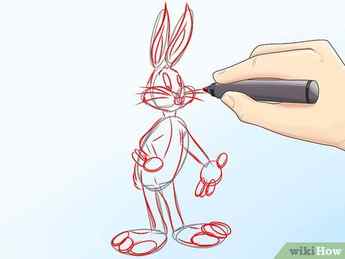
Re-focus on the face. Draw an upside-down triangle in the middle of the oval for the nose, and a curvy “w” for the mouth with a small line at each corner, so it looks like a smirk. Under that, draw a square with a half line in the middle for the teeth.
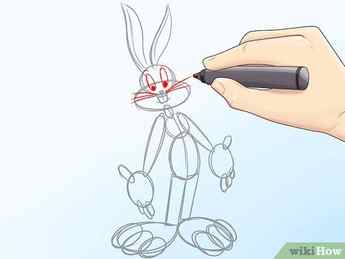
Add in some whiskers and two ovals for the eyes. Draw small circles for the pupils, and fill them in.
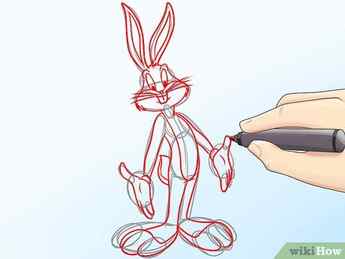
Put in some more details, like color separations and gloves. The gloves should have indentations on them and end roundly around his wrists.

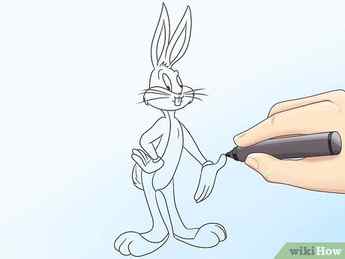
Erase the guidelines. Then outline your drawing more darkly with a pen or a marker .
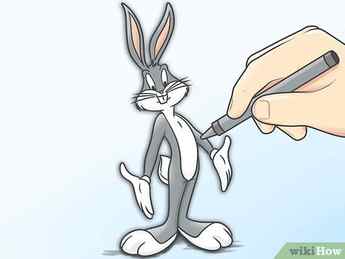
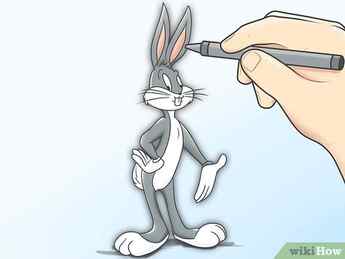
Color Bugs in and you’re finished! The traditional Bugs Bunny is mostly gray and white, but you can use whatever colors you’d like for your drawing.
Advertisement
Method 2
Method 2 of 2:
Side-View Bugs
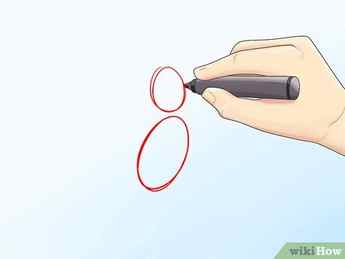
start of with a pencil. Draw two simple ovals, as shown.
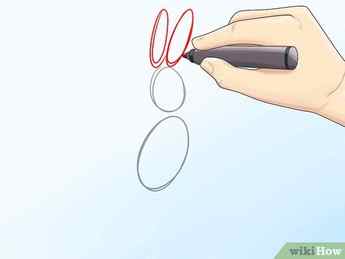
Add two more ovals for the ears.
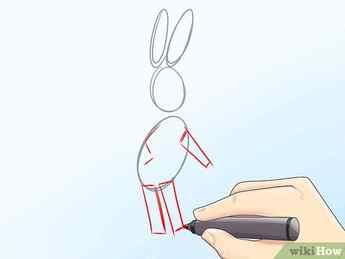
Now, add rectangles, for legs and one for the arm.
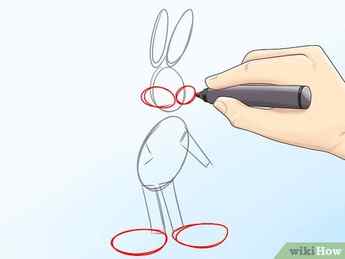
Again, more ovals, for the feet and cheeks.
Draw more lines, add more details…for fingers and legs.
Now, draw his eyes, fingers and other parts.

Erase everything which is not needed anymore and shape the drawing.
Outline the drawing, with pencil or felt pen.
Color the drawing using crayons markers and colored pencils .using only gray color, and little bit of pink for is tiny muzzle
Advertisement
Community Q&A
Search
Question
How do you do a left-side view?
DracoBug
Community Answer
Keep trying. Always remember to look at reference images and maybe copy them at first to get a hang of what you’re trying to draw. Then you can go on your own and keep improving.
Thanks! We’re glad this was helpful.
Thank you for your feedback.
As a small thank you, we’d like to offer you a $30 gift card (valid at GoNift.com). Use it to try out great new products and services nationwide without paying full price—wine, food delivery, clothing and more. Enjoy! Claim Your Gift If wikiHow has helped you, please consider a small contribution to support us in helping more readers like you. We’re committed to providing the world with free how-to resources, and even $1 helps us in our mission. Support wikiHow
Question
I find it very difficult to border a picture out, I become scared and the lines become wobbly. Is there any easy way to make it straight?
Community Answer
One easy answer: a ruler. I don’t really know why you are scared while drawing, but I hope you get over your trauma. Use the ruler and level it out on both sides, draw a line straight across.
Thanks! We’re glad this was helpful.
Thank you for your feedback.
As a small thank you, we’d like to offer you a $30 gift card (valid at GoNift.com). Use it to try out great new products and services nationwide without paying full price—wine, food delivery, clothing and more. Enjoy! Claim Your Gift If wikiHow has helped you, please consider a small contribution to support us in helping more readers like you. We’re committed to providing the world with free how-to resources, and even $1 helps us in our mission. Support wikiHow