Challenge yourself to do a series of sea turtle drawings and see what you can come up with. Not only will it improve your drawing skills, but it will also improve your creativity.
Learn How to Draw a Sea Turtle Step by Step

Sea turtles are more than just critters with cute faces. These amazing animals share ancestry with dinosaurs and travel thousands of miles to nest and forage. Not only that, but they can live for a hundred years in the wild.
Want to learn how to artistically draw this incredible reptile? This tutorial will teach you how to render a sea turtle in pencil, before completing it in ink. All you will need to get started is a reference photo of a sea turtle, some paper, and drawing supplies. Ready to give it a go? Then, let’s draw a sea turtle!
Learn How to Draw a Sea Turtle Step by Step

Photo & Art: Margherita Cole | My Modern Met
First, draw a sideways oval to create the head of the turtle.
Step 2: Add the neck

Photo & Art: Margherita Cole | My Modern Met
Next, make the neck by attaching two lines to the right side of the oval.
Sea Turtle Sketch Exercise
I’ve always understood the benefits of doing quick sketches as a warm up exercise. But I’ve recently been doing them before working on all my drawings and it’s been a game changer for me.

Doing some quick sketches is a great way to familiarize yourself with whatever it is you’re going to be drawing.
So by doing some quick sea turtle sketches you’ll better understand the shapes and proportions that make up the overall body of the turtle. And you’ll be able to see all the details better.
To do the exercise, just set a timer for three or five minutes and do as many sea turtle sketches as you can before the timer goes off.

Or, you can just sketch until your paper is filled. Just make sure you do them quickly and don’t spend too much time on the exercise.

You want to keep your lines loose and free flowing. Don’t worry about the really small details. Just capture the essence of your sea turtles.
And use some reference photos when doing your sketches. It will make things so much easier.
How to Draw a Sea Turtle Easy Step by Step
Learning how to draw a sea turtle, or anything else, is easiest if you start with some basic shapes. This not only helps to simplify the drawing process, but it also helps you take that first step.
And it helps get the layout, size, and proportions correct. It’s much easier to change things early on than towards the end.

Start by drawing an oval for the shell and the head. You can draw the head slightly away from the body and then connect it with a couple of lines to make the neck.
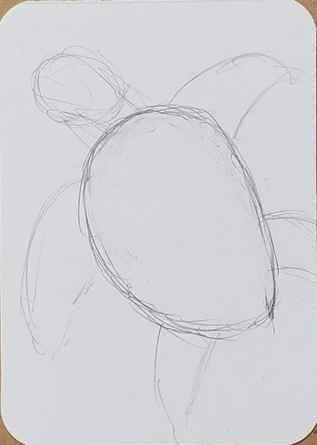
Then draw the front and rear fins, or legs. Not sure how you would refer to them.
Using a reference photo would be helpful to see the shapes and details.
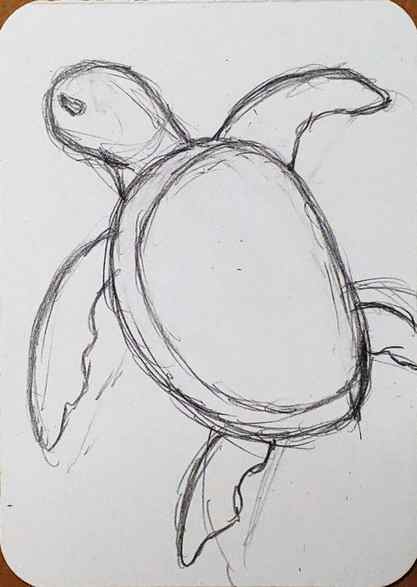
Now we’re going to start drawing in some details for our sea turtle drawing. Begin by adding the outside edge of the shell.


Refine the shape of the head and neck. Also, draw an eye for your sea turtle.

Next, work on the shape for the fins. Use your reference photo to see how to draw in the details.
Now you can start drawing the pattern in the shell. Start with the ones going down the center of the shell.

And then fill in the rest of the shell by adding the patterns along the sides. This will create texture in your drawing.

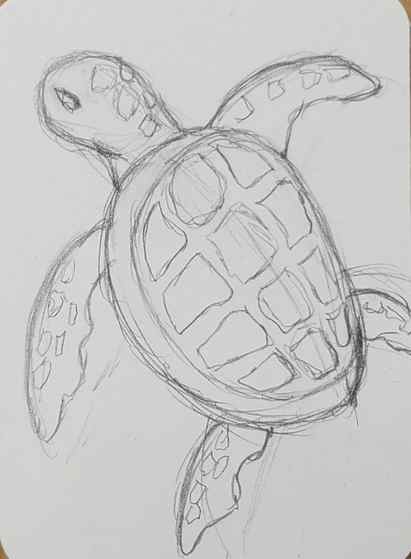
You can learn more in our tutorial How to Use Texture in Art.
Sea Turtle Outline
After you’ve finished your sea turtle drawing, you can use a black pen to go over your lines. Making a sea turtle outline will help to create a clean drawing and get it ready for color.
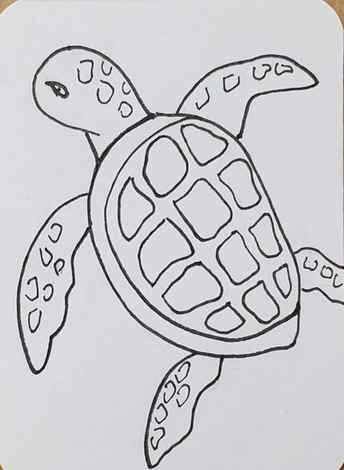
You can use thin lines, thick lines, or a combination of the two. You could also use a color other than black. Do whatever fits your artistic style. If you don’t know what that is yet, don’t worry. Your own style will develop over time with more practice.
There are many different ways you can do your outlines. Have fun, be creative, and try new things.

When you’re finished with your outline use an eraser to remove all of your pencil lines.


