Color the drawing. To color the butterfly, use gray, blue, and black. Add the highlights to the eyes.
How To Draw A Butterfly Drawing In 8 Easy Steps
Butterflies are fascinating creatures that have captivated humans throughout history. They are known for their enchanting nature and intricate wing patterns. Butterflies are part of the order Lepidoptera, which also includes moths. The earliest known butterfly fossils date back to the mid-Eocene epoch, between 40-50 million years ago, Butterflies have transparent wings that are covered by thousands of tiny scales, which reflect light in different colors, They taste with their feet and live on an all-liquid diet, feeding on liquids such as nectar and sap, Butterflies are also known for their unique life cycle, which includes four stages: egg, larva, pupa, and adult. So what now? In this article we will draw a beautiful Butterfly drawing in 8 easy steps.
- Which Materials You’ll Need to Draw A Butterfly
- Here How You Can Draw A Butterfly Drawing In 8 Easy Steps
- Watch This Video Tutorial To Draw This Butterfly Drawing
- 2 Bonus Tips
- FAQs
Which Materials You’ll Need to Draw A Butterfly
To complete this butterfly sketch guide, you should gather the following materials:
- A pencil
- An eraser
- Either a marker or a pen
- Any suitable drawing surface, such as a sheet of paper , a notebook , or a sketchbook
- The reference images provided in this tutorial or any other butterfly pictures of your choice. You may want to search for images of butterflies from various angles, including side views, butterflies with their wings spread open, or those found in books and scientific collections.
Here How You Can Draw A Butterfly Drawing In 8 Easy Steps
Step 1: Draw Straight Line With 2 Antennae
Draw a straight line in the center of your paper. Add two antennae at the top of the line.

Step 2: Draw 4 Side Wings
Draw two wings on each side of the line. The wings should be symmetrical and have a triangular shape.
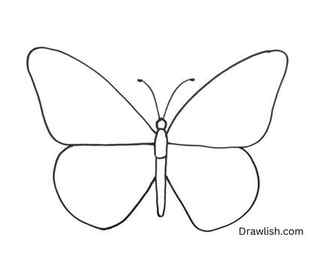
Step 3: Draw Wing Veins Or Inner Wings
Draw veins on the wings to give them a more realistic look. You can also add inner wings to the butterfly.

Step 4: Draw Full Wing Structure
Draw the full structure of the wings by adding details like spots, stripes, or patterns.
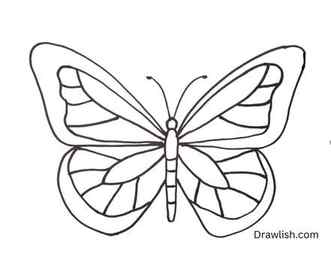
Step 5: Draw Round Particles On Wing Sides
Add small round particles on the sides of the wings to give them texture.

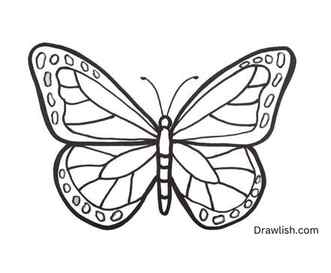
Step 6: Use Marker To Colour The Butterfly All Rounds
Use a marker to colour the butterfly. You can choose any colour you like.
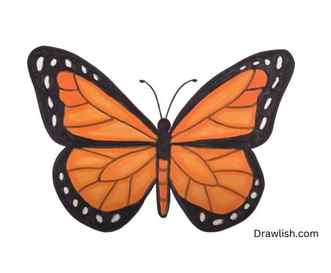
Step 7: Give Orange+Yellow Mixed Up Colours
Add orange and yellow mixed up colours to the wings to make them look more vibrant.
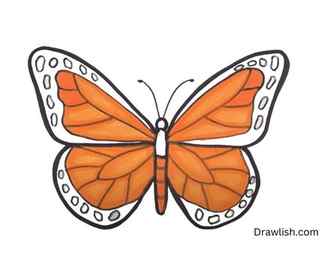
Step 8: Now Complete The Whole Butterfly With Black Colour
Finally, complete the whole butterfly with black colour. This will give it a finished look.
How to Draw a Butterfly Step by Step


I am glad to bring to your attention this wonderful and very useful drawing lesson, in which I will tell and show you how to draw a butterfly step by step.
Any novice artist or child can easily cope with the implementation of this drawing lesson. I am sure that the implementation of this instruction will give you a great mood and help improve your artistic skills.
I am sure that each of you has seen a butterfly at some point in your life. Now I will tell you some interesting information about this beautiful insect. So, a butterfly is an insect with two pairs of wings that are covered with special pollen.
The entire body of butterflies is covered with many small scales and hairs. These insects have short antennae and large eyes. Their mouth is presented in the form of a small transparent proboscis, with the help of which butterflies drink droplets of nectar from plants.
You could see many beautiful colors of butterflies. This tutorial shows a butterfly with a solid gray-blue color. But you can also show your imagination and use any colors if you want to add bright colors and patterns on the butterfly wings.
By learning how to draw a butterfly step by step with the help of this instruction, you will be able to depict it in the future as an element of your paintings. For example, you can draw a beautiful natural landscape, a clearing, flowers, or a garden, and then add a butterfly to your drawing.
- Pencil
- Paper
- Eraser
- Coloring supplies
Time needed: 30 minutes
How to Draw a Butterfly Step by Step

-
Draw the outlines of the head and body of the butterfly. Add the head as an oval shape, add the torso using a long, curved line.

Add facial features. Depict two large eyes on the sides of the butterfly’s head using an oval and a curved line.

Depict the antennae of the butterfly. At the top of the head, draw the tendrils in the form of curved lines with small circles at the ends.

Sketch out the limbs of the butterfly. To add the legs of the butterfly, draw three curved lines near the drawn head and torso.

Add the outline of one butterfly wing. On the right side of the previously drawn butterfly body, draw the large wing using a curved line.

Draw another butterfly wing. Add another wing above the one drawn by drawing a curved line from the head to the first wing.
Color the drawing. To color the butterfly, use gray, blue, and black. Add the highlights to the eyes.
I remind you that you can download the PDF file that I have prepared especially for your convenience. This file contains a short version of this lesson and has additional useful training materials. Download this file so as not to lose it and return to this lesson at any time convenient for you.


