After reading this Echo Tutorial, you will be able to use bedside Cardiac Ultrasound (Echocardiography) to:
How to Use Google Maps For RV Trips
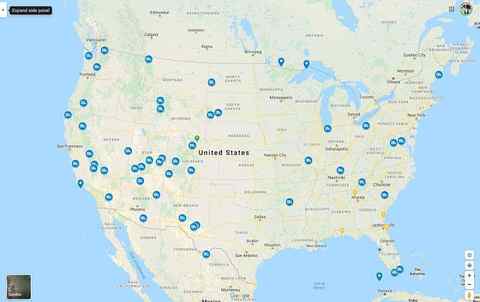
As the RV lifestyle explodes in popularity across the United States, I see many people asking the same question on social media. What program or app does everyone use to log their RV trips? I prefer Google Maps to keep track of all my trips to America’s National Park, State Parks, RV Resorts, Restaurants, and the list goes on. It’s FREE and easy to use and it’s NOT filled with ads for you to support the app developer. If you have a Google account, you can use Google Maps to create your very own interactive road map. You can even make it “public” and share it with the world like the RV There Yet National Park’s map below:
Let’s get started showing you how to create your very own RV Road Trip Google Map. This tutorial will be much easier if you use a desktop or laptop computer rather than your smartphone. It can be done, but this tutorial will use screenshots from the Google Maps desktop version.
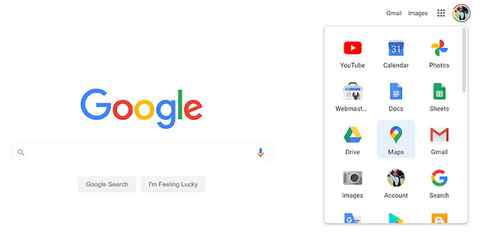
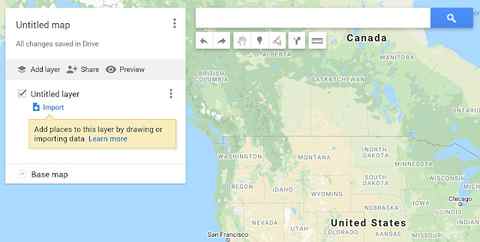
First, navigate to www.google.com and log in to your Google account. Once you are logged in, up in the right top corner, click the Google Apps icon in between Images and your Account Icon. This will open a panel containing icons. Locate the icon with the word Maps below it and click the icon to open the Google Maps website. You should now be looking at Google Maps default screen. It will look similar to the screenshot below:
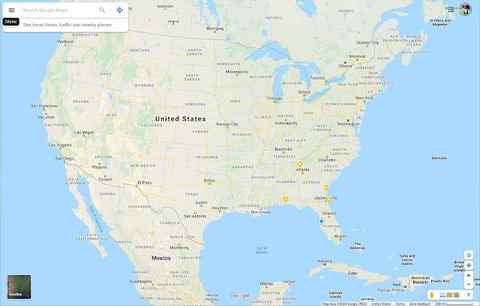 |
| Click Google Maps Menu Icon to Access Side Panel Options. |
In the upper left hand corner of the screen, you should see 3 horizontal bars. This is the Menu icon. Click it to reveal the menu options side panel. Your computer screen should look like the screenshot below:
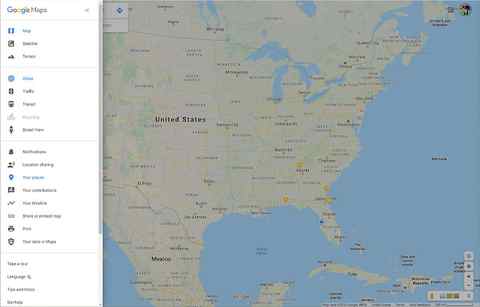 |
| Click on Your Places to create your own Google Map. |
This panel provides many options for you to play with in Google Maps, but we want to create our own RV Road Map, so click on “Your Places” halfway down the side panel. This will open another side panel like the image below:
| Click MAPS to create your own Google Map. |
This panel will have LABELED locations like “Home” and “Work” listed along with any SAVED locations and previously VISITED locations. To create our own map, you want to click on MAPS. You are now ready to create your own Google Map. Click CREATE MAP at the bottom of the side bar and the screenshot below is what you will see next.
 |
| Add Your Own Map Title and Description |
Click on the words “Untitled map” to give your map a title and a description. Make sure to click SAVE to see your changes. Next, click the words “Untitled layer” and add your last RV trip. For this tutorial, I’m using my last trip to the Grand Canyon as shown in the screenshot below.
Here comes the fun part. To add your first marker to your map, search for the places you went. I stayed at the El Tovar Hotel on the South Rim, so that is my search above. Hit ENTER and Google Maps takes you to your location as seen in the screenshot below.
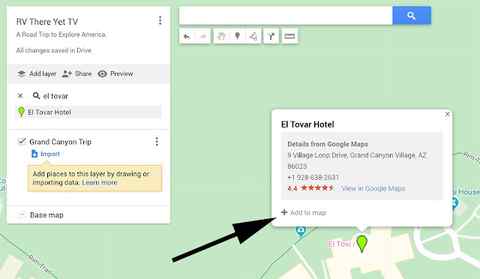 |
| Click + Add to map to add this location to your map. |
To add this hotel to your trip, click + Add to map. Notice the hotel is now listed under the Grand Canyon trip on the side bar and the marker has been added to your map as seen in the screenshot below. (marker changed from green to blue)
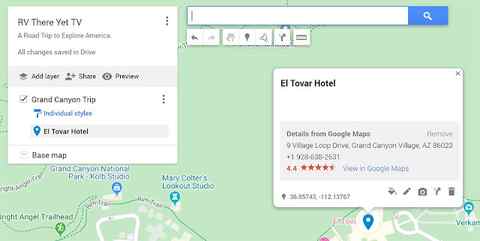 |
| Adding Markers to Your Google Map (ie: El Tovar Hotel) |
Adding markers is the easiest way to create your own Google Map. The first map in this tutorial is a marker map with 62 National Parks listed, and you may have noticed the markers are RV icons. To change your icon from the default marker, hover over the words “El Tovar Hotel” in the side bar and a paint can will pop up on the right side of the panel. Click the paint can and a panel pops up that will let you change the color of the icon and choose from hundreds of different icons as seen in the screenshot below.
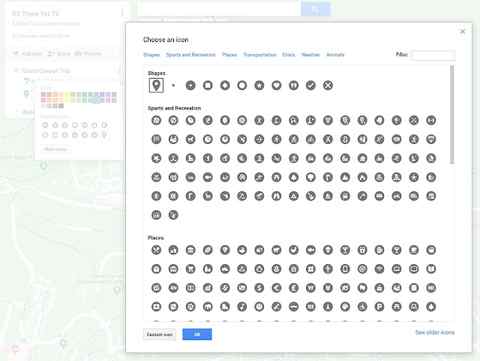 |
| Choose From Hundreds of Different Icons and Colors |
The screenshot below shows three different trips listed with activities under each trip. Notice the different color icons represent the same trip. To create a new trip, click the ADD LAYER button on the side bar. To add new destinations to a trip, make sure the layer is selected before adding locations to your map.
There is so much more to learn in Google Maps, so I urge you to go poke around and have some fun. You can use your Google Maps to SHARE with your family so everyone knows your itinerary. You can pre-plan your trip complete with directions and follow your map on your smartphone. If you still think you need another driving app, I would reconsider. Give Google Maps a chance and create your own interactive log books.
Feel free to leave your comments and/or questions and I’ll be happy to answer them to the best of my knowledge. I hope this tutorial helps you log all your travels living the right lane life.
Jacks Up! I’m out!
MORE RV THERE YET?
- Get link
- Other Apps
POPULAR POSTS
The first leg of Season 3 has officially begun and what a road trip it has already been!! It all started with picking up our new Winnebago Adventurer 35F and loading it up with all of our gear. Then, Producerman had the entire trip planned for Patrice to follow. Here’s a quick run down of the itinerary: Forest City, Iowa (Winnebago’s Grand National Rally) Niobrara State Park Oklahoma City Chadron State Park Eastern Montana (Makoshika State Park) Fort Robinson State Park Two Rivers State Park Philadelphia Two Rivers State Park Lincoln, NE Home! You can follow along with us on our journey here . It’s been fun getting to stay out on the road, live, and work in the RV this trip. We’ll be gone from home base a total of 47 days, but we’re getting a lot done. We’ve been conducting zoom calls, getting episode outlines done, crew meetings, and talking to the networks. Discovery and MotorTrend ratings are in for Season 2, and boy are we thrilled!! We’d like to thank
Cardiac Ultrasound Indications
Point of Care Bedside Cardiac Ultrasound can used in the following indications:
- Significant EKG changes
- Assessing Left ventricular Function
- Chest Pain/Palpitations
- Dizziness
- Shortness of Breath
- Hypotension
- New Heart Murmurs
- Cardiac Arrest (assess for cardiac standstill)
Cardiac Ultrasound Preparation
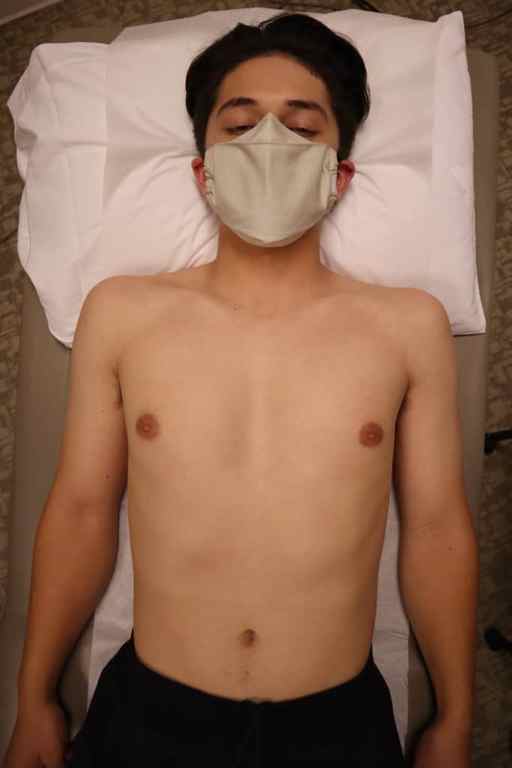
Patient Preparation
- The patient should be supine with the head of the bed flat.
- If you are unable to visualize the heart in the supine position, consider repositioning the patient into the Left lateral decubitus. This will bring the heart away from the sternum and give you better sonographic access.

Cardiac Ultrasound Machine Preparation
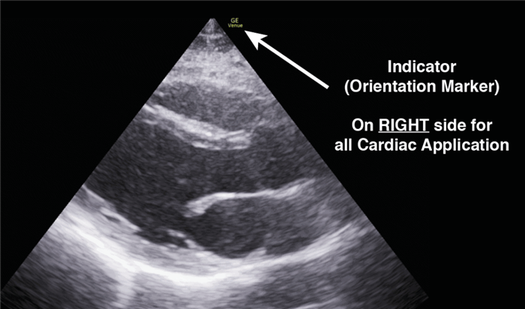
One of the most confusing parts of performing cardiac ultrasound (echocardiography) is understanding where the indicator goes on the ultrasound screen and probe orientation.
With the Cardiac Preset:
- Make sure the Ultrasound Image Indicator Marker is on the RIGHT side of the ultrasound screen.
- This is different from almost all other standard applications where the Ultrasound Image Indicator Marker is on the LEFT side of the screen.
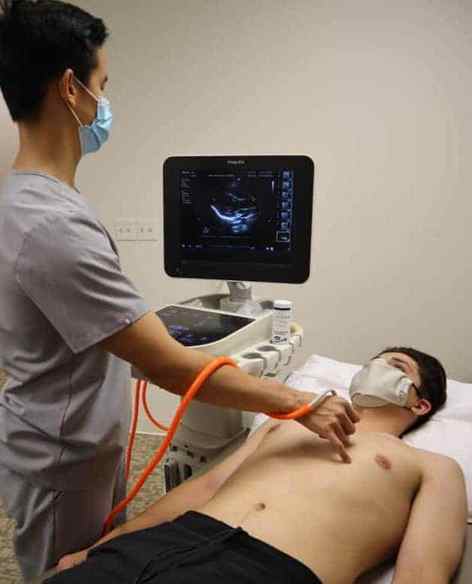
Cardiac Ultrasound Machine Placement:
- Place the ultrasound machine on the patient’s right side, so you can scan with your right hand and manipulate ultrasound buttons with your left hand.
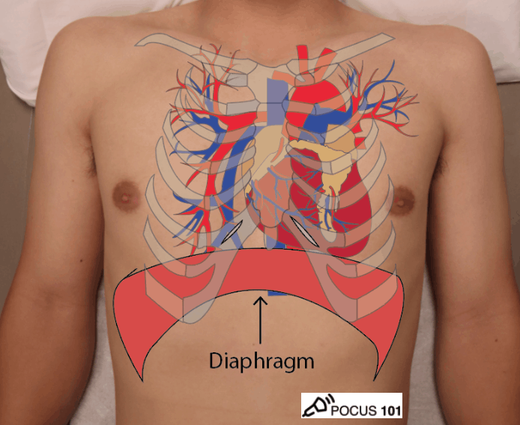
Cardiac Ultrasound Anatomy
Understanding the general anatomy of the heart is important in helping you to visualize the different ultrasound views we will be performing. In addition, it will help keep you organized throughout the cardiac ultrasound exam.
There are a total of 4 chambers in the heart: Right Atrium, Right Ventricle, Left Atrium, and Left Ventricle. These are separated by their respective valves: Tricuspid Valve, Pulmonic Valve, Mitral Valve, and Aortic Valve.
With transthoracic echocardiography (TTE) you are able to visualize all of these structures but you will need to keep in mind that the heart is located much more medially (toward the sternum) than you may think.

Like this Post?
Sign Up For POCUS 101 Updates!