When the sun sets and darkness falls over Paris, the City of Lights awakens. And so does the Eiffel Tower! It switches on its lights. It shines, it sparkles, and it can be seen from dozens of miles away. The Iron Lady puts on her most beautiful golden gown and sparks the entire world’s imagination. We’ve assembled your most frequently asked questions and answered them here. You’ll know all there is to know about Eiffel Tower after dark!
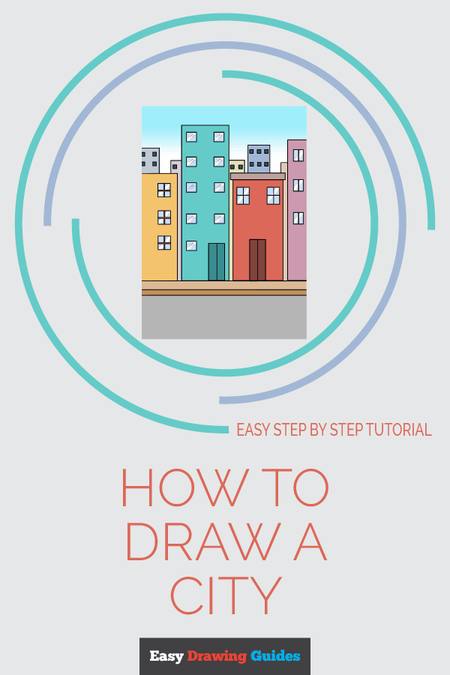
How to Draw a City
Learn how to draw a great looking City with easy, step-by-step drawing instructions, and video tutorial.
By following the simple steps, you too can easily draw a perfect City.
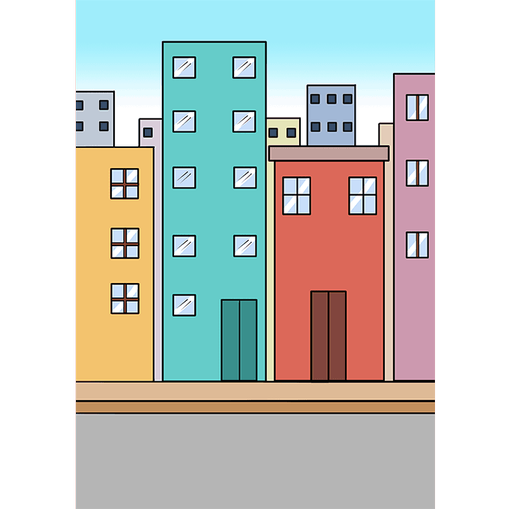
Complete City drawing
“Just listen to the music of the traffic in the city,
Linger on the sidewalk where the neon signs are pretty.”
– Petula Clark, “Downtown”
Big, bustling cities have become a part of the global culture. Some cities are iconic. Paris is known as the City of Love; Tokyo is often called the Neon City. Other famous metropolises include London, New York, San Francisco, and Sydney.
The buildings and landmarks of each city – such as the Eiffel Tower, the Golden Gate bridge, and the Statue of Liberty – are widely recognizable, giving to each a unique personal identity.
Culturally, cities have represented both good and evil in religious works, such as in the Bible. They have been the subject of written stories and in movies. One example of the city in film is that of Metropolis (1927), based on a futuristic dystopian novel.
The cityscape is a popular image in art, especially photography. City landscapes at night are especially lauded, the city lights sparkling against a bedarkened sky.
Scroll down for a downloadable PDF of this tutorial.
Many photographers use long exposures to capture “rivers” of vehicle headlights. Bokeh effects, or softening of light rings, are also used. Before the advent of photography, cityscapes were recorded in paintings.
Would you like to draw a city skyline? Doing so is easy with the help of this simple drawing guide. All you will need to draw your city is a pencil and a sheet of paper.
You may also wish to use crayons, colored pencils, paints, or markers to add color to your city.
If you liked this tutorial, see also the following drawing guides: Eiffel Tower, Cartoon Castle, and Cartoon House.
Step-by-Step Instructions for Drawing a City
How to Draw a Great Looking City for Kids, Beginners, and Adults – Step 1

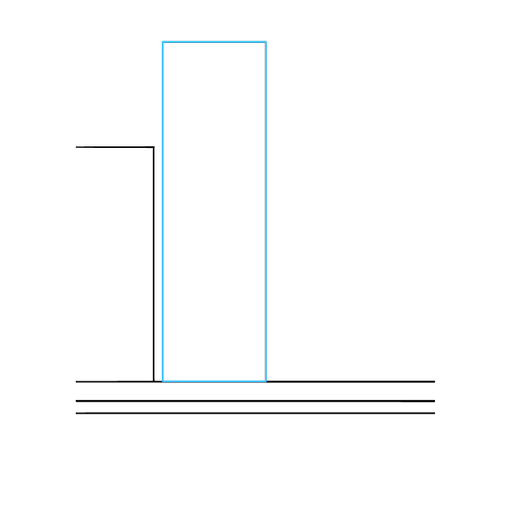
1. Begin by drawing three straight, horizontal, parallel lines. These will form the sidewalk and edge of the street.
Easy City Drawing – Step 2

2. Draw your first building. First, draw a long, straight, vertical line to form the side of the building, and a short, straight, horizontal line for the roof.


Easy City Drawing – Step 3
3. Draw your second building. To do this, use two long lines and one short line to enclose a rectangle.
Easy City Drawing – Step 4
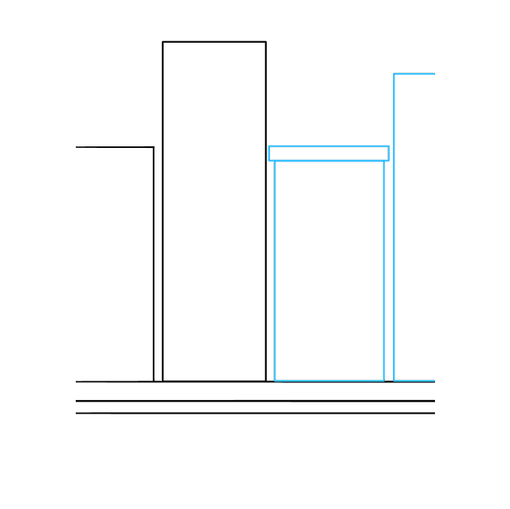
4. Draw the third and fourth buildings. For the first, shorter building, enclose another rectangle using three straight lines. You may place a special roof on this building by drawing a narrow horizontal rectangle. Use a long, straight line and a short horizontal line to outline the final building.
MORE DRAWING TUTORIALS:
How to Draw the Eiffel Tower

How to Draw a Cartoon Castle

How to Draw a Cartoon House
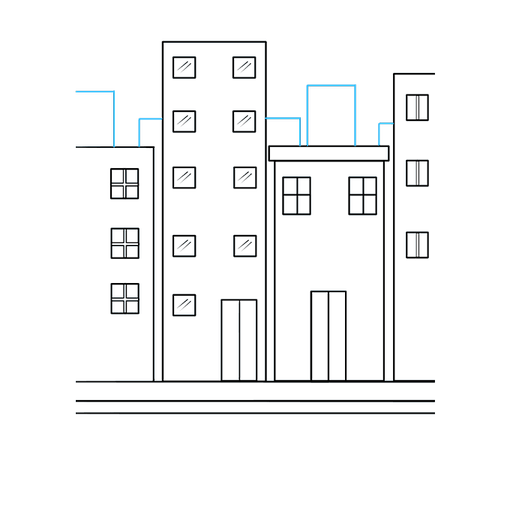
Easy City Drawing – Step 5
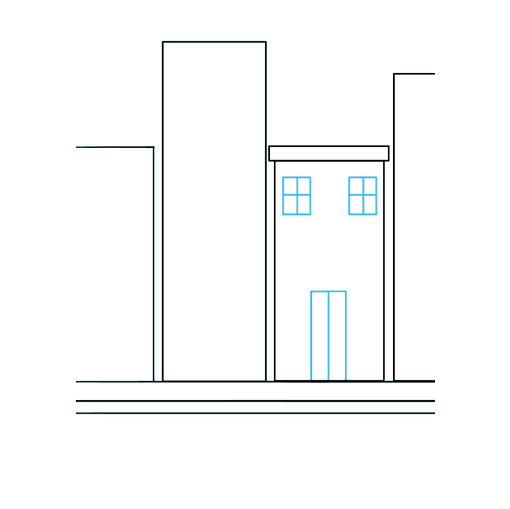
5. Add detail to one of the buildings. Draw a tall, narrow rectangle at the bottom of the building. This will form the entryway. Then, draw a vertical line down the middle of the rectangle to distinguish the two doors. Then, draw two smaller rectangles near the top of the building. Place a set of perpendicular lines in each, forming windows.
Easy City Drawing – Step 6
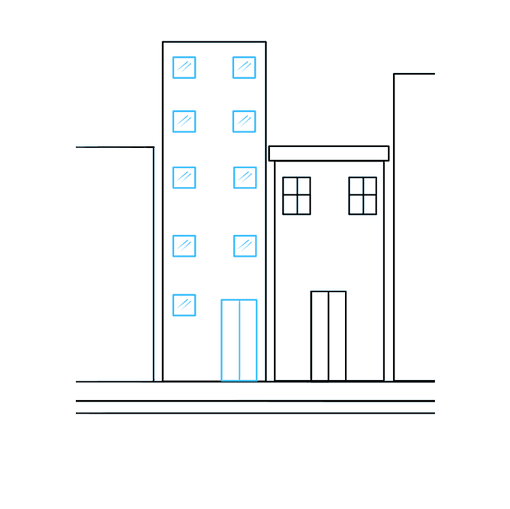
6. Draw a narrow rectangle at the bottom of the next building. Draw a vertical line through the rectangle to indicate doors. Then, draw a number of small squares for windows. Draw a couple of parallel, diagonal lines across each window to indicate the shine of the glass.
Easy City Drawing – Step 7
7. Draw squares on the walls of the remaining buildings to form windows. On one building, draw a parallel set of perpendicular lines in each window. On the other, draw a set of vertical, parallel lines.
MORE DRAWING TUTORIALS:
How to Draw the Statue of Liberty
How to Draw a Lighthouse

How to Draw a Haunted House

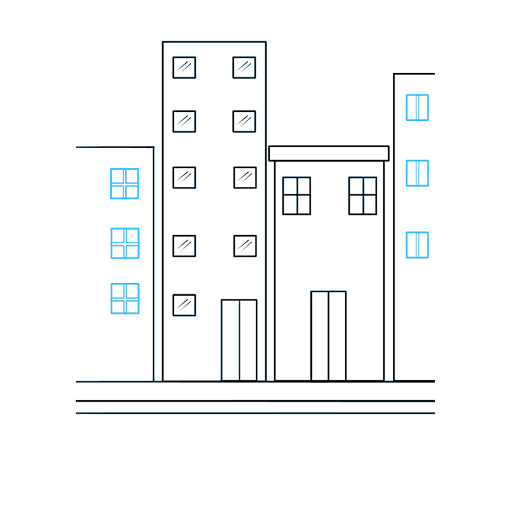
Add More Details to Your City Picture – Step 8
8. Draw additional buildings in the background by enclosing rectangles of various heights, using straight lines for each.
Complete the Outline of Your City Drawing – Step 9
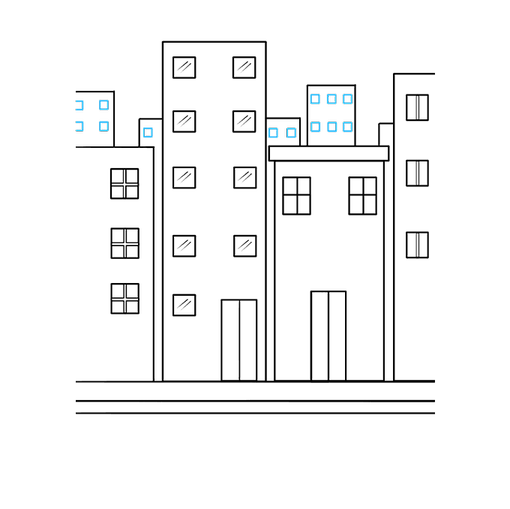
9. Draw small squares on each of the background buildings to indicate windows.
Color Your City Drawing
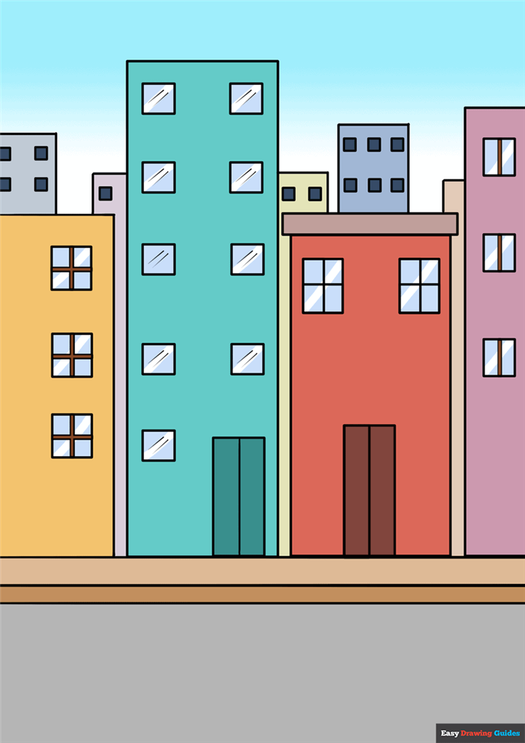
10. Color your city. Will it display shades of grey as a concrete jungle? Or will your architecture wear bright and unusual colors? The choice is yours, so be creative.
Cities are known for their traffic. Why not check out our drawing tutorials for cars or even a monster truck to populate your city streets?
For more great Building drawing tutorials, see the 21 Easy Building Drawing Tutorials post.
Easy, step by step City drawing tutorial
Click HERE to save the tutorial to Pinterest!
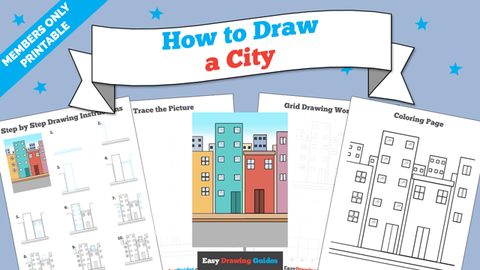
City Drawing Tutorial – Easy & Fun Printable Pages
Join now and get immediate access to thousands of printable drawing instruction and practice pages!

MEMBER TROUBLESHOOTING
Still seeing ads or not being able to download the PDF?
First, check that you’re logged in. You can log in on the member login page.
If you’re still not able to download the PDF, the likely solution is to reload the page.
You can do this by clicking the browser reload button.
It is a circular arrow-shaped icon at the top of the browser window, typically found in the upper-left side (you can also use keyboard shortcuts: Ctrl+R on PC and Command+R on Mac).
Method 1: Simple skyline
This method is the simplest way to make a city skyline visual. You can take or leave steps as you see fit, so the skyline has your desired level of detail.
Step 1:
Create a horizon line.

Step 2:
Up from the horizon line, draw what looks like an uneven row of connected rectangles; suddenly, you might find yourself understanding Death Cab for Cutie’s song line, “the skyline looked like crooked teeth.”

Step 3:
Have you stopped singing? Good. Go ahead and add a second row of irregular rectangular shapes behind the first.

Step 4:
Begin to add details, such as tiered tops on the buildings; make some rectangular, and others with diamond shapes. Don’t make any two quite the same, as buildings in a city skyline are often eclectic.
From here, you can build upon this concept, layering more rows of buildings to make the city skyline as dense as you’d like.
Method 2: Layered skyline
This skyline is in a single row, and a little bit more segmented than the previous method.
Step 1:
Create a horizon line.
Step 2:
Draw a bunch of vertical rectangles of different widths and shapes. You can align them so that some rectangles appear to be in front of others for added city-style density.

Step 3:
Refine the shapes so that some have rectangle tops, some have a second rectangle on top, some have diagonal tops, etc. Make each one a little different — like snowflakes, no two skyscrapers are exactly the same.

Step 4:
Draw in additional detailing on each building, such as little squares or dashes to resemble windows.

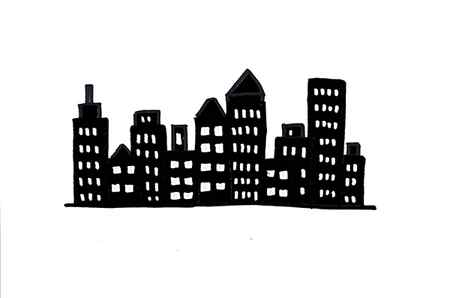
Method 3: Silhouette skyline
The city comes alive at night — this is an easy way to let your drawings reflect the kinetic energy of an urban setting in the evening. This mode of drawing a city skyline is especially well suited to mixed media, as it looks especially striking with a colorful sunset in the background.
Step 1:
Follow Steps 1 through 3 in the tutorial for Method 2, creating a row of skyscraper shapes.
Step 2:
Block outlines for the windows, but darken the rest of the building shape (with hatching, crosshatching, or stippling) with ink, so that the “windows” are left white (to represent light shining from inside) while the buildings have the appearance of being dark.
From there, you can add clouds or even employ color to add a pretty sunset.
Of course, these are just the building blocks for a city skyline. Try using these techniques while referencing a photo (or a real view) of your favorite city. Once you have the basics in place, you can add extra detail and perspective to make the drawing more realistic, if you like.
The Tower’s lights and sparkles
The Iron Lady first donned her golden raiment on 31 December 1985, and it was an instant success. The 336 yellow-orange spotlights it encompasses are integrated into the structure itself and serve two purposes: they highlight the Eiffel Tower’s elegant structure and ensure its safe night-time operation.
Previously, the Eiffel Tower was illuminated by many more external projectors. It has always been lit up after dark, by gas lighting before electricity took over.
When are the lights and sparkles turned on?
The projectors are triggered automatically by nightfall sensors. The sparkling lights are superimposed over the golden lights for 5 minutes.
The last sparkle occurs at 11pm, and the Eiffel Tower lighting is switched off completely at 11.45pm, as soon as it has been evacuated (lighting and beacons).
How much energy do all these lights consume?
In 2004, the Tower took control of its ecological footprint by reducing the electrical consumption of its spotlights by 40% while preserving the beauty of its illuminations. Three years later, the lighting was renewed to the same specifications.
Is it illegal to photograph the Tower at night?
Photographing the Eiffel Tower at night is not illegal at all. Any individual can take photos and share them on social networks.
But the situation is different for professionals. The Eiffel Tower’s lighting and sparkling lights are protected by copyright, so professional use of images of the Eiffel Tower at night require prior authorization and may be subject to a fee. Professionals should therefore contact the Eiffel Tower’s management company to learn about conditions for using the images depending on the case.

1 / 12

2 / 12

3 / 12

4 / 12

5 / 12

6 / 12

7 / 12

8 / 12

9 / 12

10 / 12

11 / 12

12 / 12
The Most Beautiful Views of the Tower at Night
Lancer
le diaporama
12 photos
The Eiffel Tower’s beacon
Why is there a beacon at the top of the Eiffel Tower?
As far back as 1889, Gustave Eiffel installed spotlights to illuminate the monuments of Paris. In 1947, the beacon became useful for air navigation by offering a wider geographical coverage and better visibility than the one on Mount Valérien, which was at a lower altitude. Today, it is mostly a symbolic and universal landmark.
What’s the range of the Tower’s beacon?
The beacon was inaugurated to ring in the year 2000. The 2 beams are composed of 4 motorized spotlights and have a range of 50 miles, which is more than twice the length of the Paris ring road!
Experience the Eiffel Tower at night
Can you go up the eiffel tower at night?
The Tower is open in the evening during specific periods (summer, week-ends, holidays). You have plenty of time to admire the City of Lights all year round! Check the current opening times.
What to do at the Eiffel Tower in the evening?
Visiting the Eiffel Tower in the evening and at night is a completely different experience to day tours – and just as much of a must-see experience! In particular, climbing the stairs while the structure is lit up from the inside offers a unique ambiance that you don’t want to miss. And the most thrilling is a meet up at the summit over a flute of champagne at the end of the day (weather permitting, of course) for a romantic and unforgettable sunset. The view over Paris at dusk, as the lights come on around the city, will remain engraved in your memories forever.
Several dining options await you, from take-away counters for a quick bite to seated dinners on the 1st and 2nd floors, while reservation are required for the restaurant on the 1st floor. Dinners in the 2nd floor gourmet restaurant, the Jules Verne, must be booked well in advance and do not include a ticket to visit the Eiffel Tower.
What’s the best way to experience the sparkling lights when you’re inside the Tower?
Inaugurated on 31 December 1999 to welcome the year 2000, the sparkling lights are superimposed over the golden lighting and consist of 20,000 bulbs that make the Tower sparkle for 5 minutes on the hour. We therefore recommend that you keep an eye on your watch and find your way to the 2nd floor, lower level, as the hour strikes for the best view of the sparkling lights covering the entire structure as it rises above you.