Here is a list of what’s to come:
DIY Pour Painted Christmas Ornaments
This post may contain Amazon or other affiliate links. As an Amazon Associate I earn from qualifying purchases. Click here to read our privacy policy.
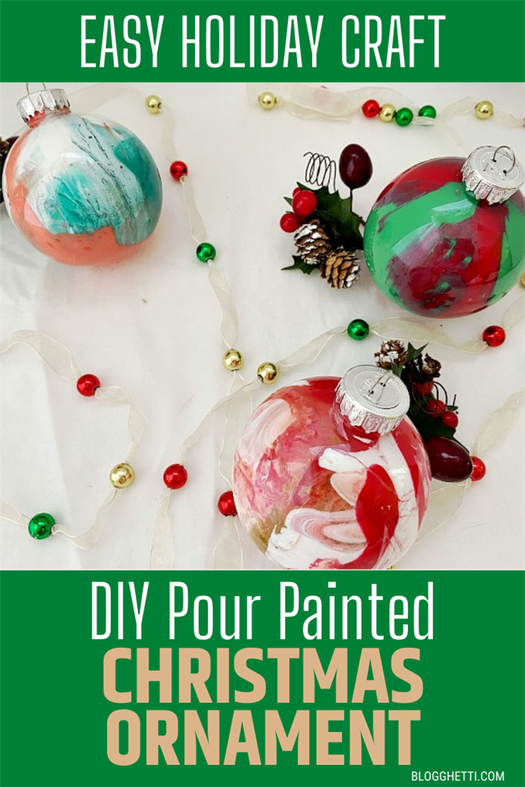
Make a one of a kind Christmas decoration with this DIY Pour Painted Christmas Ornament technique. Great for gifts to give!
Welcome back to year 6 of our Festive Christmas Event where we team up with a bunch of talented blogging friends to bring you a plethora of creative ways to celebrate your holiday season. We will be baking some cookie recipes for you, sharing some party games, making some handmade gifts, doing some ornament crafting, and sharing our Christmas movies family fun. There will be breakfast recipes and as always our decorated Christmas Trees which is always a fun tour of homes.
New this year is Gift Guides. We are right there with you shopping from home due to COVID 19 and we understand how hard that can be so we have been busy little Elves doing tons of research to create fabulous Gift Guides to help you with your holiday shopping. You will find new ideas every Monday and Wednesday between Oct. 19th through Nov. 18th. Scroll all the way down to find all the ideas linked at the end.
Here’s what I have shared so far with the event: Check out the Holiday Gift Guide of Cookbooks Written by Your Favorite Food Bloggers and this one filled with Holiday Gift Ideas for the Foodies in Your Life. If you’re needing a homemade gift to give, I’ve shared these cute Holiday Cookie Mix Gift Sack with Printable Gift Tags. I’ve got a fun and festive holiday party game to share – Bobbing for Candy Canes.
Today, it’s DIY project making your own ornaments using a pour painting technique.
A few years ago my daughter made our annual ornament to hang on the tree and I love it. Remembering this, I asked her to help me make a couple more for this post. She really enjoys the pour painting technique and has a few canvas done using it.

This pour painting concept creates a pretty marbled look with whatever paint colors you choose. No two ornaments will look the same, even if you use the same colors!
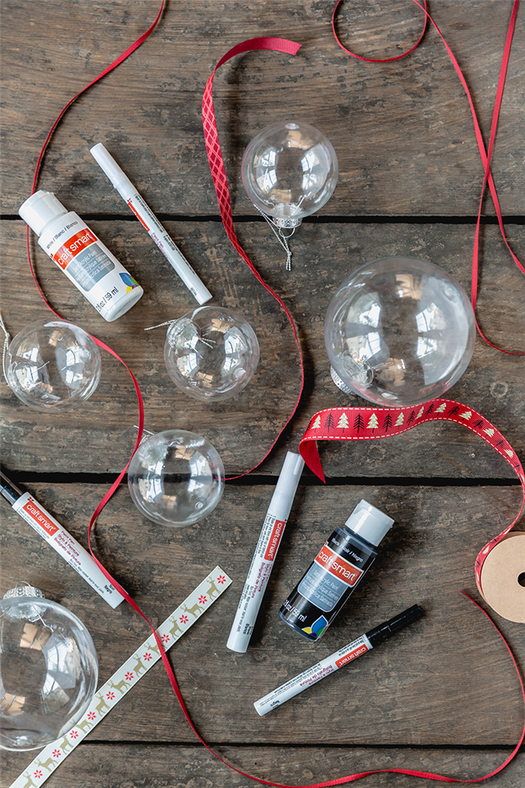
Supplies Needed for DIY Pour Painted Christmas Ornament

Acrylic Paint in your choice of colors: three colors work best with one of them being a contrasting color.
Clear plastic (or glass) ornaments: I bought ours from Hobby Lobby
Plastic cups: to catch the dripping paint
Covered work surface and paper towels
These DIY Acrylic Pour Christmas ornaments are so easy to make, can be done in any color to match whatever color scheme you want.
Click to Tweet
How to Paint Inside Plastic Christmas Ornaments
Once you have your work surface covered, we used a large piece of scrap wood that has been used many times for painting projects.
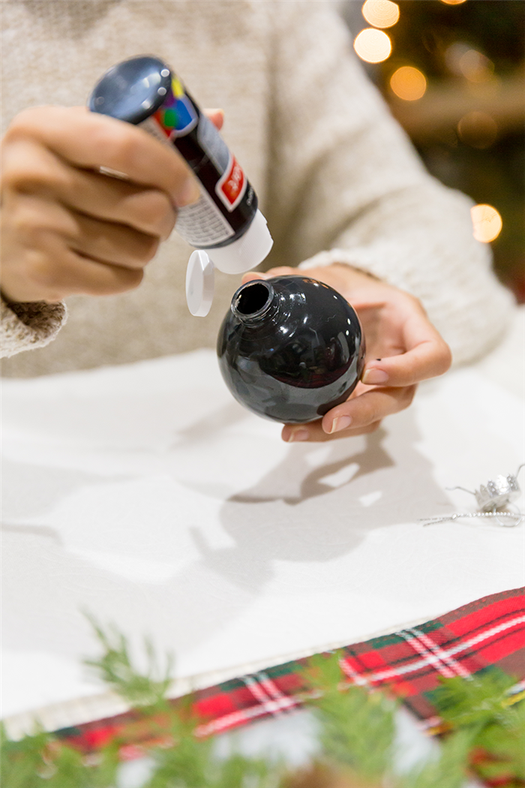
PRO TIP: Be organized: set your paints in front of you and then remove the metal tops of the ornaments.

Add the paint to the ornament by squirting some into it. Turn the ornament about a quarter of the way and add more paint (same color). Repeat this process with the same color a couple more times, while swirling and turning the ornament so the paint coats part of the inside of the plastic.
You are NOT covering the inside of the ornament with this one color.
Now, add your second color and squirt a few times, turning your ornament between squirts. If you have a third color, repeat this process with that color.

Check to see if there are any uncoated areas. If there are, rotate, gently shake, or swirl the ornament to cover them.

When you have the ornament completely covered, turn it upside down over the plastic cup and let the excess paint run out.

This part of the process takes time and patience. It may take overnight for all the excess paint to drip out. It may even take more than one day.
Pro Tip: This is an easy DIY craft; however, there’s only one issue we ran into with the paint. We let the ornaments dry upside down a bit too long and the paint all dripped out. Lessoned learned with attempt number two! We found success with rotating the ornament often so that the paint dries inside setting the design so that when we did set it upside down, only some paint was left to drip.
When your ornaments are dry, put the tops back on them, and if you want, add a pretty ribbon to the top.

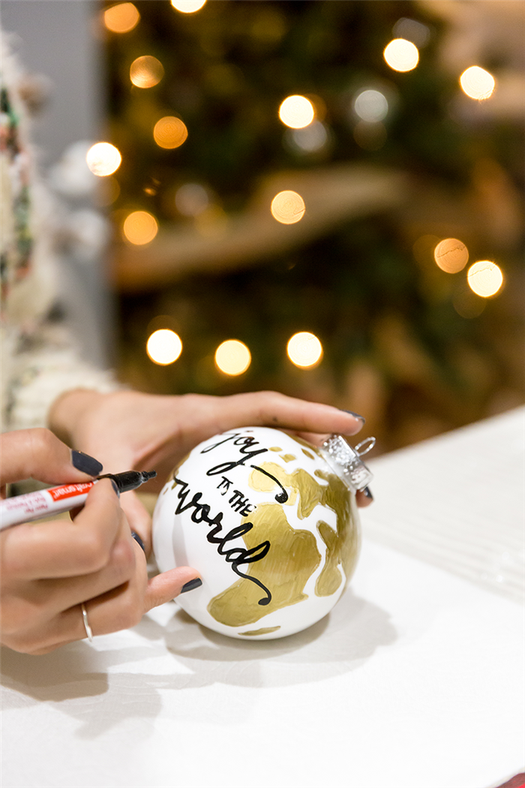
Your pretty DIY Pour Painted Christmas Ornament is now ready to hang on your tree or to give as gifts. Use a paint pen to personalize the outside of the ornament with a name or the year.

We cannot ship to the selected state
Unfortunately, we cannot ship to this state due to state regulations. However, you can continue to browse the website without the ability to purchase products.
Back Browse
Share This
Categories
By Murphy-Goode Winery
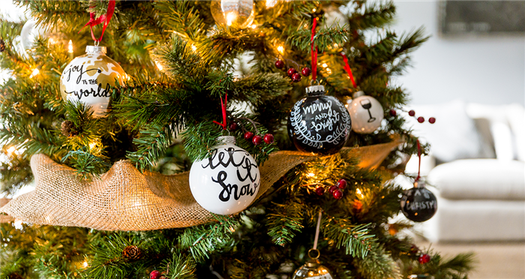
Create a fun, personalized Christmas tree this holiday season with these DIY hand painted ornaments.
For many of us, the holiday season can often be a stressful time. From shopping for the perfect gift, planning a holiday meal, attending parties and decorating the house, it can quickly make us forget what the season is really about. That’s why we like to take time out of our busy lives to do some creative projects that bring a personalized feeling back into the holidays & let us unwind with some fun for an afternoon.

I invited a few girls over & encouraged them to let their creative juices flow. Most people are going to tell you that “this is going to turn out terrible” or “I’m really bad at drawing,” but once you throw on the holiday music and open a bottle of wine you’ll find that they end up loving the opportunity to get a little crafty. Take a look at some of the gorgeous hand painted ornaments they created! I find that it’s a great way to get us all away from technology & actually enjoying one another’s company. We found ourselves laughing over years past holiday stories and catching up on all the upcoming holiday plans. It really was a great way to spend time with friends.
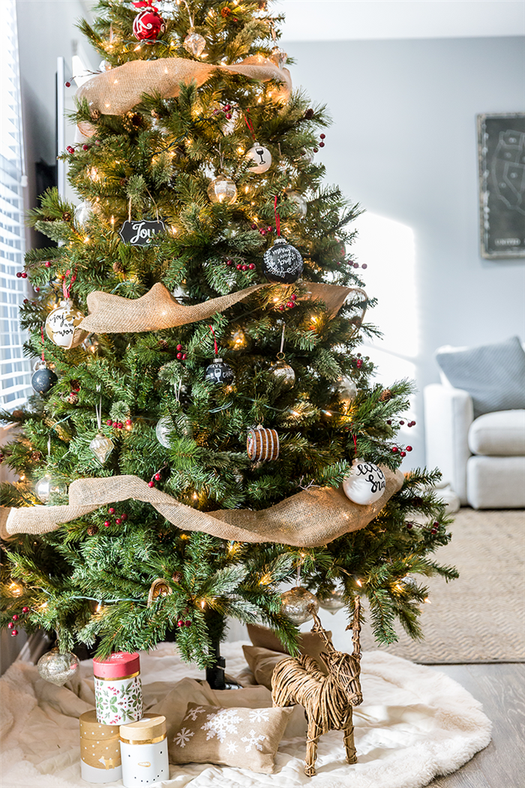
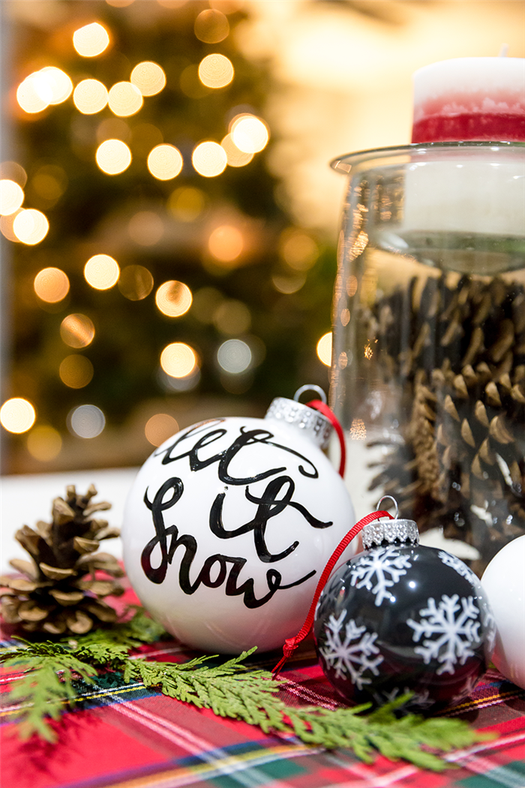
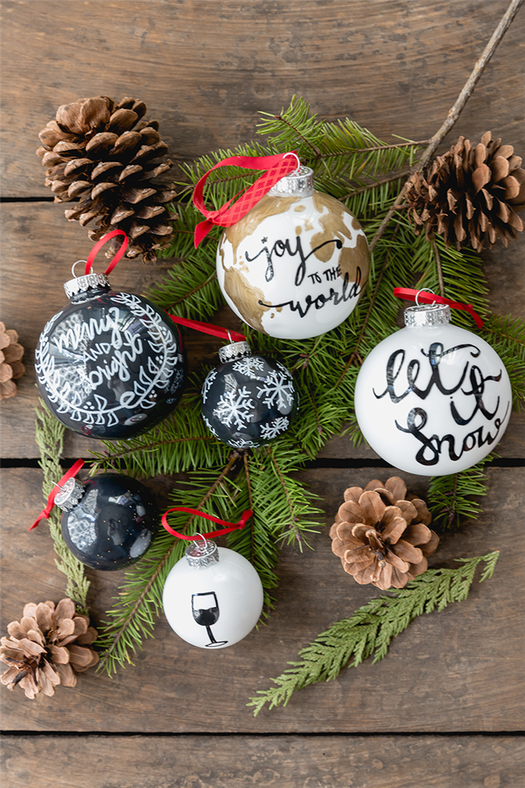
DIY Hand Painted Ornaments
Supplies:
- Black Acrylic Paint
- White Acrylic Paint
- Fine and Medium Point Paint Markers (or Chalkboard Markers)
- Metallic Markers (optional)
- Assortment of Clear Glass or Plastic Ball Ornaments
- Ribbon
Directions:
Step 1 : Remove the top from the glass ornaments.
Step 2 : Squeeze a small amount of black or white acrylic paint into the ornament, hold a piece of paper towel over the top and shake. Add more paint if necessary until the entire ornament is painted.
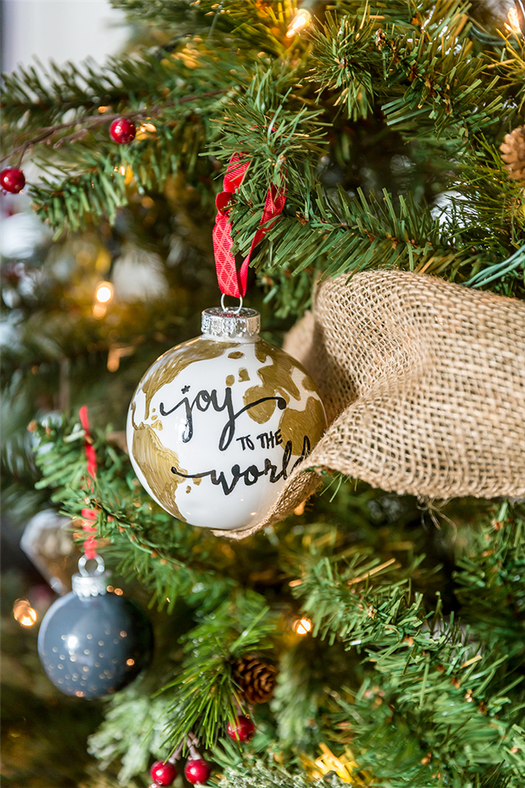
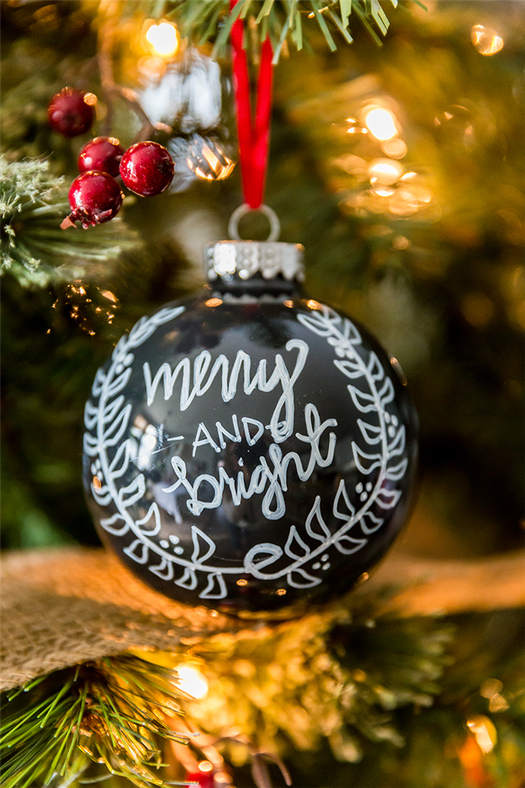
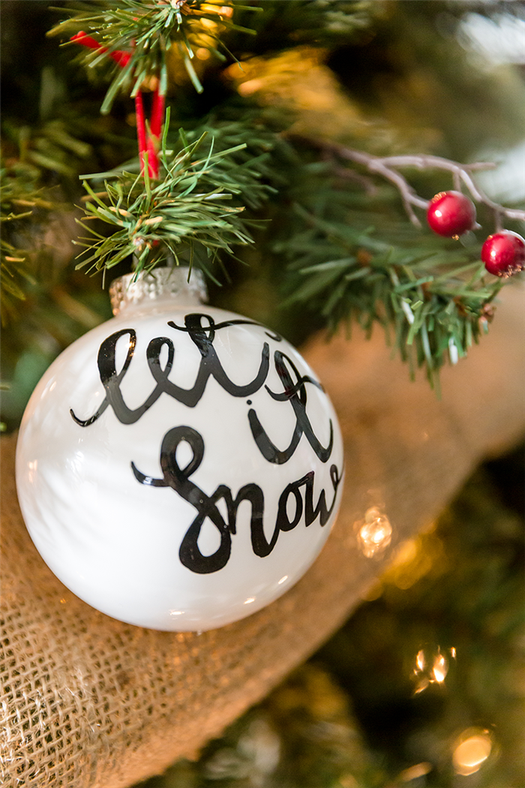
Step 3 : On the black ornaments, use a white (or colored markers if you desire) to draw holiday messages or designs. Use the black marker on the white ornaments.
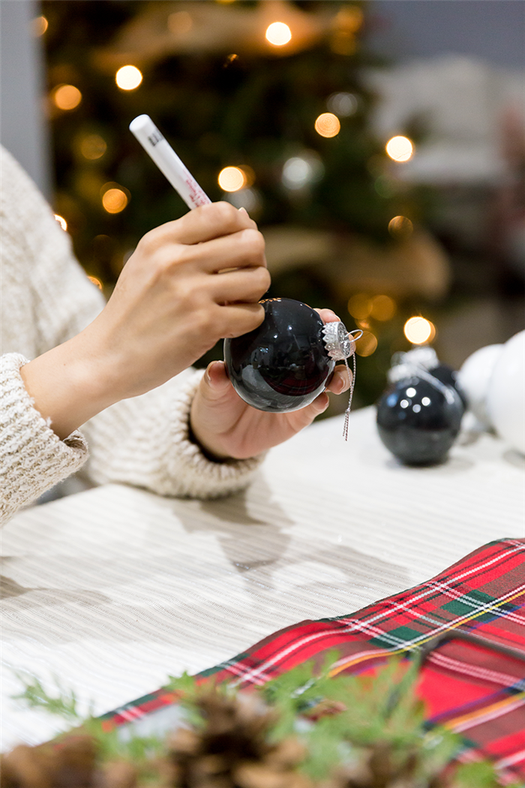
Step 4 : Let dry for a minimum of 15 minutes to prevent any smudging.
Step 5 : Tie a festive ribbon on the ornament and hang on the tree!
The best part about this DIY hand painted ornaments project is that it’ll cost you less than $25 to make. I found the clear ornaments at the dollar store and had coupons for the paint and ribbons at a local craft store. After you’ve hung the ornaments on the tree and the crafting party has ended, you’ll have memories of the fun you had each time you look at your tree and spot your friends hand painted piece of art. You can even tie them onto your gift holiday packages for an extra dose of the holiday spiriting when giving them to your family & friends.
There’s no pressure to become the next Picasso, just have a little fun & enjoy the moment. Cheers!


