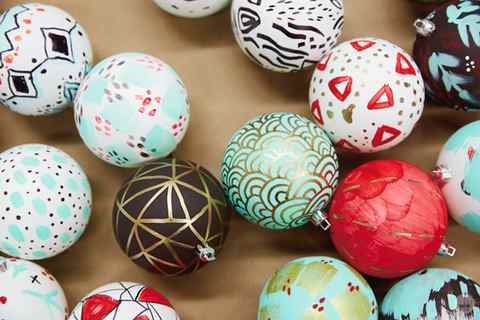
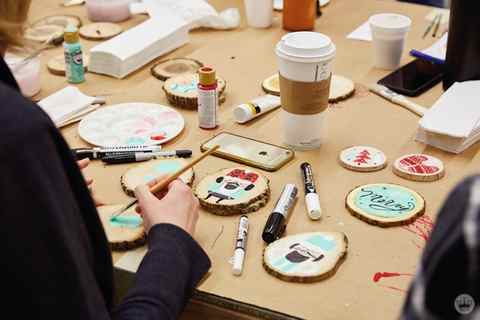
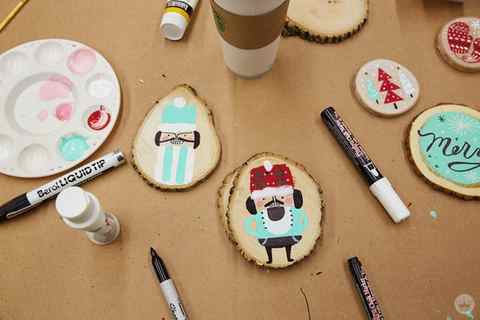
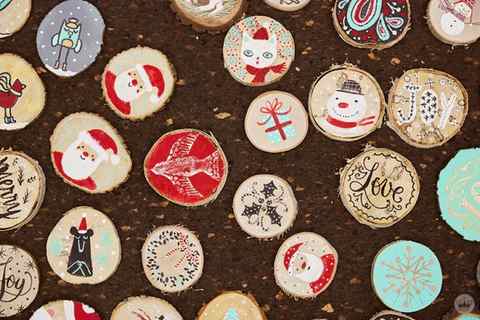
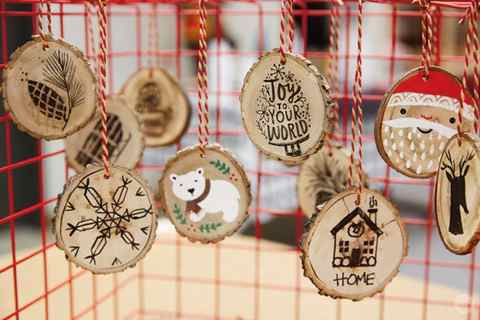
Christmas is the best time of year to get out your craft supplies and just play. There are so many excuses to make things—and none better than ornaments. You can make quick and easy ones to fill up your tree with a fresh new color palette, or go slow and create special ornaments for friends and family. Looking for inspiration? Get some DIY ornament ideas from the group of Hallmark artists we turned loose in our workshop.
How to Make Custom Wood Christmas Ornaments
I am so excited about Christmas this year. Like kid in a candy store excited.
This year I really want to add some color and a hint of shine to my Christmas tree and these ornaments are just the ticket.
I used a super easy paint technique that gives them an artistic look that looks much fancier than your typical painted ornament. And the good news is you really don’t need to have any actual artistic talent to make these.

This post contains affiliate links which means if you make a purchase after clicking a link I will earn a small commission but it won’t cost you a penny more. Click here to see my full disclosure policy.
Materials

- Wooden ornament shapes – I used these wooden ornaments from Michaels. There are also lots of wooden ornament shapes on Amazon that will work, but most of them aren’t as thick.
- Chalk paint or acrylic craft paints – I used Americana Décor Chalky finish paint in Treasureand Craft Smart chalky paint in Scarlet (this paint is similar). White paint would also look really beautiful. (Secret paint tip – chalk paint and acrylic craft paint are actually surprisingly similar and can be used interchangeably for small crafts.)
- paintbrushes
- dark wood stain – I used Minwax dark walnut
- clean rag – for applying stain
- gold Sharpie oil-based paint pen – these are seriously the best paint pens
- Mineral Spirits
How to Make Painted Wood Ornaments
These ornaments are seriously easy and fast to make – you can definitely knock out three in less than thirty minutes.
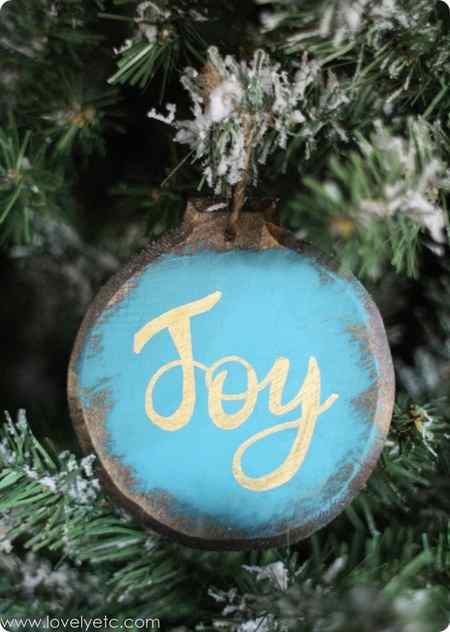
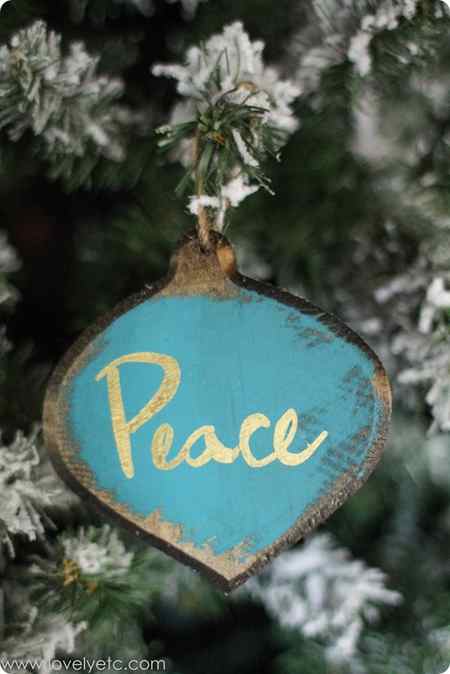
The first step is to paint the ornaments. Don’t worry about painting the whole thing, just roughly paint the front.
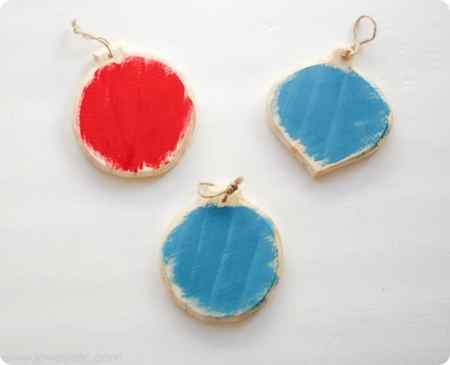
You could also use basic acrylic craft paints for this instead of chalk paints, but I already had some chalk paint on hand.
Either type of paint can be painted onto raw wood without worrying about primer and they both dry very quickly.
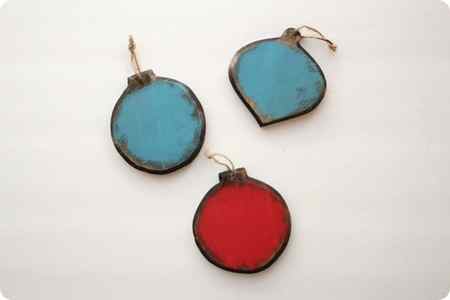
Once the paint has dried, use a clean rag to rub stain all over the ornament, including the painted area as well as anywhere the raw wood is still showing.
Immediately after applying the stain, wipe it off the painted area using a rag dampened with Mineral Spirits. This will wipe any excess stain from the painted area while staining the wood and giving the paint a deeper, richer color.
This two step paint/stain technique is one of my favorites for creating a rich, weathered finish for decor and furniture so I figured why not ornaments too!
Once the stained ornament is dry to the touch, you can add your words.
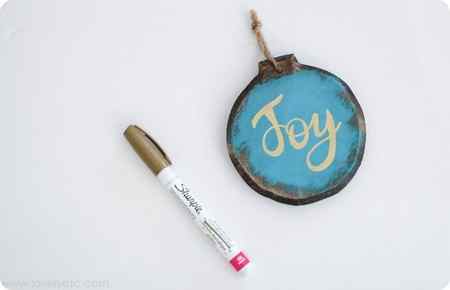
I used a gold oil–based Sharpie paint pen and it worked fantastically.
The gold has a great shine and the paint pen writes incredibly smoothly. If your handwriting isn’t great, you print your lettering in any font you want and use this super simple technique to transfer it to your ornament.
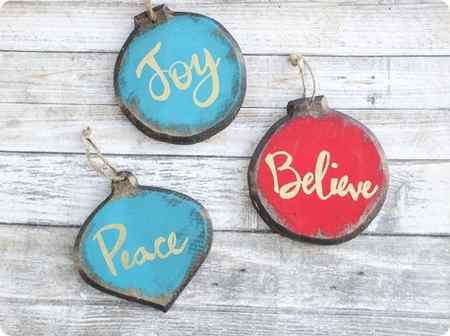
And of course you could customize these any way you want with your own favorite Christmas colors and words. Or use them to create personalized ornaments with your family member’s names.
I am loving these ornaments so much, I think I just might make some more!
I also just made a set of rustic turned wood Christmas ornaments that coordinate perfectly with these. And you can see all of my DIY Christmas ornament ideas here .
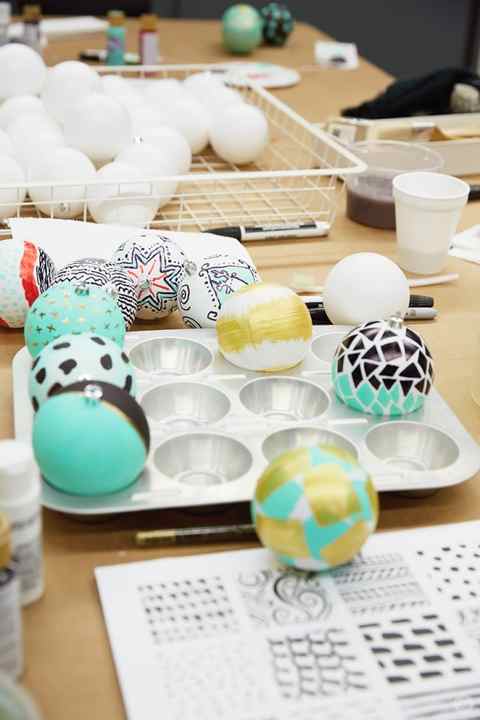
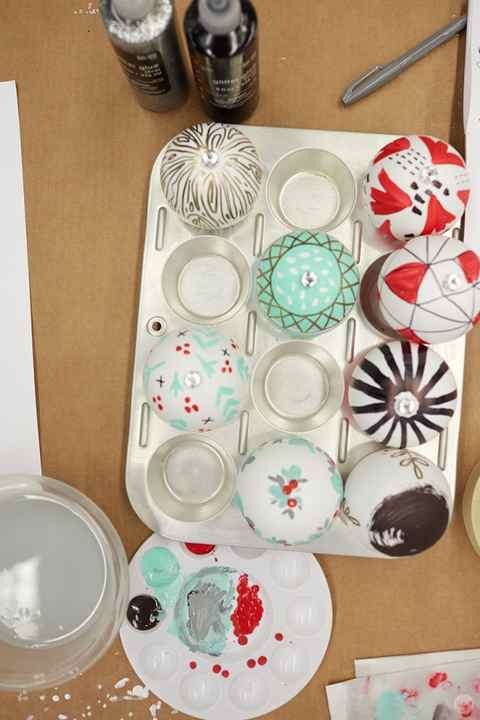
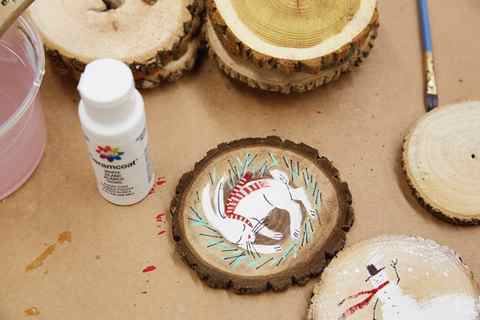
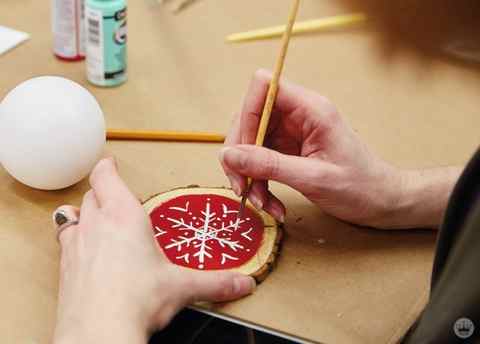
DIY ORNAMENTS: WHAT YOU’LL NEED
- Blank ornaments: We used matte white balls and wood rounds
- Acrylic paint in your chosen color palette
- Paint brushes
- Paint pens/markers
- Plastic paint palette (optional)
- Bakers twine (for hanging)
- Pencil (remove the cap from a ball ornament and pop it on the pencil while you paint)
- Muffin tin (for drying ball ornaments)
- Drill (if wood ornaments aren’t pre-drilled)
Pro-tip
For a collection of ornaments that holds together, limit your colors: pick three or four you love. Need inspiration? Look to your favorite holiday gift wrap or fabric.
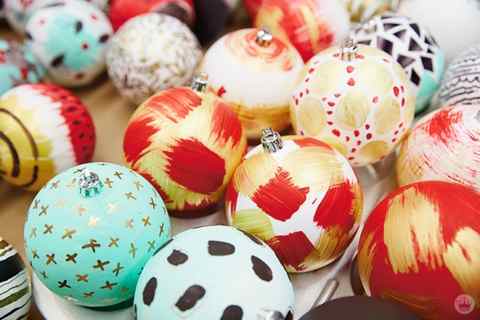
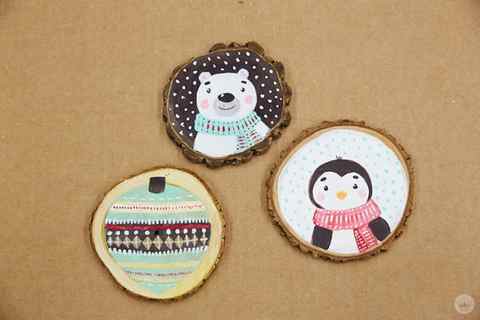
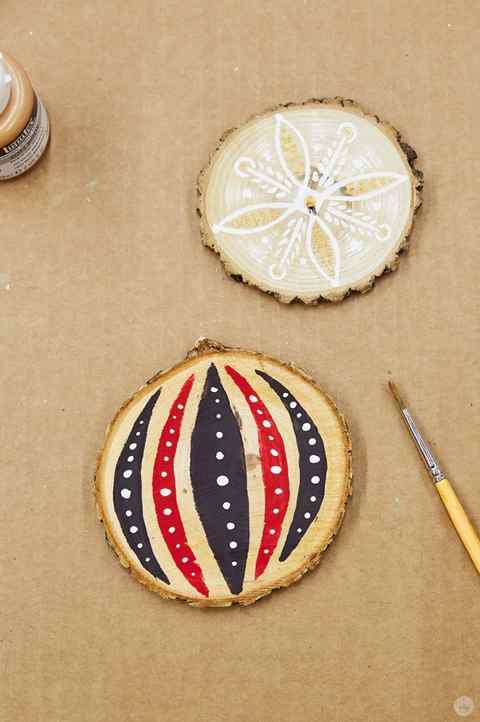
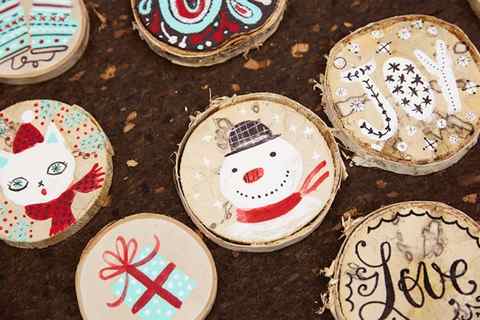
DIY ORNAMENT IDEAS AND INSPIRATION
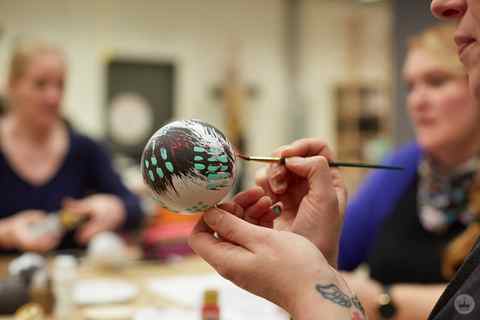
- Try making simple marks and patterns. (Get ideas from our designers here and here.)
- Experiment with overlapping brush strokes—just be sure to let one color dry before adding another.
- Use different brushes to make different marks. Load a small brush to make dots, or try a dry-brush technique with a wide one. Practice on paper first.
- Use markers and paint pens to create patterns over solid color ornaments.
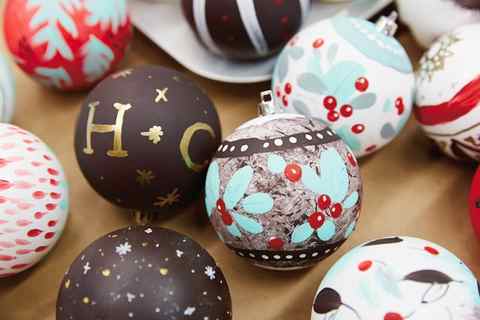

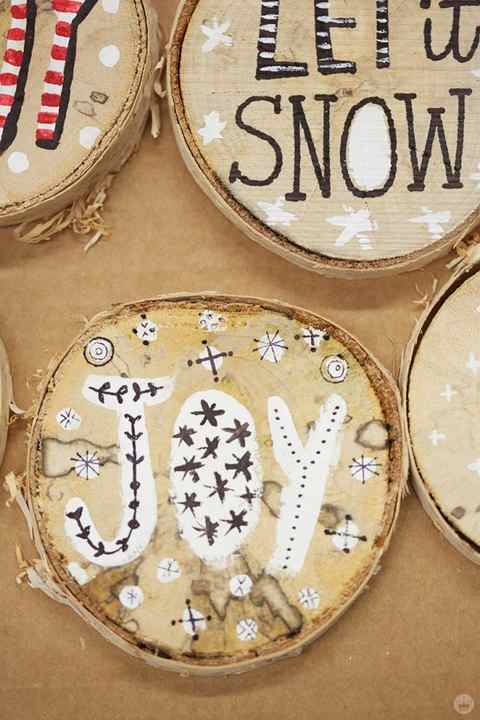
DIY WOODEN DECORATION IDEAS AND INSPIRATION
- Choose super-simple holiday patterns, icons, and phrases to paint.
- Try a really limited palette—just one color. (See the red ones above, and the black designs below.)
- Give your paintings solid-color backgrounds that go to just inside the edge.
- Doodle. Fill in the spaces around your main subject with dots and stars and squiggles.
We’d love to see your hand-painted Christmas tree ornaments! Share your homemade ornaments and your DIY ornament ideas on Instagram at @think.make.share or on our Facebook page.


