It looks just like a real canvas up close, and you’d never know there was glass underneath…
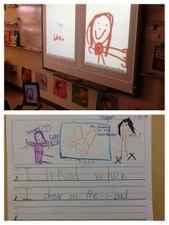
Transform old artwork into watercolor
When we had some of the downstairs walls repainted last month, I had to figure out what I was going to do with the large rectangles I had created with molding above the living room sofa (sorry about the old pic, I couldn’t find a newer shot):
![]()
I’ve had it up there for years so I was kind of feeling like a change, but I wasn’t sure what kind of change. Thing is, I knew if I left it as is then I did take the trim down later, I would end up with the pinkish wall color behind that molding that I would have to paint.
So to avoid that, I took all the trim down before they painted – I figured I could put it back up pretty easily if I wanted.
After the wall painting was done, it wasn’t long before I couldn’t handle the empty wall, so I went ahead with an idea that had been growing in my head for awhile. 😉
I had a large canvas art print I had purchased years and years ago on clearance that wasn’t really my style anymore. I almost took it to the consignment shop a while back, but decided to keep it with ideas of reworking it.
So rework it I did. 🙂 I started by priming it a couple times:
Then I grabbed as many colors as I could find in my stash that worked with that room. I wanted mostly aqua and blue tones but also wanted to pull in the wall color in the room.
So the Bub and I opened them all up (I think we used seven colors total), and I would pour paint on the canvas (totally randomly) and he would paint:
At first I thought, what in the heck am I doing?? But then…the more we poured and brushed, the more it came together.
And I tell you what – it was FUN! We were making art! 🙂
I figured out about half way in that I needed to keep a “wet edge” on my paint brush –- otherwise the paint was pulling a bit the more I added to the canvas.
So I got a cup with water, and I would dip the brush in, then paint, and it went so much better. It kept the paint really smooth and easy to work with.
When we were done (and it was hard to stop!!), I couldn’t have been more pleased!
You can see on the left where it was pulling a bit, so the paint wasn’t as smooth. On the right, it’s more flowing:
![]()
![]()
And when all was said and done, I actually like the combo of the two textures. I totally meant to do that. 😉
I was trying to have the colors continue onto the sides perfectly, but I just ended up painting them when I was done:

I LOVE how it turned out – we are arteests!! 😉
The Bub thinks it looks like clouds (he kept telling me as we were working on it, which I thought was adorable). I think it looks like waves – either way I think it turned out pretty darn beautiful. 🙂
I love that the texture of the original art still shows through too:
Of course it’s not nearly as wide as the molding was, but I think it works well on that wall. At first I was going to make another large rectangle around it and paint it out white, so it “frames” it a bit. But now I’m not sure – I’ve decided I’m going to live with it as is (by itself) for a while and see what comes to me:
I may go ahead with the trim, I may do a couple large sconces? I’m not sure, but I know with time the right thing will pop in my brain. It may be years. 😉 But until then, I’m enjoying it as is!
I can’t believe we created this – it’s so fun to tell people we painted it. 🙂 I know I say this a lot, but this could NOT have been any easier to do this. There was absolutely no rhyme or reason to it – we just swiped the paint back and forth, added more, painted back and forth, over and over till it was covered. (And it’s not even covered perfectly.)
When there was too much of one color in one area, I just poured on another and brushed it in. Like I said – it was a BLAST. I truly enjoyed it. And may do it again. 😉
Have you ever created your own art? Did it turn out how you hoped it would? Better? Worse? 🙂
Step 1: Find an old framed picture
It all started with this $12 framed art I found on Letgo.
![]()
I didn’t have a plan for it, but it was the perfect size to hang over our new bed and I knew I could figure something out.
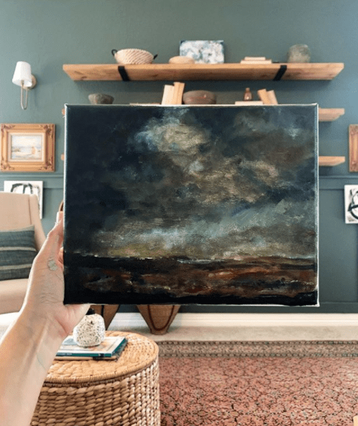
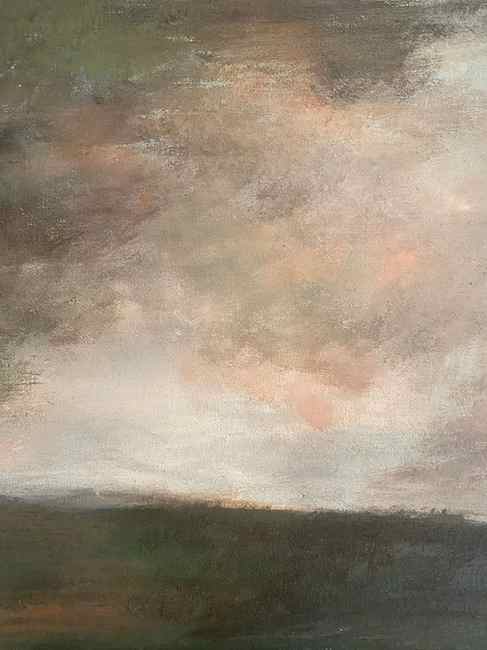
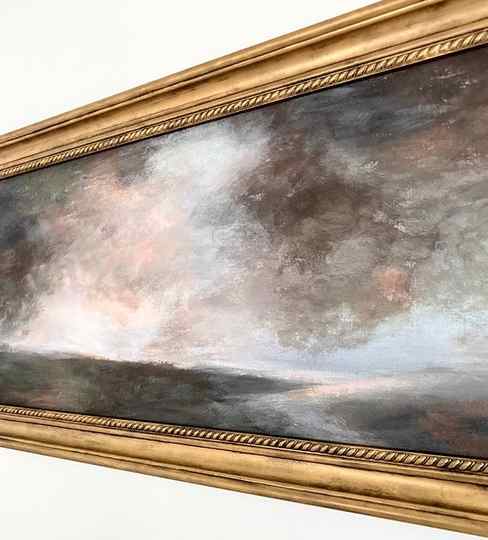
Lately I’ve been drawn to these antique French oil paintings with the chunky gold frames—I’m sure you’ve seen them around…
![]()
Dark, moody scenes with worn, chipped frames…
![]()
Sophisticated, elegant, and way out of my budget for the real deal. Luckily, art is subjective and anyone can create their own. I wanted to try my hand at another abstract landscape painting, but there was one problem…
![]()
This wasn’t a canvas, it was a framed photo underneath glass. I Google’d how to paint over glass and couldn’t find anything relevant to my situation. Painting over a smooth surface wouldn’t give me that textured canvas quality needed to make the painting look authentic, so I thought about it a little longer and then bam! It hit me…
Step 2: Find a scrap of fabric
![]()
I dug through my craft bin and pulled out a scrap of fabric. It was a thin linen-like fabric (not sure of the exact material) and I suspected I could glue it on top of the glass, which would then give me a “canvas” surface to paint on. It was free and I had nothing to lose (note: you don’t have to use white fabric since you’ll be painting over it anyway!)
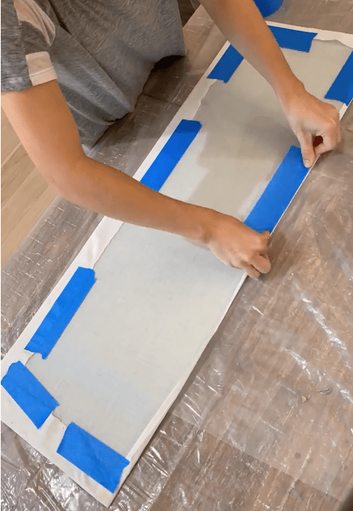
Step 3: Attach the fabric to the glass
To access the glass, I first had to remove the kraft paper and pry out the old staples.
![]()
The only glue I had on hand was wallpaper adhesive, so that’s what I used. I applied a thin layer with my favorite paint brush (in hindsight I could have even used less, you only need enough to make it tacky).
![]()
Once I had an even coat of adhesive, I pulled the fabric over and flattened it out with a smoothing tool (you could just as easily use your hand).
![]()
Note: someone DM’d to tell me that they’ve done this before and used paint instead of glue. Apparently when the paint dries, it sticks to the fabric well enough that no glue is needed. I also received another DM warning that the adhesive base layer could end up cracking the paint. There aren’t any signs of this yet, but hopefully if that happens it will just make it look really vintage Next time I do this, I’ll try using paint instead of glue!
![]()
I started with a light coat of Oil Rubbed Bronze spray paint—any dark paint will work here.
![]()
Since I was going for an aged look, it didn’t have to be full coverage or even.
![]()
After letting it dry for a few minutes, I went over it once more with black spray paint. You definitely don’t have to do both, since it will be mostly covered with gold anyway.
DIY abstract art on a thrifted canvas
![]()
![]()
1. Tape off the frame and paint over the old art. I did three coats to make sure the old message was covered!
![]()
![]()
2. Paint the design using acrylic paint of your choice. I actually used printer’s ink cause that’s what I had on-hand. It was nice and thick and dried shiny which gave it more drama!
I was looking at a print in a moodboard I’d recently pinned when I painted this. I’ve since noticed a similar type of art on a bunch of pins I have going back several years. You can’t go wrong with a swoopy swirly shape, different thicknesses, and a few dots!
![]()
Around this point I also switched the hanging mechanism by unscrewing and screwing in so it can hang vertically.
![]()
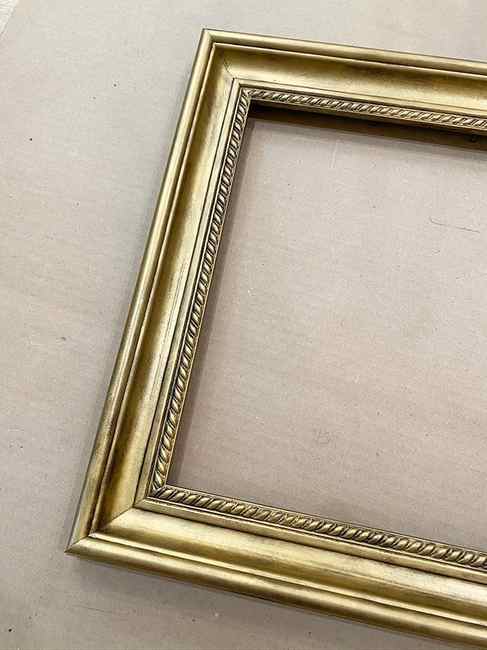
3. Cover the art you just painted with large paper and tape off so only the frame is visible. (Note: if you like the frame as-is, you can skip this and you’re done! This one was cheap fake wood and already chipping.)
![]()
4. Spray paint the frame in a color of your choice. This was high-gloss black.
![]()
Reveal! And hang!
![]()
![]()
It’s perfect above this bench!
![]()
I also love it when we move the bench around! It’s a really modern look, but I think art and light fixtures are great elements to play with in a traditional home too. Great mix!
![]()
I’m so happy with this one and it’s really improved our living room! It was fun and easy too!