With a little practice and patience, you’ll be able to capture the charm and personality of these adorable creatures! By following the steps depicted in the collage below, you too can draw a sloth like a pro!
How to Draw a Sloth – Create an Adorable Sloth Sketch

Sloths, the adorable and quirky creatures of the rainforest, are known for their incredibly slow movements and sleepy disposition. With their long limbs and hook-like claws, they spend most of their lives hanging upside down from tree branches, blending seamlessly into their environment. Despite their sluggish appearance, sloths are expert swimmers and climbers, and their unique digestive system allows them to survive on a low-energy diet of leaves. With their endearing personalities and fascinating adaptations, it’s no wonder that sloths have captured the hearts of nature lovers all over the world! Get ready because today, we will show you how to draw a sloth in our easy step-by-step tutorial!
Table of Contents
- 1 A Step-by-Step Guide on How to Draw a Sloth
- 1.1 Step 1: Draw the Head of Your Sloth Drawing
- 1.2 Step 2: Continue onto the Main Body
- 1.3 Step 3: Add the Arm and Leg to Your Sloth Sketch
- 1.4 Step 4: Draw the Claws
- 1.5 Step 5: Add the Facial Guidelines
- 1.6 Step 6: Start Adding Facial Features
- 1.7 Step 7: Draw the Nose and Mouth
- 1.8 Step 8: Outline the Main Body of Your Sloth Sketch
- 1.9 Step 9: Outline the Claws
- 1.10 Step 10: Draw the Tree Branch
- 1.11 Step 11: Outline the Head of Your Sloth Sketch
- 1.12 Step 12: Draw the Facial Pattern
- 1.13 Step 13: Add the Eyes of Your Sloth Drawing
- 1.14 Step 14: Outline the Nose and Mouth
- 1.15 Step 15: Apply the First Color Coat
- 1.16 Step 16: Color the Details
- 1.17 Step 17: Add Color to the Tree Branch
- 1.18 Step 18: Continue to Color Your Drawing of a Sloth
- 1.19 Step 19: Texture the Head and Arm
- 1.20 Step 20: Continue to Texture Your Sloth Drawing
- 1.21 Step 21: Add Texture to the Rear of the Sloth
- 1.22 Step 22: Texture the Face
- 1.23 Step 23: Continue to Texture the Facial Features
- 1.24 Step 24: Add Texture to the Branch
- 1.25 Step 25: Finalize Your Drawing of a Sloth
- 2.1 How to Make a Sloth Drawing Look More Realistic?
- 2.2 Can You Draw a Sloth in a Different Position or Pose?
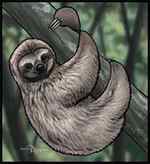
A Step-by-Step Guide on How to Draw a Sloth
Get ready for a fun and rewarding experience as you’re about to learn how to draw a sloth! Sloths have a unique appearance with their long, curved claws, round faces, and shaggy fur, which make them fascinating subjects to sketch. When drawing a sloth, start with a basic outline of their body shape and add in their distinctive features such as their large eyes and smiley mouth. Sloths have a lot of character, so don’t be afraid to exaggerate their expressions to make your drawing come to life. Pay attention to the texture of their fur, which can vary from thick and fluffy to sleek and shiny depending on the species.
With a little practice and patience, you’ll be able to capture the charm and personality of these adorable creatures! By following the steps depicted in the collage below, you too can draw a sloth like a pro!

Step 1: Draw the Head of Your Sloth Drawing
Begin your drawing of a sloth, by drawing an oval shape that will represent the head of your sloth drawing.

Step 2: Continue onto the Main Body
In this step, you will overlap the head, by drawing a larger oval to represent the main body.

Step 3: Add the Arm and Leg to Your Sloth Sketch
Draw the construction lines for the visible arm and leg of the sloth. To do this, draw a narrow oval shape overlapping the main body to represent the visible arm. Below the arm, draw a vertical oval shape with a small oval attached to represent the leg.

Step 4: Draw the Claws
Attached to the end of the hand and leg, draw three visible claws.

Step 5: Add the Facial Guidelines
Within the face, draw a vertical centerline and five horizontal crossing lines.
These guidelines will aid you in drawing the facial features on your sloth drawing.

Step 6: Start Adding Facial Features
Make use of the previous guidelines to aid you in drawing the placement of the two eyes, including the facial pattern on your sloth sketch.

Step 7: Draw the Nose and Mouth
In this step, begin to draw the nose between the two eyes and the simple mouth line.

Step 8: Outline the Main Body of Your Sloth Sketch
Begin to trace your entire drawing and outline a more realistic sloth body. Continue to connect the head to the main body. Finish this step by outlining the hand and leg of your sloth drawing.

Step 9: Outline the Claws
Outline the sharp claws on your sloth drawing, and draw a fine line within each claw.

Step 10: Draw the Tree Branch
Draw two slightly curving lines beneath the sloth to represent the tree branch.
Note! Your sloth drawing should look like it’s grabbing onto the tree branch.

Step 11: Outline the Head of Your Sloth Sketch
Outline the head of your sloth by making use of your previously drawn construction lines. Complete the step by drawing the visible lower body line. Once you have completed this step, you may erase any construction lines that are still visible.

Step 12: Draw the Facial Pattern
Within the face, continue the pattern, drawn in step six, and curve it around the forehead.

Step 13: Add the Eyes of Your Sloth Drawing
Draw the eyes within the circles drawn in step five. To do this, draw additional ovals within the eyes.

Step 14: Outline the Nose and Mouth
Begin to outline a more realistic nose and mouth line for your sloth drawing. Once you have completed this step, you can erase any still visible guidelines.

Step 15: Apply the First Color Coat
Select a fine, sharp brush and brown paint, and evenly coat your drawing of a sloth.

Step 16: Color the Details
Use the same brush as previously and switch to dark brown paint, and evenly color the eyes and claws. Continue using gray paint to color the nose. Complete the step using light purple paint to color the lips.

Step 17: Add Color to the Tree Branch
In this step, you will evenly coat the entire tree branch using a thin brush and dark olive paint.

Step 18: Continue to Color Your Drawing of a Sloth
Begin by painting the face pattern of your sloth drawing with a thin brush and cream paint. Within the face pattern, make use of light brown paint to add a color blend to the bottom of the face.
Continue by using a small, soft brush and black paint, and add shading within and around the face and main body of the sloth. Continue by adding soft shading using a darker shade of brown.
When shading the face, remember to shade around the eyes, leaving a fine brown outline. Complete the step using a blending brush to smooth out the previously added colors.

Step 19: Texture the Head and Arm
With a fine brush and a combination of tan, gray and black paint, add individual rough hairline brushstrokes covering the entirety of the head and arm. Follow the curvature of the outline to aid you in the direction the fur coat should curve in. Repeat the step using white paint.

Step 20: Continue to Texture Your Sloth Drawing
Use the same combination of paints and paintbrush as the previous step, and paint individual fine hairlines within the lower main body and leg.

Step 21: Add Texture to the Rear of the Sloth
Repeat the previous two steps, and add fine hairline brushstrokes to the rear body of the sloth.
Remember, these hairlines need to be painted in a wavy motion to represent the rough and wave-like fur of a sloth.
Complete the step using a thin brush and the corresponding colors to add a fur coat extending the outline of the sloth. This will create a less “cut out” look.

Step 22: Texture the Face
In this step, add fine hairline brushstrokes leading outwards from the face, using a thin brush and a combination of brown, white, gray, and black paint.

Step 23: Continue to Texture the Facial Features
With a thin brush and black paint, trace the outline around the eyes and fill in the pupils. Switch to white paint, and add a shimmer to each eye. Continue by using a small, soft brush and black paint to shade the nose. Continue to shade the lips using gray paint. Switch to a thin brush and fill the nostril holes with black paint, leaving a small area of the first color coat visible. Repeat using white paint to add highlights.

Step 24: Add Texture to the Branch
Continue to add shading to the edges of the tree branch, using a small, soft brush and black paint. Continue using a shade of mustard yellow paint, and lightly add an uncoat to the branch. Complete this step, using a combination of white, gray, and yellow paint, and add steak lines within the branch. Repeat using a rough brush, and dab patterns for a more intense texture.

Step 25: Finalize Your Drawing of a Sloth
Erase any harsh outlines that are still visible. Where this is not possible, select a fine, sharp brush and the corresponding colors and trace these harsh outlines to create a final seamless result of a sloth drawing.

Congratulations on finishing our tutorial on how to draw a sloth! You have just created a wonderful piece of art that captures the unique characteristics of these charming animals. Now that you have mastered the basics of drawing a sloth, you can experiment with different styles and techniques to add your creative touch. Consider adding more details to your sloth, such as leaves to place it in its natural habitat. You can also experiment with different shading and coloring techniques to make your sloth stand out. Keep practicing and exploring your creativity, and who knows, you may even become a sloth drawing expert!
Frequently Asked Questions
How to Make a Sloth Drawing Look More Realistic?
To make your sloth drawing look more realistic, focus on adding details that reflect the sloth’s unique characteristics. Sloths have shaggy fur, long claws, and a distinctive face shape, so pay close attention to those features. Try to replicate the texture of the fur using short, jagged lines and shading techniques, and make sure the claws are curved and hooked. Additionally, consider adding shadows and highlights to make the drawing more three-dimensional and realistic.
Can You Draw a Sloth in a Different Position or Pose?
Of course, you can certainly draw a sloth in a different position or pose! Sloths are known for their slow movements and their ability to hang upside down from tree branches, so you can play around with different poses to capture their unique character. You could draw a sloth stretching, sleeping, or climbing a tree, for example. Just make sure to pay attention to the sloth’s anatomy and posture to ensure that your drawing looks accurate and true to life.
Matthew Matthysen ( Drawing and Painting Artist )
Matthew Matthysen is an educated multidisciplinary artist and illustrator. He successfully completed his art degree at the University of Witwatersrand in South Africa, majoring in art history and contemporary drawing. The focus of his thesis was to explore the philosophical implications of the macro and micro-universe on the human experience. Matthew uses diverse media, such as written and hands-on components, to explore various approaches that are on the border between philosophy and science.
Matthew organized various exhibitions before and during his years as a student and is still passionate about doing so today. He currently works as a freelance artist and writer in various fields. He also has a permanent position at a renowned online gallery (ArtGazette) where he produces various works on commission. As a freelance artist, he creates several series and successfully sells them to galleries and collectors. He loves to use his work and skills in various fields of interest.
Matthew has been creating drawing and painting tutorials since the relaunch in 2020. Through his involvement with artincontext.org, he has been able to deepen his knowledge of various painting mediums. For example, watercolor techniques, calligraphy and lately digital drawing, which is becoming more and more popular.
Learn more about Matthew Matthysen and the Art in Context Team.
LEARN HOW TO DRAW SLOTHS DRAWING LESSONS

How to draw cartoon Sloths, as well as realistic or illustrative Sloths. The following are Sloths Drawing Lessons and step by step cartooning tutorials. Learn how to draw and sketch and create great Sloths cartoons, illustrations and drawings with these free drawing lessons.

Today I’ll show you how to draw a cute cartoon / Kawaii Sloth with easy step by step drawing instructions. I will guide you through the process of drawing a sloth using simple geometric shapes, and letters.
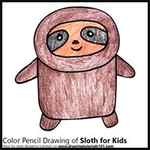
This is a step by step drawing tutorial on how to draw a sloth for kids.
Go out of your shell and start doing your best to know how to draw a sloth the easy way. Sloths can be described as mammals that belong to the Megalonychidae family. They were tagged under Pilosa order that is why they can be associated to anteaters.
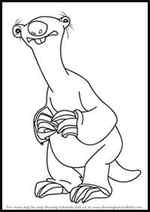
Sidney, more commonly known as Sid, was a megatherium (a part of herd of different animals). Sid met a mammoth named Manny and a saber-tooth tiger named Diego as three of them made a journey to return a human baby named Roshan to his tribe.
A very easy and quick fun drawing to due. He’s cute and fun to draw.
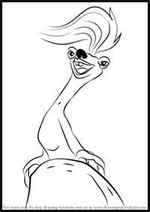
This is a step by step drawing tutorial on how to draw Sloth Siren from Ice Age.

This is a step by step drawing tutorial on how to draw Male Sloth Siren from Ice Age.
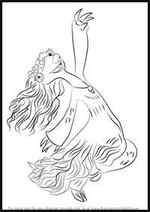
This is a step by step drawing tutorial on how to draw Brooke from Ice Age.
This is a step by step drawing tutorial on how to draw Rose from Ice Age.
Learn how to draw a sloth by following this video tutorial or images.
Austin and I are learning how to draw a cartoon sloth today! We hope you’ll follow along and learn with us. This project is meant to be simple and easy for younger artists, but still fun for older artists 🙂
This is a drawing of a cute little sloth. Sloths are like the coolest animals ever. I always wanted to draw one on camera, and this is chance lol. I go over how to draw the sloth step by step.
How to draw Sloth step by step you can learn drawing by easy ways.
In this quick tutorial you’ll learn how to draw a Sloth in 8 easy steps – great for kids and novice artists.
Sloths are amazing creatures, so different from everything we know. The seem to have a very chill attitude towards life, and they’re definitely not lazy—they just don’t see the need to hurry! Sloths are also unbelievably cute, so we’re going to draw one today. It will be a simple illustration perfect for beginners, and later you can use it to create a colorful vector illustration with Nataliya Dolotko!
This tutorial is about how to draw sloths step by step.
If slow and steady wins the race, we think the sloth’s a winner. Would you like to draw a slow and steady sloth? This easy, step-by-step drawing tutorial is designed to make doing so simple and fun. All you will need is a pencil, an eraser, and a sheet of paper. You may also wish to color your finished drawing.
Hello everyone! We have a habit of doing drawing lessons about very strange animals, and today’s drawing lesson is no exception. And as you can see today we made a drawing tutorial about how to draw a sloth step by step.
There are 6 species of sloths lives in South and Central America. In this tutorial, we’ll show you how to draw a two-toed sloth hanging from a tree. Keep in mind that the fore feet of the two-toed sloth have two toes, although there are three clawed toes on each of the hind feet.
These amazing creatures have a purely arboreal lifestyle. It so happened that they feed almost exclusively on cecropia leaves, which are very low in calories. Therefore, the metabolism of sloths is extremely slow. Almost all the time sloths spend hanging on a tree branch back down. Now we will learn how to draw a sloth in this position.


