Firstly, start off with the basic guidelines for the koi fish. This is always essential for creating accurate work. Once you’ve completed the guides, move onto the next step.
How to Draw A Koi Fish Step by Step
Would you like to download the How to Draw A Koi Fish Step by Step printables? You’re just one step away! Sign up now and download the 4 PDF Printables for FREE!
If you want to draw a koi but are wondering where to start from, do not worry. You have come to the right place to understand how to draw and color it. Drawing is something I enjoy. I am extremely passionate about art, which allows me to make the most of my work and provide guidelines to others too. So, I want to help you draw a koi through this stepwise tutorial I designed. I keep things super simple and efficient. At the same time, you will learn a lot of new things from the way I draw this koi.
Start with the body. Add the facial features. Do the fins and color. Your koi drawing is complete.

Draw a wave
Draw the body
Turn the wave into the body of the koi.

Draw the fin
This one goes on the back.
Now the patterns
Get creative with them.

Draw the eyes
Keep them round and big.

Now the side fins
They should be flat.
So far so good
You are doing great so far.
Almost done
Just a few more steps.
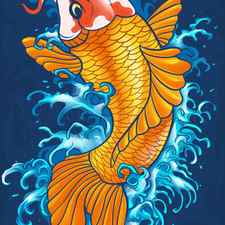
Add the details
Draw lines on the fins to add depth.

Final touches
Get a dark pencil for this.

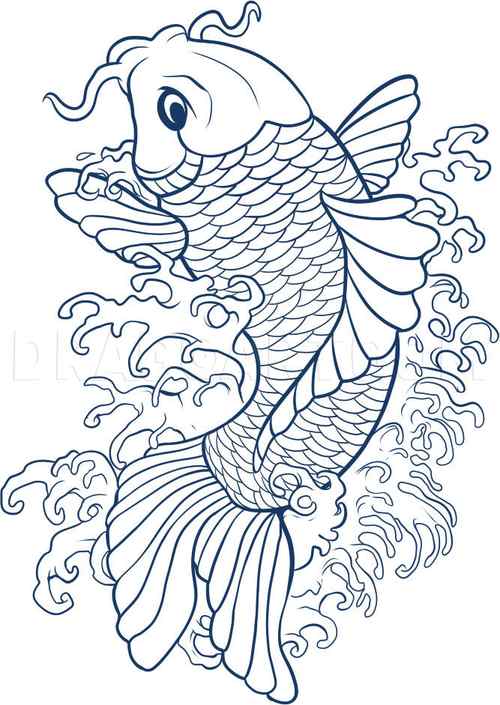
Now we color
The drawing is complete. Now we just have to color it.

About Us

Jimena & Iñigo
My husband and I are learning how to draw and paint. We wanted to share this learning process with the world and have fun! That’s why we created this blog. We’ll have drawing contests every week and you’ll decide who won that week! Follow along and learn with us!
FREE Printables
1. Trace the picture:

2. Coloring picture:

3. Koi Fish Step by Step Printable:
Step 2.

Next, let’s work on the details for the shape of the body. Start with the head first before you move onto other details.
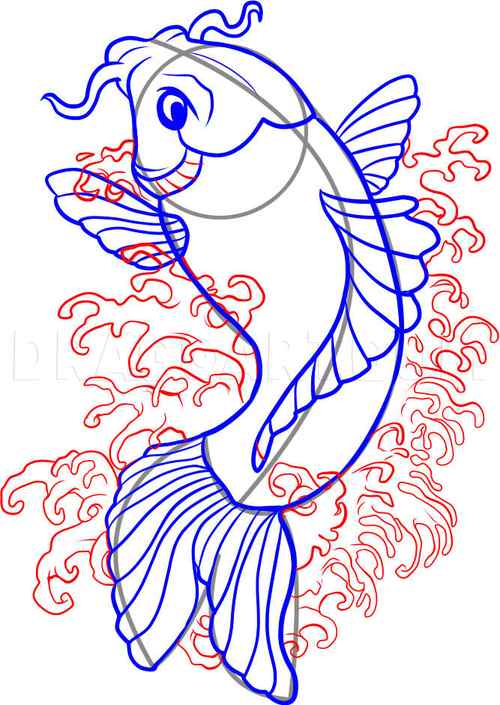
Step 3.

Then, we must start shaping up the inner details of the face! Start with the eye first and then the fins. Once you’ve done that, finish off with the back fin and the tail fin.
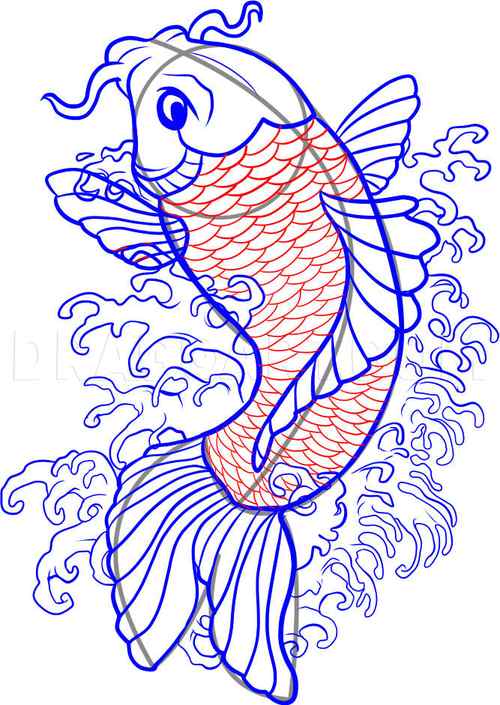
Step 4.

Next, detail the fins with swift curved lines. Separate only the areas that are curved outwards as edges.


