Make a black like in the middle and draw an outline of a few mountains on the top of the line, then repeat the same drawing at the bottom.
How to Make a Sunset on Autodesk Sketchbook
When you open the app, at the bottom you will see a plus symbol, press on that.
Press new sketch
Once you press new sketch, I kept it at 718 and 718 to make it a square piece of paper. You can also rotate the page by pressing on the icon on the right side (circled in blue)
Add Tip Ask Question Comment Download
Step 2: How to Make a Perfect Circle
You will see a fresh page after this. At the top (circled in blue) allows you to insert shapes. You will see a circle, you must press on that
Then you must tap the page and drag your stylus pen or finger to the bottom, you will see a dotted line in the shape of a circle. Adjust it till you think it is perfect (doesn’t matter if it isn’t in the correct spot, we shall fix that)
On the left side of the shape icon is target sort of symbol once you press on that symbol you can move the circle around and place it in the perfect spot. Once you think it is in the perfect spot press done.
Add Tip Ask Question Comment Download
How to paint sunset boat silhouette with watercolors

Sunsets are always exciting to paint! They can be the perfect thing to admire at the end of a very busy day. In this tutorial I decided to paint a sunset boat scene with vibrant colors in order to capture the essence of a typical sunset.
I thought this scene would be perfect for anyone wanting to try painting different types of skys. Not to mention, you will also learn how you can use contrasts as a technique.
Contents hide
Before you continue, I would recommend checking out my article on how to paint a watercolor sunset, which goes over the planning process and has 3 step by step watercolor sunset examples!
Materials used:
- Cold pressed 300gsm/140lb paper
- Watercolor brushes:
- Round: size 8, size 4
- Flat: size 1/2
I have listed the different colors I use in this tutorial. However, you are more than welcome to use different color variations according to your personal preferences.
- Colors used in the sky:
- Rose madder +Ultramarine = purple + cobalt blue= Lavender purple
- Lemon yellow
- yellow-orange
- Rose madder + Ultramarine = purple + cobalt blue= Lavender purple
- Lemon yellow
- Yellow orange
- burnt umber
- Burnt umber+ Paynes grey (only a small touch)= Dark brown
Step by step sunset boat tutorial

Painting the sky
- Rose madder +Ultramarine = purple + cobalt blue= purple blueish color
- Lemon yellow
- yellow-orange
- Round brush size 8
I began with the wet in wet technique, adding a glaze of clear water to the sky area. However, I made sure not to add too much water to prevent unwanted blossoms. Next I added streaks of Lemon yellow in the middle.
I then added the purple-blueish mixture along the top of the sky. Making lighter strokes as I moved towards the middle of the sky.

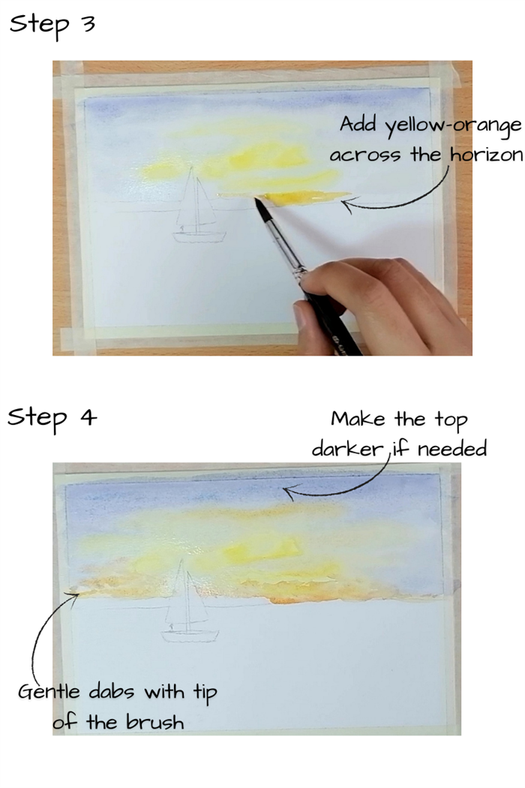
In step 3 I added a few strokes of yellow-orange along the horizon just below the sunlight. At this point the first layer was still damp (close to dry but not yet).
I used the tip of the brush to add dabs towards the left and right ends of the horizon.
Painting the ocean
Now that the sky was drying it was time to work on the water!
- Rose madder + Ultramarine = purple + cobalt blue= Bluish-purple color
- Lemon yellow
- Yellow orange
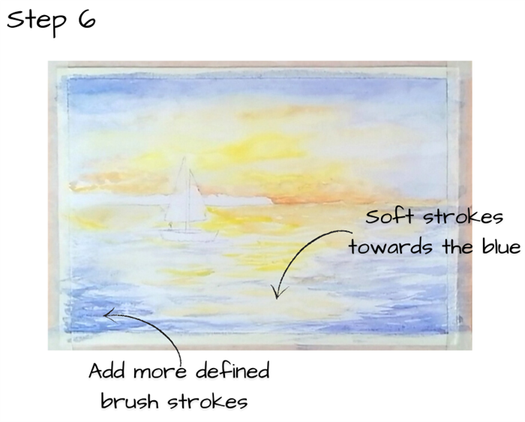
Still using the size 8 brush I began by adding a gentle glaze of bluish-purple. I added soft waves using a sweeping motion with my arm. The middle was left for later…

Repeating the fifth step, I added smaller waves of lemon yellow along the centre of the water surface.
Just then, I switched to the size 4 brush and added more defined strokes of blue and yellow (image below).
Painting the land
- burnt umber
- Burnt umber+ Paynes grey (only a small touch)= Dark brown
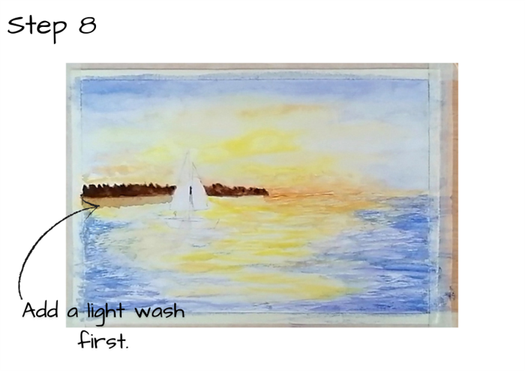
When painting the land, I first painted a light layer, allowed it to dampen then added another layer.
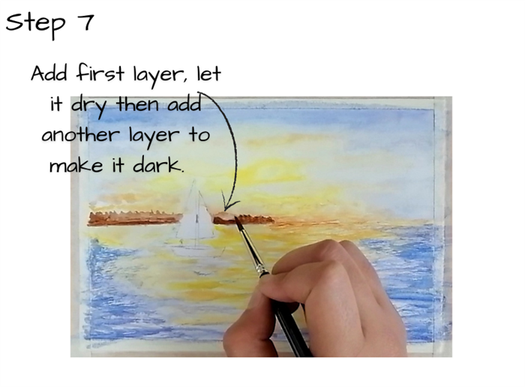
I continued on and added another light wash of burnt umber just beneath the first layer.
While the layer was still wet, using the size 1/2 flat brush I mixed burnt umber with a small touch of paynes gray (not too much). I then used the end of the brush to dab the paint.

Adding the boat
The final step of the painting!!
- burnt umber
- Burnt umber+ Paynes grey (only a small touch)= Dark brown
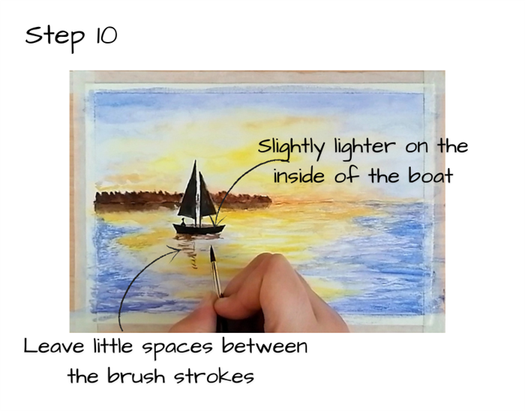
In this step I made sure to mix more paynes grey with less burnt umber. This is because I wanted to make the boat darker than the land behind it. I was trying to create contrast between the sunlight and silhouette.
It was only a matter of painting the sails, the outside of the boat and the teeny tiny person with the same value that brought out a silhouette.
I continued by adding the reflection of the boat with a slightly lighter value. All I did was use less paynes grey when mixing.
And there you have it, the step by step process to painting a colorfule lively sunset with the boat silhouette.
I hope you all enjoyed trying out this tutorial! I would love to hear your thoughts or questions so definitely let me know in the comments below.
If you want to learn about more watercolor techniques click here.


