The holes should be narrow enough to collect only the sap and wide enough to prevent damage to the tree.
How to Grow Pine Trees
This article was co-authored by Tyler Radford. Tyler Radford is a Plant Specialist at Hollie’s Farm & Garden in Tampa, Florida. With over nine years of experience, Tyler specializes in gardening, planting, mulching, and potting. Hollie’s Farm & Garden is a full-service landscape nursery offering landscape supplies including trees, shrubs, mulch, and flagstone.
There are 9 references cited in this article, which can be found at the bottom of the page.
wikiHow marks an article as reader-approved once it receives enough positive feedback. In this case, 91% of readers who voted found the article helpful, earning it our reader-approved status.
This article has been viewed 354,697 times.
Pine trees are evergreen trees that come in many varieties. Young pines need special attention, and need to be guarded rigorously against animals and sun damage during their first few years. With good care while young, your pine trees will grow for decades.
Steps
Method 1
Method 1 of 3:
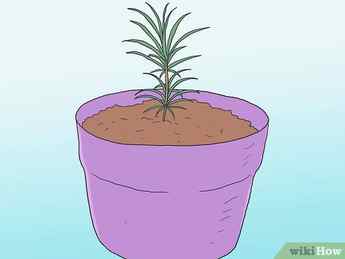
Planting a Pine Seedling

Choose the species of pine that is the best for your soil and your climate. Some types of pine trees used for landscaping include white pine, jack pine and Scotch pine. Ask the seller about growing environments if you live in a different climate or at a different elevation than the location where the seedling was grown.
- Most seedlings can be kept for several weeks between 35º and 38º F (1.7 – 3.3ºC), but you should check with the seller in case the species you bought has different requirements. [2] X Research source
Advertisement
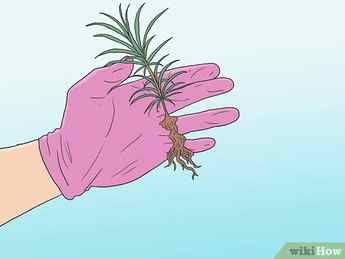
- Some seedlings are sold with a small amount of soil mixture packed around the roots. Try to keep as much of this on the roots as possible while rearranging.
- If you cannot plant a pine tree somewhere with shade on its west side, instructions are included below for creating a sun shade.
- A mix of sand and loam is best for pine trees, but you should only need to mix in suitable organic mulch such as sphagnum if the soil is a hard clay consistency. [4] X Research source
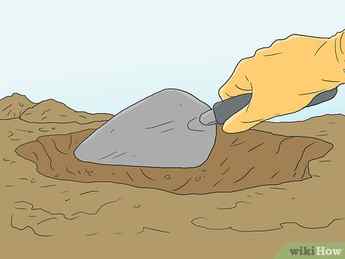
- Choose an area with well-draining soil. A 1 foot (30 cm) deep hole filled with water should drain easily within 12 hours. If it does not, you may need to install drainage.
EXPERT TIP
“If you want to plant several pine trees together, it’s generally recommended that you plant them about 10–12 feet (3.0–3.7 m) apart.”
Home & Garden Specialist
Maggie Moran is a Professional Gardener in Pennsylvania.
Maggie Moran
Home & Garden Specialist
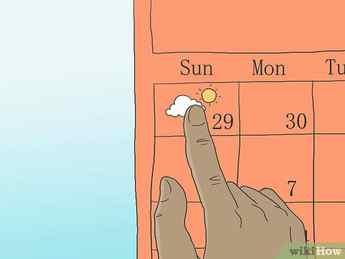
Choose a good day for planting. Do not plant trees when conditions are windy, dry, or above 85ºF (30ºC). The soil should not have standing water or ice on the day you plant, but should not be parched either. [5] X Research source
- Warning: Contact your utility company to discover the location of underground lines before digging any large holes.
- Try to plant the tree to the same level it was planted in the nursery. If you’re unsure, it is better to plant the tree too high than too low.
- If you’re planting more than one pine tree, be sure to leave at least 10 to 12 feet (3 to 4 m) of spacing so they can grow to mature width without any obstruction. Some varieties of pine may need even more space, like the huge Austrian pine. [7] X Research source
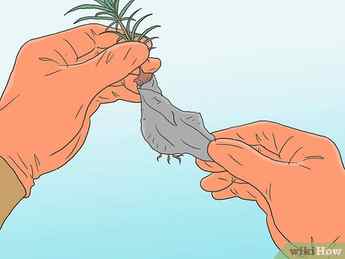
Remove the container or burlap from the seedling. Although burlap and other biodegradable material can be left on the plant, carefully removing it gives the seedling a better opportunity for growth.
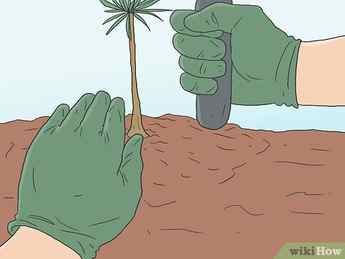
- Have an assistant hold the tree upright while you fill the hole if necessary.
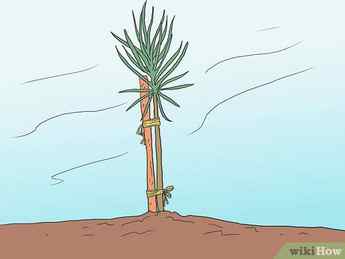
Lightly stake only if the tree cannot support itself. Staking pine tree seedlings is only necessary in areas of unusually high wind. If you think the pine tree is in danger of blowing over, use one or two stakes attached by ties or straps, and leave enough room for the tree to sway. Do not loop wire directly over the tree.
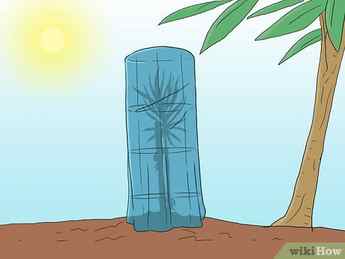
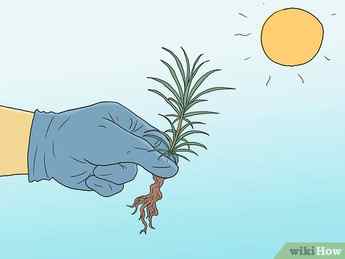
Protect young pines from hot sun. You may need to provide a sunscreen for your small pine tree by using a tarp or sheet of painted plywood. Planting where there is shade from another tree or a building is also a practical choice. The shade should be on the west side of the tree, which is where the sun is located during the hottest parts of the day.
Advertisement
Method 2
Method 2 of 3:
Caring for a Pine Tree Seedling
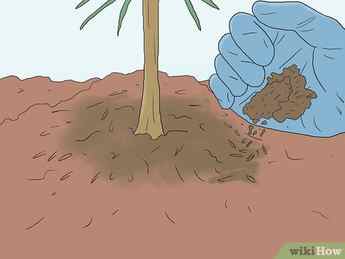
Mulch around the tree frequently. Wood chips are cheap and work well for pine trees. Apply them to several inches (centimeters) depth around the tree, leaving space around the trunk.
-
While mulch should help control weeds in addition to providing good growing conditions, you should pull out any grasses or other small plants near the base of the tree if you do see any grow there. [8] X Expert Source
- Soil that feels moist and holds together when picked up should not be watered, as over watering can suffocate the roots. Only water when the soil is mostly dry and crumbles apart, until it feels moist again.
- Water more in fall so the tree is prepared for winter. Water additionally during dry winter spells to protect young trees from drought, which is especially dangerous when the tree expects a wet season.
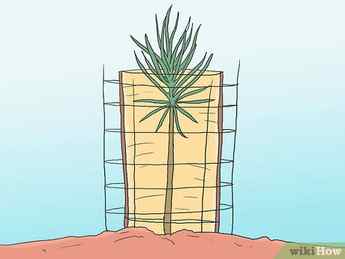
Protect the young pine trees from animals. A plywood sunscreen can also do double duty as an animal repellent. However, if you live in an area with deer or other persistent, large wildlife, you may need a plastic tube or chicken wire fence encircling the seedling. [9] X Research source

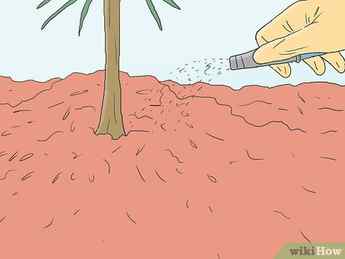
- Many pests can be controlled chemically by spraying seedlings with insecticide and fungicide. Trees may need repeated applications to kill off pests, as the larval stage of boring insects live underneath the bark and aren’t affected.
- You can also ward off pests by good management. Keep your trees healthy, for instance, as pests are less likely to attack healthy young saplings. Plant trees on medium soil to promote vigorous root growth and check your plantings often to prune dead or dying limbs.
- Planting some pine varieties (i.e. white) with hardwood trees or under a hardwood canopy seems to protect them from Dendroctonus bark beetles.
- It’s often best to remove damaged trees that will be vulnerable to pests. Always remove and destroy trees killed by boring insects, too.
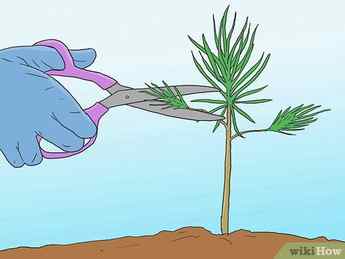
Prune dead or diseased branches only. Pruning to direct growth is not necessary for pine trees and may stunt their growth. Cut dead or diseased branches a short distance from the trunk, leaving the “branch collar” ring between the branch and the trunk. [11] X Trustworthy Source Virginia Cooperation Extension Publications and Educational resources from Virginia Tech and Virginia State University Go to source Follow the instructions in the article How to Prune a Tree carefully to avoid damaging your pine.
Advertisement
Method 3
Method 3 of 3:
Short Answer
Making turpentine from pine trees is done by a process called “distillation”.
First, the pine trees are cut and the stumps are burned to release the resin.
The smoke is collected and the resin is then boiled to create a liquid that is collected and cooled.
This liquid is then distilled to separate the turpentine from the other components.
Finally, the turpentine is filtered and stored for future use.
What Is Turpentine?
Turpentine is a type of volatile organic compound (VOC) derived from the distillation of resin obtained from trees.
It is a colorless liquid with a strong, pungent odor and is used in a variety of products, including paint thinners, wood preservatives, and cleaning solutions.
Turpentine is also used in traditional medicinal remedies, such as treating respiratory illnesses and muscle pain.
In terms of production, turpentine is made from the resinous sapwood of pine trees.
The process involves removing the bark from the tree and then drilling into the sapwood to collect the resin.
This resin is then distilled to create the turpentine product.
With the right tools and techniques, making turpentine from pine trees is a safe and straightforward process.
What You Will Need
Making turpentine from pine trees requires a few specific tools and materials.
To successfully remove the bark, you will need a sharp knife, saw, or mechanical debarker.
If you plan on tapping the sapwood for the sap, you will need a drill, saw, and collection buckets.
To distill the sap into turpentine, you will need a distilling unit, heat source, and distilling flask.
Finally, to make use of the turpentine, it is recommended to have some clean containers for storage and a few items for your application, such as rags and paint brushes.
With these materials in hand, you will be ready to begin the process of making turpentine from pine trees.