Painting With Acrylics and Gold Leaf

When my kids were young, I used to buy them canvases and let them paint their little hearts out. I have their masterpieces sprinkled throughout the house. Well, I have this wall I’ve been wanting something new and abstract in my family room. Remember last November when I began this family room and bar makeover? Here it is. Ya what month are we in? Yup. Ok so only a couple more things before I share it all and it’s complete. And this is one of them. So today I’m channeling my inner artist and letting my creativity flow through art. And I’m going to share with you painting with acrylics and gold leaf in case you ever want to let some creativity flow like this. I preface this by saying I’m a total amateur. This is my first piece that I’ve taken seriously. But it definitely won’t be my last. So, with that, let’s go! (wink!)
- Canvas
- Acrylic Paints
- Gold Leaf
- Clear protective spray sealer
- Brushes
- An old plasic cup with water
- Glue
- Molding paste
- Plastic shower curtain
- Paper plates
First I want to start by telling you to READ this because I created this by reading some other blogs on how to do the gold leaf and followed her instructions. Had I known better I would have done things differently. Not that it’s wrong, but I’m prefacing by saying it seemed backwards… you’ll see why as we go along!
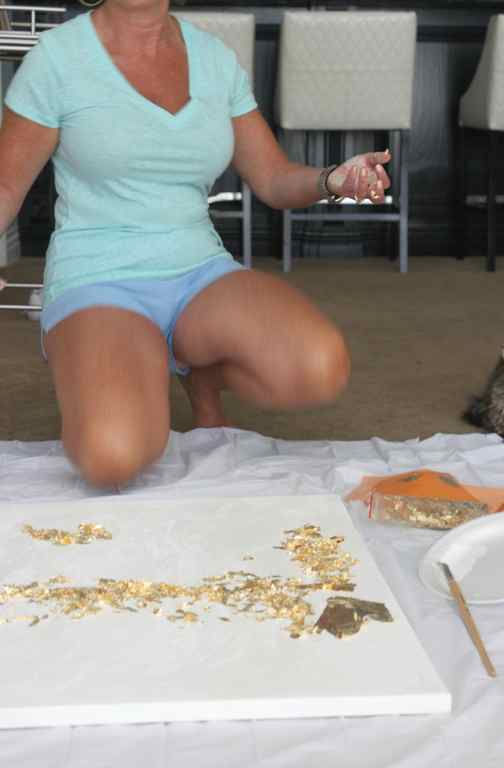
So first, use your shower curtain to lay your canvas on. I just plopped it on the floor in an open space. Since I’m not an artist, I don’t have an easel and I didn’t want to invest in one since I didn’t know how much I’d enjoy this and want to do more. And this made for easy and inexpensive cleanup.
I began by painting the base of the canvas white, and then using my fingers to apply the molding paste however it came to me. It was really kinda fun getting messy!

Side note… be wary of your furry friends at home. Angel was a curious kitty and I had to keep her away and she intuitively knew to not get too close after that.

The next step I did was the applying of the gold leaf. Here’s where I suggest doing this AFTER you paint your canvas the way you want. Apply the glue where you want to have the gold leaf. I tried the sheets and that was really a challenge to peel it back and keep it in one sheet. And to be frank, I wanted more texture and something more abstract, so the gold “sprinkles” were a better fit for what I wanted. So I did just that. I just sprinkled them… and laughed! I was like…. um I hope I’m doing this right! ha! I got messy with it again and used my hands to make sure it was placed and spread how I wanted it to set. Like I said, this was my first time, and whether or not I did it wrong or right, that’s how I did it. And it seemed to work. Once I let that set and dry, I sprayed a setter to keep it set.


After that, I just began to mix colors to begin my creation. That’s where I used the paper plates. It was the perfect place to mix the colors and throw em away when I was done. I used a big old plastic cup and put water in it for my brushes.

I worked around the gold leaf and the next thing I knew, I had this fun colorful piece of expression.


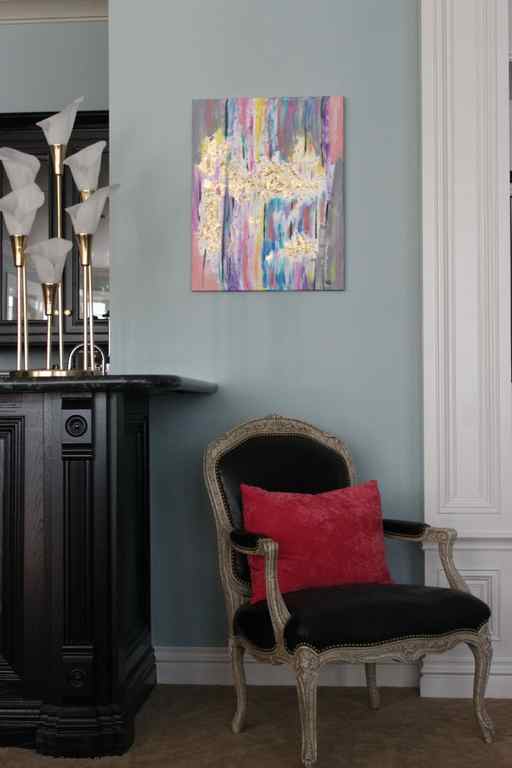


So what do you think? Do you like my creation? Would you try painting? I have to say….. I think I see more of these in my future and it EXCITES me! I had no idea I’d love it like I do. That is a cool thing… to learn something new about yourself. We never stop evolving.
Make the Ultimate Nature Art Project
Summer may be officially over, but where I am the warm weather is lingering. Hikes, walks, beach trips—these are all fodder and inspiration for my artwork, so I’m making the most of every minute spent outside while the balminess lasts. Recently I decided to see how many ways I could incorporate nature art into one mixed-media project, and I’m pretty pleased with the outcome. Amazing how much you can do with a few leaves and twigs when you combine them with great techniques!
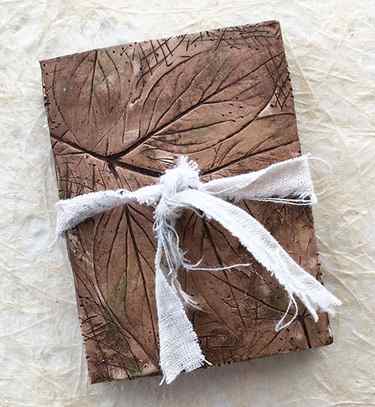
I thought a book would be a good vehicle for a bunch of different nature art mini-projects, but I didn’t want to spend a lot of time on the binding, so I went with an accordion. I made the covers out of polymer clay, which allowed me to embed some leaves—I love that fossilized look you can get with clay. For the interior, I created prints, a collage, and did some sketching for a 360-degree nature art view.


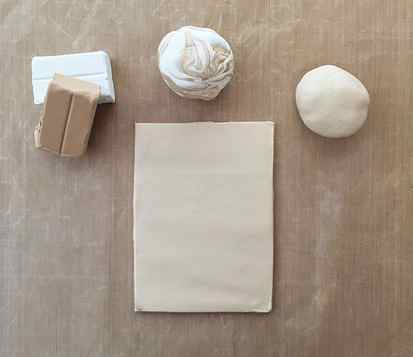
For the covers, I started with two 2-ounce blocks each of Tan and White Sculpey clay (two blocks were used for each cover). I combined the colors and conditioned the clay at the same time; you’ll see below that eventually the marbling gives way to a solid color as you continue to condition it by squishing it and squeezing it your hands (you can also use a clay rolling machine). The clay was rolled with an acrylic roller and cut to size, two pieces about 4 ¾” x 3 ½”, and about ¼” thick. I didn’t worry too much about trying to make it perfect, since I was going for a somewhat rustic look.
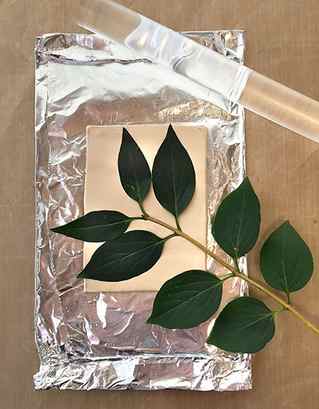
A small leaf sprig was pushed into the clay—I simply positioned it and used the roller to make sure the leaves and stem made good contact. I used the back side of the leaf, since that has more relief than the front. A few marks were made with an awl to add a little more texture, and the clay was baked in a dedicated oven according to the manufacturer’s instructions.
When the clay was cool I painted it with heavy-body acrylic paint, mixing burnt umber with a little bit of black. Make sure to use a stiff-bristled brush so you can get the paint into all the recesses.
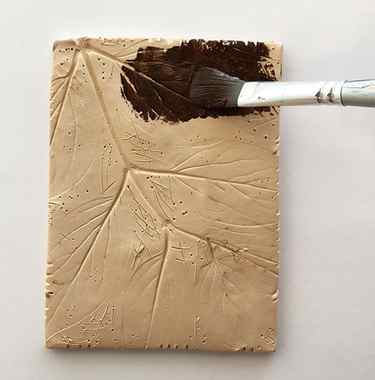
After the entire cover was painted I let it sit for a minute, then wiped off the excess paint with a paper towel. This is when all the great details in the leaves and the marks are revealed. If the result is too light, repeat the painting and wiping, and if it’s too dark, wipe off some of the paint with a damp paper towel or rag. Don’t forget to paint the sides and the edges of the inside cover, at least ½” in. Let the paint dry completely.
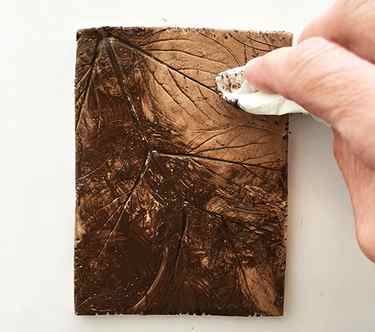
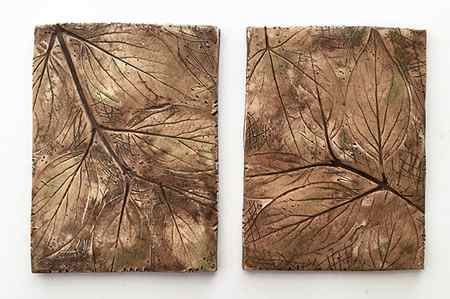
To add a little more visual texture I sanded the covers lightly with a sanding block, then added a few spots of green paint with my finger, rubbing them in so they’d look more cohesive and integrated.
For the inside pages I cut 2 long pieces of heavyweight art paper 4 ½” high, then folded them at 3 ¼” intervals to create 5 panels. The two pieces were glued together to create a 10-panel accordion with valley folds for the first and last folds.
To attach the pages to the cover I slipped a piece of scrap paper between the first and second panels and brushed PVA glue on with a glue brush. After removing the scrap paper I pressed the panel to the inside front cover and smoothed it with a bone folder. The back panel was attached to the inside back cover the same way, with one addition: Before gluing the accordion, I adhered a scrap of linen fabric across the inside back cover for a closure, using PVA. I slipped scrap paper between the covers and first and last panels to absorb any moisture from the glue, and the book was put under a weight to dry.
Here’s the book all tied up and ready to use!
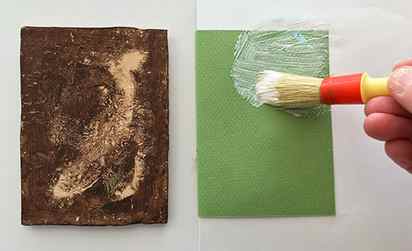
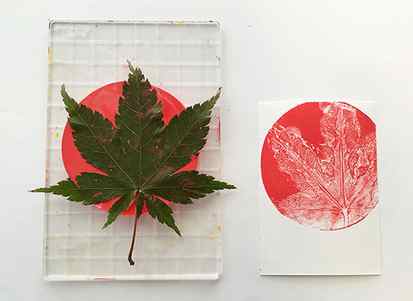
I’m a firm believer that a functional book should be filled and not just left on a shelf to look pretty. Since I dedicated this book to nature and summer, I used several techniques for small pieces of nature art on each page. I love printing with leaves and did a couple of techniques; here I brayered a thin layer of acrylic paint onto a small round Gelli Arts Printing Plate. I then pressed the back of a leaf onto the plate, removed it, and pressed the plate onto mixed-media paper. I love how so much of the leaf’s details are revealed.
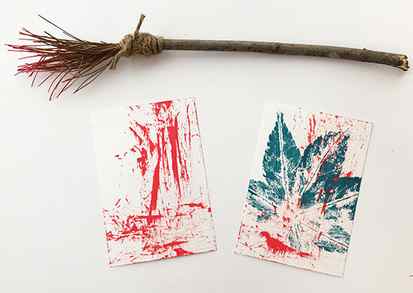
For this piece I created a rustic paintbrush by gathering some pine needles, gluing them to a twig, and wrapping them with twine to secure. Use the brush with acrylic paint and you get a fun sketchy background design. I printed a leaf directly on top by brushing the back with paint, then pressing it onto the paper.
Bonus tip: If you can’t use leaves the same day you pick them, place them between damp paper towel sheets and store them in a zipper-lock plastic bag in the refrigerator. The leaves should stay fresh for several days.
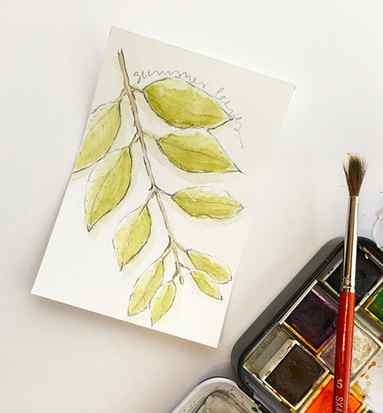
I included a watercolor sketch in the mix, too, using drawing and watercolor tips I picked up from Danielle Donaldson’s video, Creative Girl Workshop: Watercolor Illustrations. She has so many great techniques, don’t miss this one!
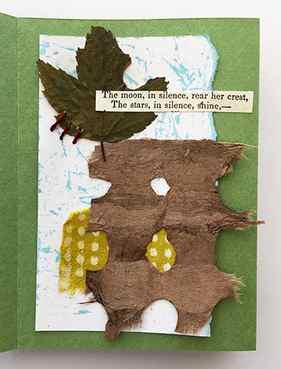
A quick collage was made from a pressed leaf, some paper scraps, and part of a poem taken from a vintage book. A quick tip for preserving leaves that I learned from Roxanne Evans Stout, author of Storytelling with Collage: coating pressed leaves with gel medium helps protect them.
I look forward to adding more to this book, and having it as a wonderful remembrance of the summer.
How do you create nature art? Leave a comment below, and be sure to check out more fantastic projects and techniques from our artists, who also use nature as their muse. Enjoy the rest of the summer!
This blog was originally published on 8/12/17. It was republished on 9/8/18.


