Eager to discover more incredible colors to use in your designs? Discover a whole spectrum of incredible colors with our new color tool, that helps to bring your projects to life.
How to make red color?

How to make red color? In this article: Understanding Color Theory Mixing Red Paint Creating Ice Red Mixing Red Polymer Clay Article Summary 7 References Red is the primary color, making it absolutely impossible to make it in pure color.
In this article: Understanding color theory Mixing red paint Creating ice red Mixing red polymer clay Article summary 7 references
Red is the base color, which makes it absolutely impossible to make it in pure color. On the other hand, you have the possibility to create shades and tones of red by mixing pure red with other colors.
Part 1 Understanding color theory
- Know that red is impossible to create. Red is the primary color and hence you do not have the possibility to create it by mixing other colors.
- Primary colors are actually colors that exist by themselves, without containing traces of other colors. Other primary colors outside of red are yellow and blue.
- Even if you don’t have the opportunity to create pure red, you can create shades by mixing pure red with other colors. Likewise, you can change the tone of any shade of red by doing this.
- Change the shade by adding other colors. If you mix pure red with other colors, you will get a different shade. You can combine pure red with most of the secondary and primary colors, and each will give a different result.
- When you want to combine red with other primary colors, you must be careful to use only a small amount of the other colors, so that you don’t lose the red completely. A small amount of added yellow will give an orange-red accent, but if you apply too much, you will get an orange. With a small amount of blue, you will have a purple and red hue, but if you add too much, it will be purple in the end.
- Mixing red with secondary orange will create an orange-red, but you must make sure that the amount of oranges you add is equal to or less than the red portion, so avoid having them more orange than red. In the same way, when you combine red with purple which is a secondary color, the amount of purple is equal to or less than the amount of red.
- You also have the option to always mix red with green with the last secondary color in small quantities. Since red and green are opposite of the color spectrum, combining them will give a shade from brown to red. If you add a lot of green to the mixture, the whole red will change to brown or muddy gray.
- Change the red by adding white or black. If you want to change the value of red without changing the shade, you will need to combine pure red with black or white.
- White will allow you to erase the colors, but if you apply too much, it will turn pink.
- With black, you can darken your red color. However, if you add too much, you will run into trouble distinguishing the result from the original red.
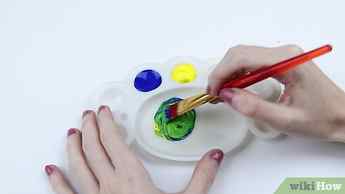
- Several panels are finished. As you paint, you’ll likely need several shades of red. You can create most of these shades by mixing pure reds and other colors.
- You should have at least yellow, red, white, blue, black, green, purple, and orange paint. Choose for each color the purest possible nuances.
- Pure Red Review. Apply some red paint to your painting. With a brush, place a line from this plate on a piece of paper.
- Look closely at the red trail. This will be your base sample which is why you should compare other shades of red that you will create later.
- Try mixing red and other primary colors. Apply red paint in two other places on the plate. Add a small portion of yellow to one side and a small amount of blue to the other.
- Either way, make sure to apply in small amounts and stir everything until everything is uniform. If you put in a lot of moonlight or another color, you can change the red a lot and get a different hue.
- Create a red trace orange (obtained with yellow) next to the red trace you made earlier. Place the red-purple trace (obtained in blue) on the other side of the red starting trace. Compare your different shades as well.
- Combine red, purple, and orange. Apply the red color to two new locations on the paint palette. Add orange paint to one spot and purple to the other.
- You should be able to mix the two colors evenly while getting the shades of red, but the red will be more noticeable if you use less moon or some of these secondary colors (purple and orange).
- Draw a line with the new obtained orange-red next to tracing the previous orange and red. Also, do a trace of the newly acquired magenta next to the old one. Compare the new shades to the previous shades as well as the redstart.
- Mix green and red. Put some red on the plate and mix it with green and put in a very small amount. It should get a reddish-brown.
- It is best to start with very small amounts of green. If desired, you can apply more gradually, but always in small quantities, to change the nuance. If you put on too much green, it could become brown or gray.
- Draw a trace of the new color formed on the test paper, somewhere near the redstart. Compare the different colors.
- Change of hue. Add two new drops of fresh red paint to the white in small amounts and a small black paint. Mix well.
- Draw a trace of dark red near the red and brown samples and compare them. The two colors are usually dark, but red-brown should have a noticeable brown shade, while dark red will be devoid of it.
- Also, apply a thin layer of red to the paper. Compare that to other shades.
Part 3 Create Red Ice
- Make frosts early. Making bright red snowflakes can be complicated, but the frost color will deepen over time. It’s best to glaze around 24 to 72 hours before you need the right shades to appear in place.
- This is especially important if you want to have only pure red ice with red food coloring. However, this can also apply to different shades of red if it is not as dark as you would like it to be.
- Taste the ice regularly. While trying to create lighter or darker shades of red, you can make myrrh iced if you don’t pay attention to the amount of dye used.
- Tasting the ice as you work will allow you to track changes in taste and avoid a bitter aftertaste.
- If your ice becomes bitter, you can adjust this by applying more scents. Use only pure flavors and add about 1.25ml to 250ml of ice.
- Add enough red dye to white powder. Place ice white in a non-reactive bowl and add red food coloring in small doses. Mix after adding a certain amount and continue until you get a bright red shade.
- Prefer to use gel or paste pigments, which are specially formulated for use on ice. The usual liquid dyes are not concentrated enough, and they will spoil the amount that needs to be added to obtain red ice as well as the taste of frost.
- As a general rule, about 1.25 ml of red dye should be added to 250 ml of ice white. If you are using dyes devoid of taste, you may need 5 ml for 250 ml of frost.
- Try mixing brown and red. If you want to make icing with a dark red color, but you only have a bright red pigment, the best way to do this is to add some brown.
- Add red food coloring to an ice-white plate by following the same procedure as above. Continue until you get a bright pink or bright red color.
- Add brown food coloring to the red ice and mix. The amount of brown dye you will need will be about a quarter or even less of the amount of red dye used. Once mixed, you should get a dark red color with a hint of brown.
- You can also mix brown cocoa powder with ice red on the other side to darken the color. Additionally, it will improve the aroma.
- Try other possibilities. You can change the frost color by mixing pure red pigment with other color pigments. Try different types of combinations, each time snow-white is placed in a container.
- Make a burgundy icing using 5 parts pinkish-red dye and 1 part purple dye.
- Get brown frosting by mixing 2 parts red dye and 1 part burgundy red coloring.
- Make red berries by mixing pink and red.
- Create a rust-colored red by mixing approximately 2 to 3 parts of red, 1 part of brown, and 5 to 8 parts of orange.
- Create a darker red by adding a small amount of black dye to the ice red.
- Create warmer shades of red. If you need warmer shades of red, but you have nothing but pure red polymer clay, mix it with a small amount of yellow or orange.
- Use golden yellow and avoid greenish-yellow, which can give a reddish-brown tint. Most orange polymer pastes should also do the job.
- If you don’t want to change the hue too much, just mix a small amount of the other colors with red. Knead, spread and mix the pasta until everything is smooth. If you need to change colors, add a little dough of the desired color and repeat the process.
- Make a red cooler. If you need cooler shades of red, mix the red polymer paste with a small amount of purple or blue.
- Light shades of blue with traces of purple are preferred to cool down shades of green with traces of green. Blue containing green can give a brown tint to the end result. The polymer core of violet will also make the majority of the issue.
- As with warmer tones, cold red pigments should be mixed by gradually pouring the chosen cold color onto the red polymer clay.
- Get a deepercolor. You can make the red polymer paste deeper by adding small amounts of black or brown paste. Regardless of which color you use, you should only add it in small amounts to avoid discoloring the base red drastically.
- Adding brown paste will gradually give a deeper color, but it will also change the shade making it more colorful.
- Adding black paste will shade the red shade further, but it will not change the color.
- Thin even red. You can dilute the red polymer paste by adding clear or white paste in small quantities.
- Place small amounts of the dough of your choice on the red sample. If the red is still not bright enough, add it gradually until you get the desired result.
- Adding white paste changes the value of the red, and if you apply too much, it may turn pink.
- Adding a transparent paste will make the color less vivid without changing its value. Up to a third of the final mixture may be a translucent paste, but if you exceed this amount, the red may be changed to a semi-transparent color rather than an opaque shade.
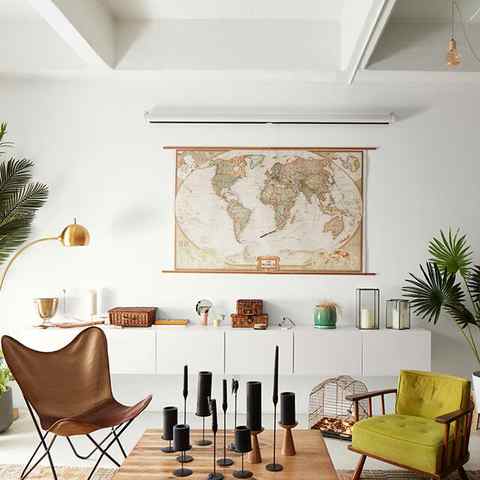
Learn about red’s symbolic associations, as well as how to pair with other colors to create a contemporary scheme. Pick up pro tips on how to design and decorate using the color red in this complete guide.
The color of blood and fire, red is a primal color that provokes an instinctive emotional reaction. Often associated with extreme emotional states such as anger, passion, and lust, it’s also these qualities that make crimson or scarlet assertive stimulating color choices when used in design schemes.
Skip to the end of the article to discover three on-trend red color palettes to use in your designs. You can also discover a whole spectrum of incredible colors to use in your designs with our new color tool.
But first! How color savvy are you? Take this quiz and find out:
What Colors Make Red?
Red is a primary color, alongside yellow and blue. This means that no colors can be mixed to create red, but red can be used to create other colors on the spectrum. Red sits at the end of the visible spectrum of light, next to orange and opposite violet.
Red is also a primary color in both the digital light-based RGB and print ink-based CMYK color models.

On a painter’s color wheel, red sits next to orange on one side, and magenta on the other.

Varieties of Red Colors
Reds can range in tints (when the red is mixed with white to create a paler color) or shades (mixed with black to produce a darker color). But there are also a wide range of identifiable reds that vary depending on whether they are mixed with blue, orange, yellow, or purple.
Red is actually a catch-all term for a very broad range of red colors. Many gained their own names throughout history. In this color wheel from the 1908 book The Colorist by J. Arthur H. Hatt, you can see that red sits alongside variations of red that range from warm orange red, through to more intense scarlet red and scarlet and more purple-red crimson.

Beyond this simple range, however, there are more than twenty historically named reds identified by color experts, including carmine (a highly saturated red), ruby (originating from the color of the namesake gemstone), cinnabar (an orange shade of red) and madder (which takes its name from a dye sourced from Rubia or “madder” plants).
Explore the diverse world of red with the Shutterstock color tool, which explores palettes and images related to a range of bold and beautiful reds, including cranberry red, cabernet, marsala, and blood orange.
Why are red, yellow, and blue the primary colors in painting but computer screens use red, green, and blue?


The color system that best matches the human eye is the red-green-blue color system. For additive color systems like computer screens, the primary colors of this type of system are red, green, and blue. For subtractive color systems like inks, the primary colors of this type of system are the opposites of red, green, and blue, which are cyan, magenta, and yellow. The red-yellow-blue painting color system is effectively a corruption of the cyan-magenta-yellow system, since cyan is close to blue and magenta is close to red. Public Domain Image, source: Christopher S. Baird.
Red, yellow, and blue are not the main primary colors of painting, and in fact are not very good primary colors for any application.
First of all, you can define any colors you want to be the “primary colors” of your color system, so that other colors are obtained by mixing the primary colors. Although there may be an infinite number of color systems, they are not all equally useful, practical, or effective. For instance, I am free to create a color system where I define light blue, medium blue, and violet as my primary colors. Even though I am free to define my primary colors as such, this color system is not very useful in general because no amount of mixing of these primary colors will produce red, orange, yellow, etc. Therefore, we should make a distinction between a color system and an effective color system. The effectiveness of a color system is best measured as the number of different colors that can be created by mixing the primary colors of the system. This set of colors is called the “color gamut” of the system. A color system with a large gamut is more able to effectively represent a wide variety of images containing different colors.
The most effective color systems are those that closely match the physical workings of the human eye, since it is ultimately the human eye which experiences the color. The human eye contains a curved array of light-sensing cells shaped like little cones and rods. Colored light is detected by the cone cells. The cone cells come in three varieties: red-detecting, green-detecting, and blue-detecting. They are so named because the red cone cells mostly detect red light, the green cone cells mostly detect green light, and the blue cone cells mostly detect blue light. Note that even though a red cone cell predominantly detects the color red, it can also detect a little bit of some other colors. Therefore, even though humans do not have yellow cone cells, we can still see yellow light when it triggers a red cone cell and a green cone cell. In this way, humans have a built-in color decoding mechanism which enables us to experience millions of colors, although we only have vision cells that predominantly see red, green, and blue. It should be obvious at this point that the most effective color systems are ones that closely match the human eye, i.e. color systems that mix red, green, and blue light.
There is a slight complication because there are really two main ways to create a light beam. We can either create the light directly using light sources or we can reflect white light off of a material that absorbs certain colors. A system that creates light directly is called an “additive” color system since the colors from the different light sources add together to give the final beam of light. Examples of additive color systems are computer screens. Each image pixel of a computer screen is just a small collection of light sources emitting different colors. If you display an image of a pumpkin on your computer screen, you have not really turned on any orange-emitting light sources in the screen. Rather, you have turned on tiny red-emitting light sources as well as tiny green-emitting light sources in the screen, and the red and green light add together to make orange.

The top image shows how red, green, and blue add to make other colors, such as in computer screens. The bottom image shows how cyan, magenta, and yellow subtract to make other colors, such as in inks. Public Domain Image, source: Christopher S. Baird.
In contrast to an additive system, color systems that remove colors through absorption are called “subtractive” color systems. They are called this because the final color is achieved by starting with white light (which contains all colors) and then subtracting away certain colors, leaving other colors. Examples of subtractive color systems are paints, pigments, and inks. An orange pumpkin that you see printed in a newspaper is not necessarily created by spraying orange ink on the paper. Rather, yellow ink and magenta ink are sprayed onto the paper. The yellow ink absorbs blue light and a little green and red from the white light beam, while the magenta ink absorbs green light and a little blue and red, leaving only orange to be reflected back.
There are therefore two equally-valid methods for creating color: additive systems and subtractive systems. With this in mind, there are thus two color systems that are most effective (i.e. most able to match the human eye): (1) an additive system that creates red, green, and blue light and, (2) a subtractive system that creates red, green, and blue light.
For an additive system, light is created directly. This means that the primary colors of the most effective additive color system are simply red, green, and blue (RGB). This is why most computer screens, from iPods to televisions, contain a grid of little red-, green-, and blue-emitting light sources.
For a subtractive color system, a certain reflected color is obtained by absorbing the opposite color. Therefore, the primary colors of the most effective subtractive system are the opposites of red, green, and blue, which happen to be cyan, magenta, and yellow (CMY). This is why most printed images contain a grid of little cyan, magenta, and yellow dots of ink. Cyan is the opposite of red and is halfway between green and blue. Magenta is the opposite of green and is halfway between blue and red, and yellow is the opposite of blue and is halfway between red and green.
In summary, the most effective color systems are red-green-blue for additive color systems and cyan-magenta-yellow for subtractive color systems.
So where did the red-yellow-blue color system come from that they teach in elementary school? Typically, students first encounter color concepts when painting in an art class in grade school. Paint is a subtractive color system, and therefore the most effective primary colors for painting are cyan, magenta, and yellow. Note that high-quality paintings typically do not use just three primary colors since more vivid scenes can be achieved using dozens of primary colors. But when teaching art, it’s easier to start more simply; with just three primary colors. Now, to a little grade-schooler, the words “cyan” and “magenta” don’t mean much. Furthermore, to an undiscerning youngster’s eye, cyan looks awfully close to blue and magenta looks awfully close to red. Therefore, cyan-magneta-yellow becomes corrupted to blue-red-yellow. Elementary art teachers either ignorantly perpetuate this less effective color model (because that’s how they were taught as children), or intentionally perpetuate it (because it’s just too hard to teach six-year-old’s the difference between cyan and blue). Historical tradition was also a prime driver of the red-yellow-blue color system since it was historically thought to be effective before the details of human vision were understood. Since the red-yellow-blue color system is less effective, it is not really used anywhere these days except in elementary school art.