The following is the full video tutorial if you prefer to learn through videos. Below the video is the step by step tutorial with pictures and written steps.
How To Paint Roses In 4 Easy Steps – Acrylics For Beginners
Learn how to paint roses with acrylics, in 4 easy steps – perfect for beginners. After this tutorial is done you’ll know how to recreate a gorgeous cabbage rose in any color you wish.
You can use this one-stroke technique to paint roses in your own project like on rocks, on glass, on wood etc. Or practice your new found skills in the vintage rose bouquet painting tutorial at the end of this post.
If you don’t have time to read the whole tutorial now, you can save /pin it it for later. And if you’re craving more easy flower painting tutorials, check out my how to paint lavender with q-tips tutorial (it’s a popular one)
Let’s get started with our roses…
How To Paint a Rose Step-by Step
In this section you’ll learn the 4 step process to painting easy, simple 3D roses. You can paint these roses as a part of a bouquet or on their own- either ways they’ll looks absolutely gorgeous!
I love using this method because you’ll get beautiful roses each and every time without hitch.
The first thing you’ll need is your paint color.
Choose Your Acrylic Paint Color
Choosing your acrylic paint color is the fun part!
Roses come in a variety of colors from red, yellow, pink, purple, blue and beyond. You can’t pick a wrong color – just use one that calls out to you. In terms of acrylic paint, you can use any soft/heavy bodied acrylic paint or craft paint works too. Just make sure it’s opaque acrylic paint- not transparent.
Next you’ll learn how to make your shadows and highlights out of any color you choose (which is your main color).

Roses in 4 Acrylic Paint Colors
- Main color = paint out of the tube
- Shadow color = main color mixed with a tiny bit Burnt Umber (or any dark brown)
- Highlight color = main color mixed with Titanium White (or any white)
- Extra highlight color = titanium white
In the end you should have 4 piles of acrylic paint on your palette and ready to use: shadow, main color, highlight color, extra highlight color.
Step 1- First Rose Layer (one-stroke)
Using a small round brush (I used a size 6), take some of your main paint color and use small curved strokes to fill in your rose shape. I find the shape of the stroke look like commas or mini boomerangs. The strokes should look like they are slightly overlapping each other too- just like in a real rose (see below). And notice the outer petals look angular -like triangles.
The comma strokes don’t have to be perfect either since we will be layering the paints in the next steps. Trust yourself and know your rose will look amazing in the end.
For more inspiration of rose shapes/petals take a look at these real rose pictures on unsplash. I find looking at a reference photo helps when painting the roses in.
Step 2- Adding Shadows To Your Rose
Clean off your brush and pick up some of the shadow color on your brush. Use the same comma stroke and paint in your rose petal shadows. Try to fill in the white space around and in between your strokes from step 1.
Step 3 – Add Your Rose Petals Highlights
Clean off your brush and pick up some of the highlight color on your brush.
Starting at the midway point of your rose, paint some more comma strokes (petals) all the way to the outer petals. These strokes will be slightly larger since they are the outer petals. Also, the reason we don’t add the highlighted petals in the middle of our rose is so the rose will look more 3D and create depth.
And don’t worry if your highlight comma strokes overlap the layers below- they’re suppose too! It doesn’t matter which ones you cover either. Just make sure that some of the main color and shadow color is still showing through in some places. We want some of the shadow and main color to peep through.
If you end up covering too much- no fret! I’ll show you how to fix that in the YouTube tutorial.
Step 4 – Add Extra Highlights
Clean off your brush and pick up some titanium white. Add a thin line of pure white to just the edges (not the whole petal) of few of the outer petals. You don’t need to add them to all the outer petals just a few will do.
How To Paint A Bouquet Of Roses
If you want to practice your roses, I’ve got an easy vintage rose bouquet step by step tutorial for you below. It’s complete with rose leaves, foliage, stems and a pretty pink bow. It makes a great valentine’s and mother’s day painting gift – in lieu of a real bouquet.
Another fun idea is to paint your roses in a wreath, just like this pretty rose wreath tutorial by Tracie from Step-By-Step painting.
Let’s get to the tutorial…
How to Paint Roses in Acrylic (Easy Tutorial for Beginners)
In this tutorial, We will show you how to paint roses in acrylic in few easy steps. This step-by-step tutorial is a great start for beginners. If you’ve been thinking about learning to paint or maybe paint something during a weekend, this tutorial is it!  Playing with colors is one of the greatest joys for me and making flowers is another one. So, I thought why not paint flowers this time and show you how to paint flowers in acrylic. Initially, I thought of painting sunflowers but eventually shifted toward roses. Do you know what is the best thing about painting a rose or any other flowers? That is, you don’t need to paint the elaborate and intricate details of flowers to make them look beautiful. Even a beginner can paint these roses and hang them on the wall. This is probably why a lot of people start painting acrylic with flowers. Although these roses are easy to paint and good to start with, there is a lot to learn about the acrylic painting medium and techniques of acrylic painting. I am not a professional and have been working with acrylics for just over a year. I’ve learned a lot about this painting medium from the book Complete Guide to Painting in Acrylics by Lorena Kloosterboer. It is the bible of acrylic painting technique. If you want to go deeper into acrylic, I recommend this book. An 8×8 inches canvas would cost around $2, a set of 12 acrylic paint tubes cost $8, and a set of 8-10 watercolor paintbrushes cost around $5. If we calculate an average cost for our how to paint roses in the acrylic project, it would be around $5 as you can reuse the paintbrushes and have most of the paints left even after painting the roses.
Materials
Tools
- Paintbrush
- Pencil

How to Paint Roses in Acrylic
Instructions
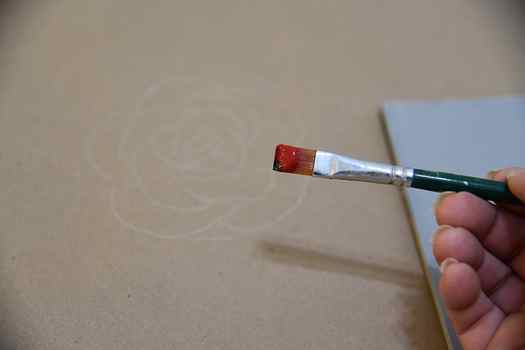
Step 1: Draw a Rough Pattern
You can apply a coat of white paint before starting, though this step is optional. If you do paint the white layer, make sure it dries entirely before you start the rose painting. After the white coat dries, use a pencil to trace the positions of each flower to get an idea.

Step 2: Paint the Base Coat
Select a color for the background of the rose painting. We’ve prepared a teal shade to paint the canvas. Simply paint the canvas from one side and continue painting all the way to the other side.

Step 3: Create Ombre Shade on Base Coat
Try creating an ombre shade if possible. To create an ombre shade of teal, you need to dip the brush (from the 2nd and every next time) into white paint after dipping it into teal paint. And then paint the canvas until it is filled entirely. Once you are done painting the canvas, allow it to dry completely before painting the roses.

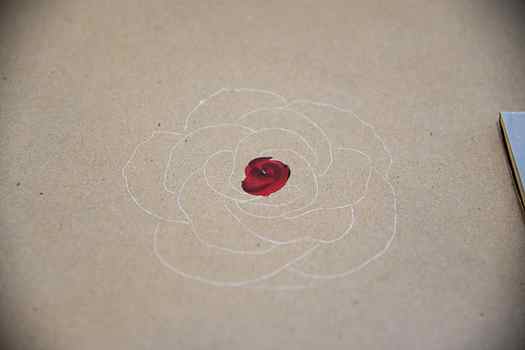
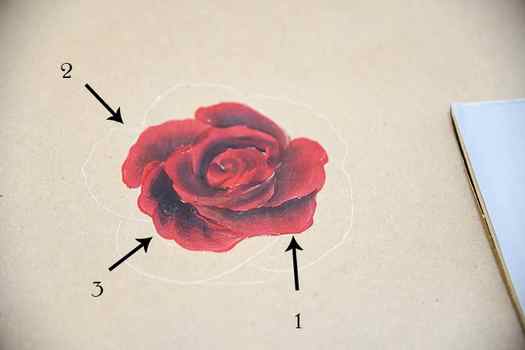
Step 4: Start the Rose Paint Outline
We have prepared a dark shade of pink for the first rose. If you’re planning to paint a different colored rose, just make sure to choose the darker shade of that color. Paint a rough round outline of the rose with random dashed strokes around the outer circle of the rose pattern.

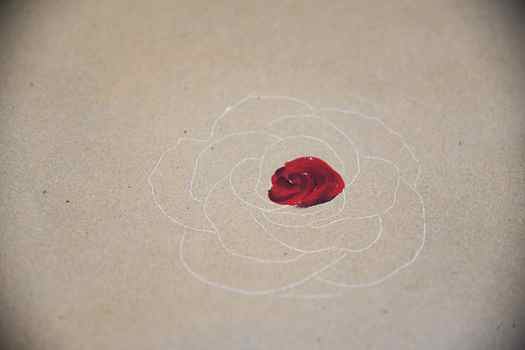
Step 5: Fill the Outline with Rough Strokes
Now fill the round rose outline with the same shade but do not fill the outline; paint in a circular motion with dashed strokes inside and outside the round outline.

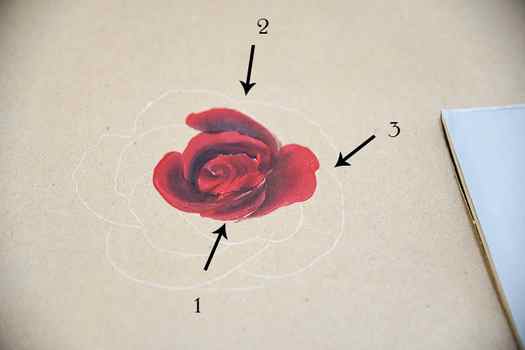
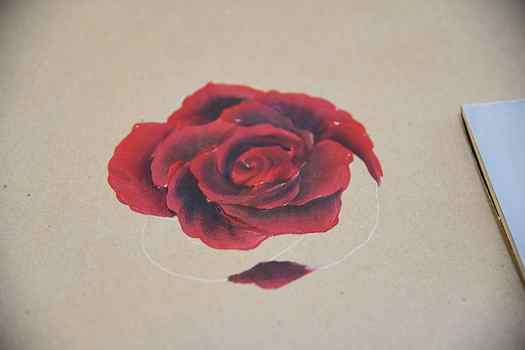
Step 6: Add Strokes with a Different Shade
For the next strokes, we have selected a lighter shade of pink and similarly painted dashed circular strokes over the previously painted rose pattern. Overlap certain parts of the previously painted pattern but do not paint over it entirely. Use a thinner brush (3 or 4) to give the painted pattern a rose-like shape.

Step 7: Add a 3rd Shade
For the 3rd shade, we prepared another lighter shade of pink and painted circular dashed strokes around the center of the rose pattern. Make sure not to overlap the other 2 shades too much. The 3 different shades of pink should be clearly visible.

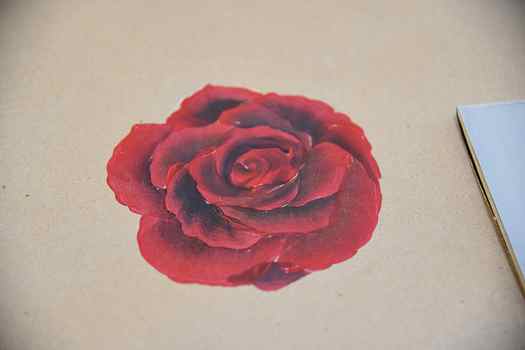
Step 8: Work with Overlapped Strokes to Smoothen the Pattern
Select a thin brush of size 3 or 4 to paint around the outer side and slightly overlap some of the previous shade patterns. Similarly, we’ve painted 2 more roses.

Step 9: Paint Leaf Outline
Use a green shade of acrylic paint and paint the leaf outlines around the roses.

Step 10: Fill the Leaf Outlines
Fill the leaf outlines with the selected green acrylic paint.

Step 11: Add Shades to the Leaves

Use different shades of green acrylic paint to give the leaf patterns a nice and finished look. Use 2 to 3 different shades of green acrylic paint to fill each leaf from one side to the other side. Simply paint with straight and smooth strokes. You can give the painting a final touch with each of the shades used.
Step 12: Final Touches
Allow the paint to dry when you’re done painting. And done! You can use different shades of acrylic paints for variation. Also, adding more or less rose and leaf patterns can also bring a different look to the final piece. The possibility is endless, so get creative and learn how to paint roses today!

We really hope that you enjoy this project if you get a chance to give it a try, it’ll be worth it, we can tell you that! We would really appreciate it if you share this with the people who may like to learn how to paint roses in acrylic. Share pictures of your version of the painting with us if you do give them a try. You can share your picture with hashtag #craftaholicwitch on Instagram or Facebook or just DM your picture to us on Instagram or Facebook page.
BTW, If you enjoy our how to paint roses tutorial, you can also check out our abstract painting tutorial for beginners.
Get Started Painting a Red Rose
1. Using the chisel edge the first few strokes are very small comma or u strokes opposite each other with the Black to the lower side.
I alternated between black and burnt umber throughout this lesson. You choose when and where you want to use which color, or you can just use the black, it does give it a lot of drama but you have to be very careful to keep it a slight amount.
2. Look at your pattern, carefully determine which stroke should come next. The petals grow in a spiral around the center. I chose the one closest to the center.
You will note it is not a perfect comma stroke. Don’t worry about being perfect! We are going for an effect not perfection or realism.
Reload your brush frequently, if not every stroke, as you work. If the black starts taking over the red, wash and reload.
3. Working around the center stroke in your next two strokes. These are comma strokes.

Remember, you can use the same pattern over and over and you will never create the exact same rose, embrace the diversity.
4. Add the next 3 strokes. The first one is more of a chisel stroke than a comma stroke. You will also note that the comma strokes vary in size and width.
Keep your Colors Clean
5. By this time really check your brush to be sure the shadow color is not beginning to take over your red.
The next 3 strokes are shown in order here but you will note how #3 is too dark, the shadow color has walked across to the red and overpowers it. I will over-stroke that petal with more red but it is hard to cover the dark well. It will tend to dull that petal.
6. Continue to layer petals in a logical order. The video will be most helpful when you view it. The outer petals really start to make it look like a rose. You can add in a touch of a more orange red to the red side of the brush to give it a highlight.
Note on Highlighting Reds
To keep the rose looking red and dramatic only highlight with an orange, if you use white it will tend to make it look pink.
7. Now add the final petals and step back to see what it may need. Do you have some gaps showing?
Just tap some paint in with the corner of your brush, or if you like, use a script liner with a touch of paint on it.
In the video I paint the red rose on a light colored background. With red you want to undercoat with a red to give it depth. Red acrylics are not opaque and you need that extra layer to achieve that deep rich red.

Please enjoy and share!


