Personally, I think that this method of blending colors is much better than the previous version! It feels more intuitive and gives better looking and more traditional results, especially for anyone coming from a background working in traditional media.
Standard VS Perceptual Color Mixing
Hello! My name is Liz Staley and I’m a long-time user of Clip Studio Paint (I started using the program back when it was known as Manga Studio 4!). I was a beta-tester on the Manga Studio 5 program and for Clip Studio Paint, and I have written three books and several video courses about the program. Many of you probably know my name from those books, in fact. I write weekly posts on Graphixly.com and on CSP Tips, so be sure to come back every week to learn more Clip Studio Tips and Tricks from me!
If you’ve been following the news about Clip Studio Paint V 2.0 then you probably have seen that there’s a new color mixing method for brushes that is more realistic than the previous version. I wanted to see how the new method was different from the old, so that’s our topic for this week!
In this article we will cover the following topics:
Standard VS Perceptual Color Mixing
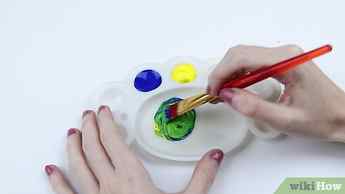
Let’s mix some colors.
Standard VS Perceptual Color Mixing
To start with I wanted to use each method to make a color wheel so that I could compare the look of each one. To do this I created a new canvas and made three circles, one for each of the Primary Colors, in a triangular pattern.
Next I chose the Opaque Watercolor brush tool. Before we start, let’s check which color mixing method we’re on. To do this, click on the wrench icon in the bottom right corner of the Tool Property window for the Opaque Watercolor tool. This will open the Sub tool detail window. Click on the “Ink” category on the left and then check the Mixing mode setting.
By default this should be set to Standard, which is the old color mixing method.
Now, using the Opaque watercolor tool, I’m going to take each of my primary colors and blend them together to try and create orange, green, and purple. The results are below. The squares show the color from the middle of the blend.
The orange and purple are okay, but the green is pretty muddy. I’d actually call the purple more of a magenta, but it’s pretty close.
Follow the above directions to change the Mixing mode from Standard to Perceptual. Perceptual is the new color mixing option that blends colors more like how they would blend with paints or other traditional media.
The results of the same color blending with the perceptual mixing mode is shown below.
The orange is more saturated, the purple is deeper and less pink, and the green looks fantastic! I was actually surprised at how different the results were!
With the Perceptual color mixing there are also Brightness Correction options that are available. You can have no correction or a lot of correction depending on the brightness that you want from the mixed color. Below I have done the same color mixes but with more brightness correction in each row to see the results.
As you can see, the more Brightness correction, the lighter the results of the color mixing will be. I feel this is really evident in the green mix of each row.
Now that I’ve done some tests, I wanted to test each color mixing method on a more practical application to see how they compare. To get started I chose a drawing of mine from a few years ago and laid down some flat colors on a separate layer from the lineart. Then I made a copy of the flat colors layer so I could try the painting with both the Standard and Perceptual color mixing.
I continued using the Opaque Watercolor brush to do the shading. The example below shows the Standard color mixing.
Then, using the same colors and the same brush tool, I tried again with the Perceptual color mixing. Those results are shown in the image below.
Comparing my two experiments, to me it looks like the mixed colors are more vibrant in the Perceptual color mixing. Maybe this is because colors don’t get as muddy as with the Standard mixing. I actually also found it easier to get smoother results in this mode and to add highlights and bits of reflected light as well.
Vanilla Undercover: Underpainting Blending Combinations for Realistic Color – Soft Lavender Swatch

Real shade is not darker color, real shade is desaturated color.
To create the murky shade colors that Copic Marker does not make, Vanilla Arts Company teaches Online Workshops using the underpainting method. Students learn to layer colors realistically rather than blend.
Underpainting creates natural colors found in everyday life.
Workshops & Coloring Kits Featuring Violet Copic Markers:
click images for more information and to enroll


Learn more about the Copic Markers in this blending combination:
(click the pic to read test results and tips at MarkerNovice.com)
Testing takes time.
We’ll add test results from the colors in this swatch recipe as they’re published.
Learn more about your Copic Markers:
click images for more information


Elena Cazares is a Vanilla Arts student with beautiful sense of color and style. She is a hurricane of positive creative energy.
Elena runs Violeta-Ink.com, an online boutique shop specializing in Copic Markers and coloring accessories. Join Elena’s Copic Facebook group here for the latest coloring news and Copic Marker updates.

Recent Articles:


Elena Cazares
Elena Cazares is a Vanilla Arts student and online instructor with a beautiful sense of color and style. She is a hurricane of positive, creative energy.
Elena runs CraftsForPaws.com, an online shop for Copic Markers and Copic supplies. C4P donates 100% of profits to rescue and care for worst-case stray dogs and cats in Dallas and Fort Worth, Texas.


Vanilla Art Company, 540 N. Lapeer Rd #285, Lake Orion, MI 48362, United States [email protected]
Vanilla Arts Co. LLC and MarkerNovice.com are participants in the Amazon Services LLC Associates Program. As an Amazon Associate we earn from qualifying purchases at Amazon.com.
Vanilla Arts Co LLC participates in affiliate programs with Dick Blick, Ranger Inc, Sarah Renae Clark, and other sites. Vanilla Arts Co. LLC and Marker Novice are compensated for purchases you make using our affiliate links.
We absolutely do not link to products or services we have not tested. Recommended products are all used in our studio frequently.
Copyright 2023 Vanilla Arts Company, LLC | all rights reserved