Thanks! We’re glad this was helpful.
Thank you for your feedback.
As a small thank you, we’d like to offer you a $30 gift card (valid at GoNift.com). Use it to try out great new products and services nationwide without paying full price—wine, food delivery, clothing and more. Enjoy! Claim Your Gift If wikiHow has helped you, please consider a small contribution to support us in helping more readers like you. We’re committed to providing the world with free how-to resources, and even $1 helps us in our mission. Support wikiHow
How to Draw a Christmas Landscape
wikiHow is a “wiki,” similar to Wikipedia, which means that many of our articles are co-written by multiple authors. To create this article, 22 people, some anonymous, worked to edit and improve it over time.
This article has been viewed 219,558 times.
The key to drawing a Christmas landscape is in the details. You have to be creative to make your snowy landscape look different than all the other snowy landscapes. Here are two methods to draw a Christmas landscape.
Steps
Method 1
Method 1 of 2:
First Method
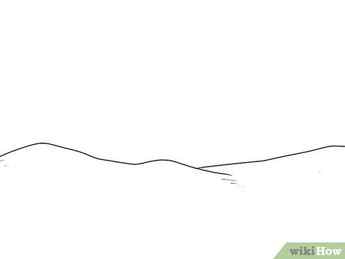
Start by drawing the land. Since this is a winter landscape, the ground will be covered with snow.
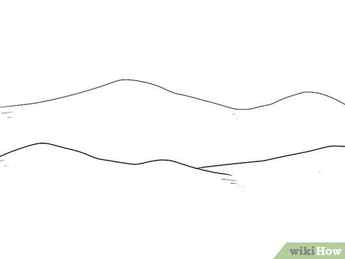
Draw another curved line on the background of the first.
Advertisement
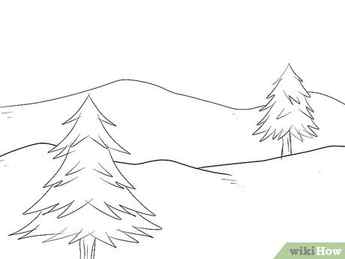
Draw two or more pine trees. If you notice, they look like triangles with jagged edges.
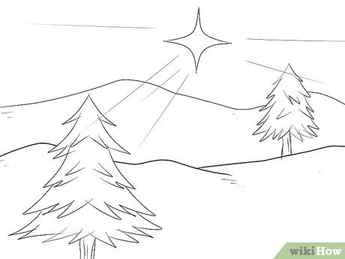
Add a Christmas star in the sky. Add a star on each of the trees. Don’t forget to put a little bit of snow on the tree.

Paint your drawing. Use soft colors like sky blue, and a very pale purple and white for the sky and snow. And, of course, paint the trees green. Use gradients and texture as you wish.
Advertisement
Method 2
Method 2 of 2:
Second Method

Draw curvy lines. This will eventually become snow and hills.

Start sketching the sky. Draw clouds, and, if desired, add a sun or moon. Make sure that you don’t add anything onto the bottom section.
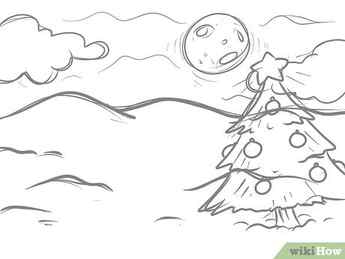
Draw a Christmas tree. Add lights and ornaments.
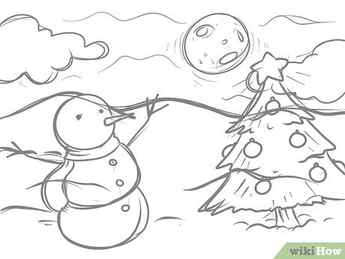
Add in a snowman or two.
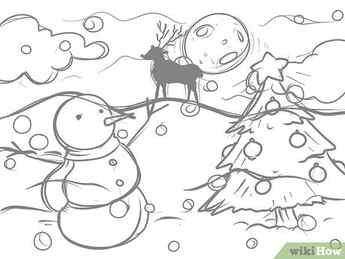
Add details. Consider adding falling snow, or animals such as reindeer.
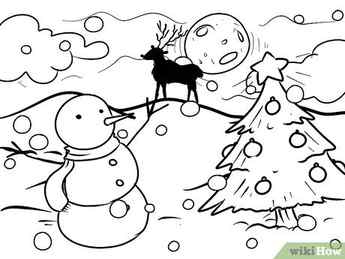
Outline your drawing with permanent media (like ink,marker,sketch pen,etc. ). Make sure to erase all your guidelines.
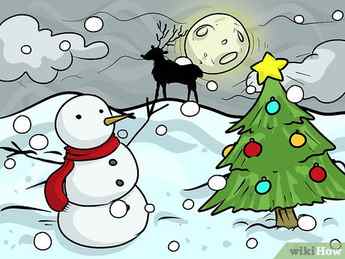
Color it and you’re done!
Advertisement
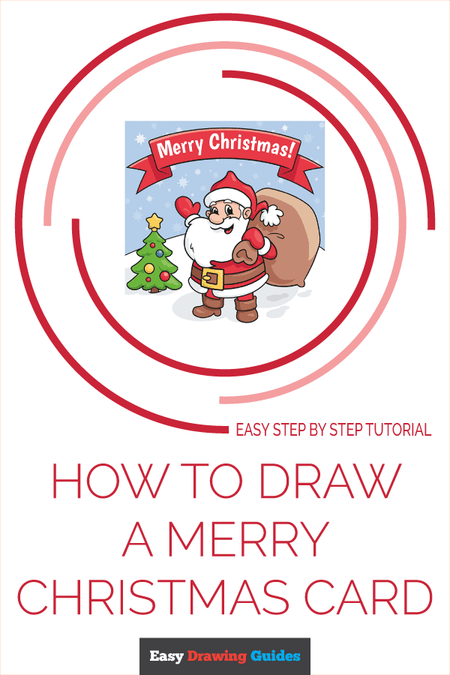
How to Draw a Merry Christmas Card
Learn how to draw a great looking Merry Christmas Card with easy, step-by-step drawing instructions, and video tutorial.
By following the simple steps, you too can easily draw a perfect Merry Christmas Card.

Complete Merry Christmas Card drawing
Would you like to learn how to draw a Merry Christmas Card? Now you can with the help of this festive winter scene.
Christmas cards have a long history. Sending letters around the turn of the year had long been a tradition in England, one which gained popularity during the 1800s as the postal service became fast and affordable.
In 1843, one socialite found he had too many friends and family members to write personal letters to.
Scroll down for a downloadable PDF of this tutorial.
He solved the dilemma by having a thousand copies of a Christmas-themed image printed. Thus the first Christmas card was born.
Today, Christmas cards like the one in this drawing tutorial combine elements from many different belief systems – for example, the gift-giving elf of European folklore, the evergreen tree of ancient European nature worship, and elements of the Biblical story of Christ.
If you liked this tutorial, see also the following drawing guides: Christmas Pudding, Christmas Lights, and Christmas Stocking.
Step-by-Step Instructions for Drawing a Merry Christmas Card

How to Draw a Great Looking Merry Christmas Card for Kids, Beginners, and Adults – Step 1

1. Begin by drawing Santa Claus. Use curved lines to outline the eyebrows, eyes, nose, and top of the mustache. Shade a small oval within each eye to indicate the pupil.
Easy Merry Christmas Card Drawing – Step 2

2. Continue to detail the face. Use curved lines to enclose the sides of the face, the ears, the bottom of the mustache, the open, smiling mouth, and the tongue. Use curved lines to enclose the brim of the hat.


Easy Merry Christmas Card Drawing – Step 3

3. Use a series of curved lines that meet at jagged points to outline the long, white beard. Then, use curved lines to outline the floppy top of the hat.
Finally, use “U” shaped lines to enclose the cloudlike pom pom at the tip of the cap.
Easy Merry Christmas Card Drawing – Step 4

4. Use curved lines to enclose the irregular shapes of the arm, cuff, mitten, and end of the bag held in the hand. Use a long curved line to outline the bulky sack full of toys.
MORE DRAWING TUTORIALS:
How to Draw Rudolph the Red-Nosed Reindeer

How to Draw Santa’s Sleigh

How to Draw a Christmas Stocking

Easy Merry Christmas Card Drawing – Step 5

5. Use curved lines to enclose the remaining cuff and mitten, and to texture the beard and bag. Outline the round sides of the jolly torso with curved lines.
Then, draw a belt around his middle. For a buckle, draw a small oval and two successively larger squares. Draw pairs of curved lines between the buckle and the sides of the torso.
Easy Merry Christmas Card Drawing – Step 6
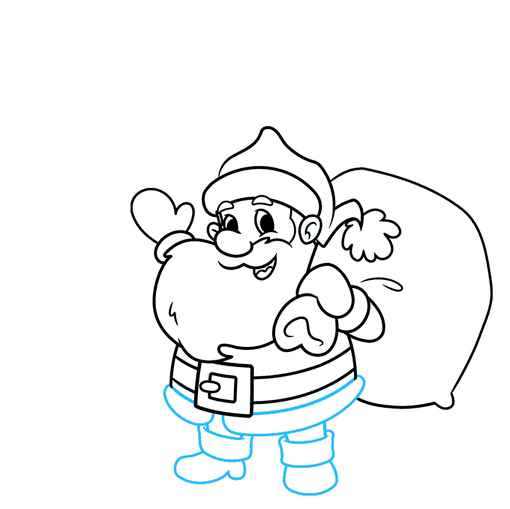
6. Use curved lines to enclose a number of irregular shapes – the elongate hem of the garment, the legs, the tops of the boots, and the boots themselves.
Easy Merry Christmas Card Drawing – Step 7

7. Draw a Christmas tree in the background. Use a series of curved lines to enclose the boughs of the evergreen tree, wider at the bottom and smaller at the top.
Draw a small circle at the top of the tree, and use curved lines to form the trunk and drifting snow. Then, draw a five-pointed star at the top of the tree.
MORE DRAWING TUTORIALS:
How to Draw Frosty the Snowman
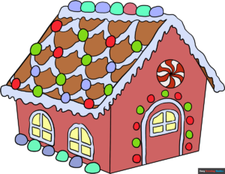
How to Draw a Gingerbread House
How to Draw the Elf on the Shelf
Add More Details to Your Merry Christmas Card Picture – Step 8
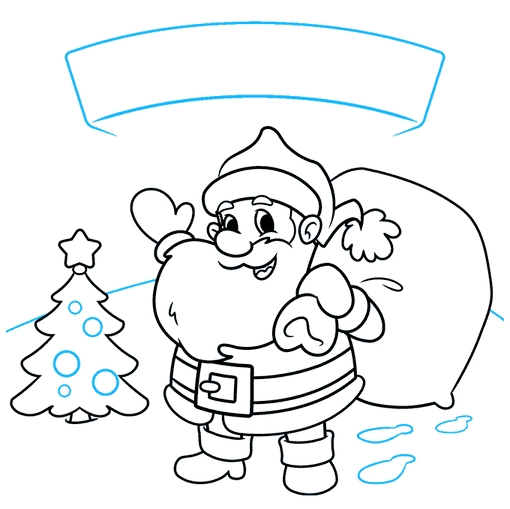
8. Draw different sized circles on the tree to indicate ornaments. Outline irregular shapes behind Santa to indicate footprints in the snow, and use a long curved line for the horizon.
Then, begin outlining a banner along the top of the card. Sketch a curved rectangle, and allow the lines to extend beyond the bottom corner.
Complete the Outline of Your Merry Christmas Card Drawing – Step 9

9. Draw “V” shaped lines on each side of the banner, and connect them to the banner with straight lines. These are the ribbon-like ends of the banner. Then, write the words “Merry Christmas!” across the banner.
Color Your Merry Christmas Card Drawing
Color your Christmas card cartoon. Red and green are apt colors.
Easy, step by step Merry Christmas Card drawing tutorial
Click HERE to save the tutorial to Pinterest!
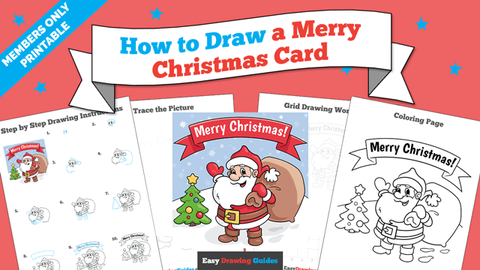
Merry Christmas Card Drawing Tutorial – Easy & Fun Printable Pages
Join now and get immediate access to thousands of printable drawing instruction and practice pages!

MEMBER TROUBLESHOOTING
Still seeing ads or not being able to download the PDF?
First, check that you’re logged in. You can log in on the member login page.
If you’re still not able to download the PDF, the likely solution is to reload the page.
You can do this by clicking the browser reload button.
It is a circular arrow-shaped icon at the top of the browser window, typically found in the upper-left side (you can also use keyboard shortcuts: Ctrl+R on PC and Command+R on Mac).
Step by Step Drawing tutorial on How to Draw Christmas Celebrations
Christmas is a holy celebration of christian community. They celebrates this holy occassion every year on 25th December. If you want to draw Christmas celebration, follow our tutorial step by step for the perfect picture.
View As : Standard Printable Step by Step
How to Draw Christmas Celebrations
Step 1
First commence the tutorial by making rectangles.
Step 2
Draw outline for doors, window and other things for decorations.
Step 3
Draw outline for some toys to decor.
Step 4
Make outline for window and curtain.
Step 5
Draw curtain and furniture.
Step 6
Draw flower bokay.
Step 7
Make outline for christmas tree.
Step 8
Enhance christmas tree with bulb and stars.
Step 9
Enhance lower part of tree.
Step 10
Draw R at the lower part of tree.
Step 11
Make stand of christmas tree.
Step 12
Enhance stand of tree.
Step 13
Make diagram of gifts.
Step 14
Enhance gifts.
Step 15
Make toys to decorate the house.
Step 16
Enhance toys.
Step 17
Enhance features of toys.
Step 18
Draw bottles.
Step 19
Make edges of doors, window, lamp and bed.
Step 20
Enhance floor, doors, window, lamp and bed.
Step 21
Enhance all items including christmas tree.
Step 22
Finally, make necessary improvements to finish.