By the time the average reader works through 50 tutorials, they should be 10x better at drawing than someone who didn’t follow my tutorials.
How to draw a sunflower?

In this drawing tutorial, we will learn How to draw a sunflower. This drawing tutorial is suitable for people of all ages.
A bright yellow and adorable sunflower! What else is needed? Sunflowers are the most attractive flowers that grab attention because of their bright and vibrant look. Kids are often seen plucking and playing with the beautiful sunflowers.
Drawing A Sunflower
Most of the kids love to draw and color the flowers. In our childhood, when we were asked to draw something, we opted to draw a sunflower. It is easy and simple for the kids to draw the sunflower. Just add the yellow leaves and a brown stem. Here it is the most adorable and lively flower!
Honeybees used to land on these flowers to collect the nectar and this is one of the reasons kids love to play with the sunflowers. Whenever you see a sunflower plant, bees are seen roaming around it. This view attracts the children.
Let’s draw this simple and lovely sunflower! We have the step by step instructions to make it super easy for you!
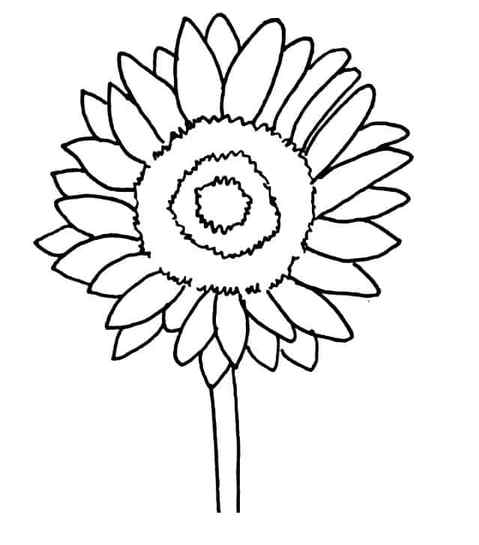
Draw a neat and clean circle in the center of the page. This will form the core of the sunflower.

Draw another smaller sized circle inside the main circle.
Reference
I was lucky in that I could use a sunflower from my garden as a reference but I found the perfect picture for you. Use this reference image to plan your lines so that you can complete this drawing with relative ease.

The inside disc which looks brown houses the seeds. These are called disc florets. The outer yellow leaves are the petals, called ray florets, which connect to the disc.
In this sunflower drawing, we’ll start with the disc and work our way out before ending with the stems.
Steps For Drawing A Sunflower
Step 1

Let’s begin with our sunflower drawing by sketching the inside discs which look very rough and jagged.
Draw the first circle which is fairly small. Make sure that your line is as rough and jagged as possible.
Repeat the exact same step with another layer outside your disc.
Step 2

Add another larger disc layer which encapsulated the others. This doesn’t have to be complete, you can have gaps in between because they’ll be filled out by the petals.
Step 3

The sunflower has a lot of long, thin and closely connected petals that circle its disc. These leaves often sit in perfect harmony with each other.
Draw the first bunch of petals which are all connected to each other.
Thereafter, add a second layer in between the upper spaces of your petals.
Step 4

Continue with the exact same step above working your way around the disc.
Step 5

Completely cover the disc floret with petals. You’ll notice that the petal which connects directly to the disc can be seen in their full scope whereas the secondary petals cannot.
This adds a sense of depth and layers to our sunflower drawing.
It looks as if there’s a set of pets sitting behind the petals that appear in the forefront of our drawing.
Step 6
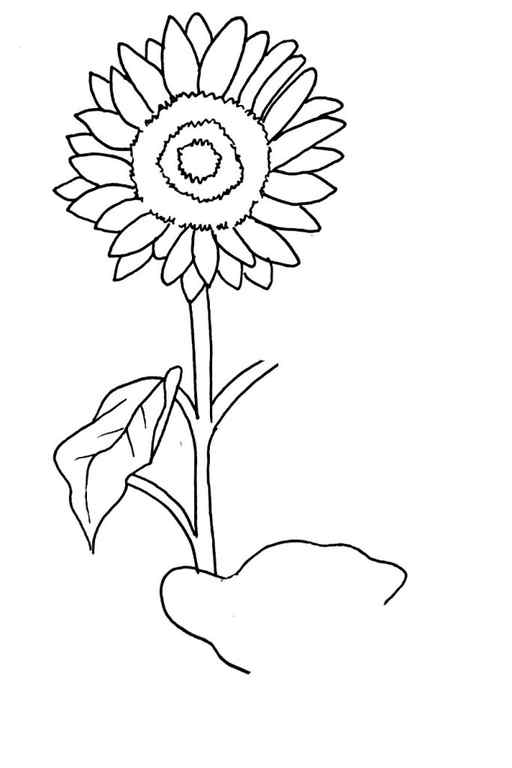
Towards the lower center point of your sunflower drawing, add two parallel lines that run straight down. This is the stem.
Stop around 5 cm in length.
Step 7

Add two curved lines that veer off in the direction that they face.
Lines that appear on the left will slant to the left and lines that appear on the right will slant to the right.
As you can tell, the stem will continue from the outer lines that make up the arms of your stem.
Step 8

let’s add a leaf to our sunflower drawing.
Starting from the left side, draw a wavy and uneven leaf that flops over.
Make sure that both your lines come to a sharp end that connect to each other at the bottom.
There’s also a small area towards the right that looks like a random thin shape.
This is actually part of the leaf which is slightly folded. This is why there’s really no joints to this line and it flows directly from the main leaf.
Step 9
To complete your leaf, add a thick wavy line that proceeds all the way just before it reaches the end of the leaf.
Add a few adjoining lines on either side that are shorter in length.
Thereafter, let’s begin with the bigger leaf on the right side of the stem. Start with the base or largest area of the leaf which looks like a sketch for an incomplete puddle of water.
Step 10
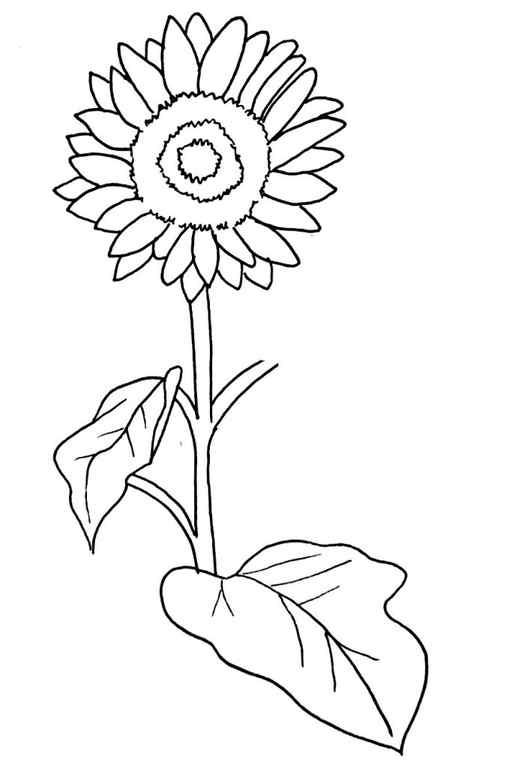
Like you did before, connect both lines for your leaf as they narrow in until they meet. Inside, add one log line towards the center of your leaf that ends before the tip of the leaf.
On either side of this center line, add shorter lines that depict the veins.
Step 11
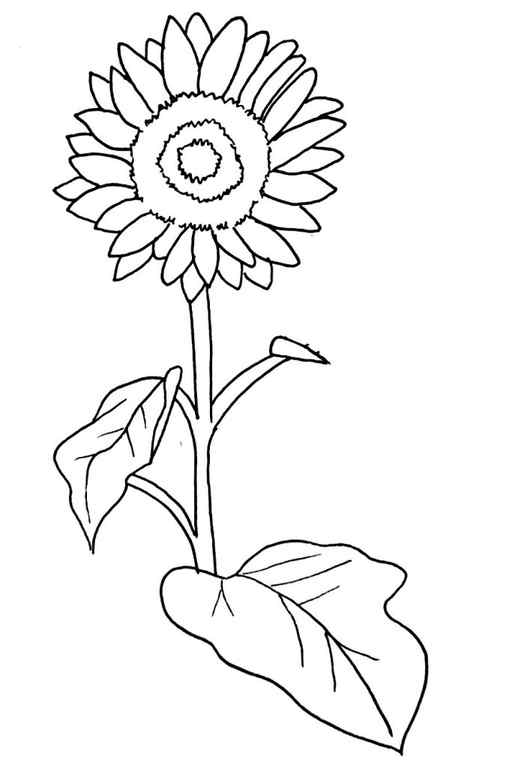
Let’s add the last leaf on the right side.
We’ll start with a short horizontal line that, a smaller rounded line on the right that curves downwards until it connects with the tip of the mainline.
Add another long and wavy line that flows to the right and curls back in until it connects to the stem again.
Step 12
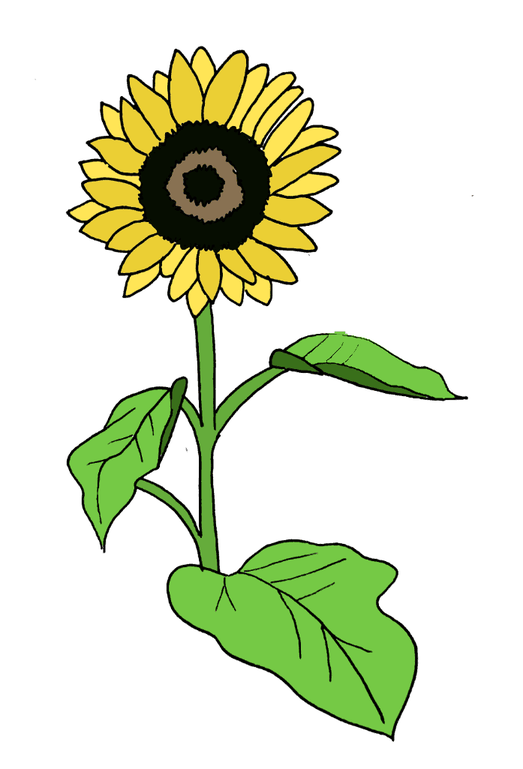
Add more details to the last leaf and then let’s complete this sunflower drawing by coloring it in. I colored the stem in with a slightly darker but rich green. The rest of the leaves were colored a slightly lighter tone of green.
The portions which appear to be folded should have the darkest tone of green as a way of showing shadows.
For the sunflower petals, two shades of yellow will work perfectly.
The largest disc floret was colored black with a tinge of brown. I used a pale brown for the middle disc and then black for the inner disc.
Conclusion
That brings us to the end of this article on how to draw a sunflower. I really hope your found this sunflower drawing to be a fun challenge.
I thoroughly enjoyed crafting this tutorial for you and I have a lot more planned for the future.
Head over to the comment section below to share your thoughts on this drawing.
Also, be sure to check out some of my other drawing tutorials that are linked below.


