These, or bacteria like them, are the active organisms in yogurt and in silage, the fermented hay that is produced all over the world as livestock feed. All smell sour or fermented but none produce a smell nearly as foul as those associated with natural anaerobic processes.
Guru’s guide to drawing things related to spring
Advertisement
Winter/Spring 2023 Activity Guide
Published on Nov 30, 2022

Follow this publisher
About
Register for classes and activities online at menlopark.gov/registration

City events and news
4min
pages 38-40
Advertisement
Advertisement
Advertisement
Advertisement
Advertisement
Advertisement
English
Deutsch
Issuu
Create once. Share everywhere.
Issuu Inc.
Company
- Company – About us
- Company – Careers
- Company – Blog
- Company – Webinars
- Company – Press
Issuu Features
- Issuu Features – Fullscreen Sharing
- Issuu Features – Social Posts
- Issuu Features – Articles
- Issuu Features – Embed
- Issuu Features – Statistics
- Issuu Features – InDesign Integration
- Issuu Features – Cloud Storage Integration
- Issuu Features – GIFs
- Issuu Features – Canva Integration
- Issuu Features – Add Links
- Issuu Features – Teams
- Issuu Features – Video
- Issuu Features – Web-ready Fonts
Solutions
- Solutions – Designers
- Solutions – Content Marketers
- Solutions – Social Media Managers
- Solutions – Publishers
- Solutions – Education
- Solutions – Salespeople
- Solutions – Use Cases
Industries
- Industries – Internal Communications
- Industries – Marketing and PR
- Industries – Publishing
- Industries – Real Estate
- Industries – Sports
- Industries – Travel
Products & Resources
- Products & Resources – Plans
- Products & Resources – Partnerships
- Products & Resources – Developers
- Products & Resources – Digital Sales
- Products & Resources – Elite Program
- Products & Resources – Publisher Directory
- Products & Resources – Redeem Code
- Products & Resources – Support
Explore Issuu Content
-
- Explore – Arts & Entertainment
- Explore – Business
- Explore – Education
- Explore – Family & Parenting
- Explore – Food & Drink
- Explore – Health & Fitness
- Explore – Hobbies
- Explore – Home & Garden
- Explore – Pets
- Explore – Religion & Spirituality
- Explore – Science
- Explore – Society
- Explore – Sports
- Explore – Style & Fashion
- Explore – Technology & Computing
- Explore – Travel
- Explore – Vehicles
Power words
Power words are incredibly easy and effective tools to use in a situation where you would like to protect yourself energetically, emotionally and mentally. All these aspects of being are closely interwoven. As the name suggests a power word is a word that has a vast amount of meaning and symbolism. It has a very specific energy attached to it.
Words like love, om or peace are all great power words but there are many more. Often your power word is the opposite to what is happening. If someone is irritating you, your power word could be calm. If you’re being drained, focus on the word invincible, whereas if feeling dark, concentrate on the word light.
Whatever power word feels right for that given moment just hold it in the forefront of your awareness. Connect with the energy of the word as fully as you can allowing its vibrational frequency to ripple out through every cell and fibre of your being and out into your aura. Feel or imagine the effect of the word on your mind, body, heart, soul and spiritual energy systems. You can repeat the word silently over and over if this helps you to focus. It’s unbelievably quick and can restore and recenter your spiritual energy, mindset and emotions in a few moments.
Breathe in your power
Life is full of moments that can cause us to feel overwhelmed, stressed and reactive. These triggers can throw your energy and disturb your peace and every emotion. Every state we feel is mirrored within our aura. Love and happiness strengthens our aura whereas anger depletes and weakens it. This simple breath technique is useful to know as it can instantly rebalance mind, body, spirit and spiritual energy.
Simply close your mouth and breath gently through your nose. Allow your attention to flow with your breath in and out of the body. Notice the rise and fall of your chest. Let you shoulders drop, relax your jaw all the while focusing on your breathing. Even just five slow, mindful breathes in and out work!
Research has proven that breath work alone has an instant and powerful effect on every part of your body and mind as well as your soul and energy systems. However you can make it even more powerful by adding a creative visualisation to it. Picture a beam of light shinning down from the cosmos onto your head (or whatever higher power you believe in). Imagine that as you inhale you draw in this cosmic light to cleanse and energise you and on every exhalation you breathe out and release any unwanted energy, stress or negativity you are holding. Even just a few moments of breath work are transformational. Just remember the more you practice this the easier and more intuitive exercises like this become.
Seal off your spiritual energy field
This exercise enable you to seal off your aura and protect yourself from any person, situation or environment. All you need to do is imagine yourself standing inside a gigantic bubble which is clear, flexible and impenetrable. The bubble encompasses you creating a powerful shield that moves with you.
You can play with this visualisation and power it up by imaging that the top of the bubble is connected to the universe so that there is a flow of beautiful, cosmic energy entering your sacred space. You can change the colour of your bubble using gold for a cosmic link, pink for love, blue for healing, or red for energy. In fact, you can add whatever elements that inspire you. Maybe there is a relative alive or in the spirit world you would like to imagine standing with you in your bubble whose presence empowers and strengthens you. You can even bring in your four legged friends!
Another great visualisation commonly used is a mirror. If you ever want to block the other persons energy touching your spiritual being, then imagine an enormous mirror popping up in front of you. All the energy being thrown towards you is deflected off from the mirror and back towards the source. Do not underestimate the power of creative visualisations. Research has shown that the act of imagining something in your minds eye is equally powerful to physically doing it!
How to Use Bokashi?
While the most common use for Bokashi is as an inoculant in anaerobic composting, it can also be added to an aerobic compost pile, added directly to soil, or used to create compost tea for watering plants.
Let’s look at exactly how you can get started with Bokashi, including how to maintain it and troubleshoot it for any potential issues:
How to Get Started with Bokashi
Bokashi is probably one of the least expensive composting systems around. A commercial Bokashi Bucket consists of a five-pound plastic bin with a tight-fitting lid on top and a spigot near the bottom.
This may seem a bit steep at almost fifty dollars, but that spigot might be the difference between a process that’s easy and one that’s unmanageable.
The leachate (liquid) needs to be poured off and lifting a five-pound bucket full of soggy food scraps, and its run-off is beyond many. A kitchen baster might be useful for this otherwise messy process.
A BESTSELLER!
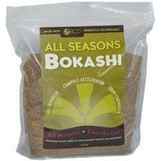
Bokashi Bran
This all-purpose starter mix (activator) is inoculated with beneficial microbes.
The only other equipment required is the Inoculated Bokashi Bran; a bag of it usually comes with the initial purchase and 2-pound replacements cost about fifteen dollars each.
How to Bokashi Compost Step by Step
The process itself is about as simple as it gets.
Perhaps once a day you mix your kitchen waste (including meats and dairy products!) with a layer of Bokashi bran (basically enough to coat it lightly), then press it into the bin, sprinkle bran over them, and close the lid.
Place a plate or a layer of plastic over the pile to help seal it against the little air left in the bucket. Large bones will not, of course, disappear over the course of ten days.
It’s recommended to cut up small bones and even chop other items into small pieces for maximum efficiency.
If one chose to skip the chopping step, a few extra days’ fermentation time would probably reduce the larger pieces to thoroughly fermented mush. You should add up to 2 tablespoons of bokashi bran for every couple of inches of food waste until the bin is full.
When the bin is full, cover it tightly and set it aside somewhere in the house where it’s out of direct sunlight for ten days or so. Every other day, draw off the liquid (bokashi tea), which can be used as a fertilizer (in a very diluted form) or full strength to control slime in drains, pipes, and septic systems.
After ten to fourteen days, the waste in the tub should be pickled thoroughly. It can then be dug into a fallow patch of the garden.
How to Maintain Your Bokashi Properly
Bokashi is an anaerobic fermentation process. It needs to be kept as free from oxygen as possible.
It’s important, therefore, to compress each day’s waste flat into the container to eliminate any air pockets and to avoid stirring up the previous day’s waste when putting in new garbage.
Some recommend using a plate to press the foodstuffs flat in the composter. Leaving the plate in place protects the surface of the compost from any air in the composter.
Drawing off liquid regularly helps maintain the environment needed by the bacteria that break down the organic materials. That liquid needs to be used within a day or so.
Troubleshooting Bokashi Issues
As usual, foul smells indicate that something has gone awry. This diagnosis is a bit trickier than usual because Bokashi does not smell like spring roses even at the best of times.
The literature talks about the difference between a “sweet and sour odor,” indicating fermentation, and a “foul odor,” indicating decay.
Bokashi should not smell like other sorts of anaerobic decay because the inoculating microbes — yeasts, producers of lactic acids, and others — do not produce the sulfuric acid that gives outdoor anaerobic piles their characteristic stench.
It’s okay if there’s white mold in the bin, but if blue, black, or green molds appear, something may have gone wrong, and decay may have occurred.
If decay does occur, it can sometimes be reversed by adding more Bokashi. If this doesn’t work, it’s time to dump that batch, scrub the bucket, and start again.
What to Do After the Fermenting Process
The statement that the Bokashi mixture can be dug into the garden after fermenting for ten days shouldn’t be confused with the statement that the mixture is done.
This description of the bin refers to what’s produced in two weeks as ‘pre-compost.’ Plant roots should not touch it directly for a week or two as it’s too acidic at this stage. Only after a month can it be fully incorporated into garden soil.
Other Ways of Using Bokashi Compost
Some people feed pickled Bokashi material to their vermicomposting worms, apparently with no problems. Given how acidic the Bokashi process (and product!) are and how sensitive worms can be to acidic environments, it may seem surprising that the worms do not react to fermented feedstock, but apparently, it’s not a problem.
Others put Bokashi pre-compost into their regular composting pile. In gardens, one must remember not to plant anything where the Bokashi was buried for at least two weeks.
Burying it in the compost pile eliminates this need. It also solves the problem of finding fallow space in small gardens.
While it might seem pointless to use the Bokashi method if you’re just going to throw the stuff on the compost heap anyway, this objection misses an important point: while the material that goes into a Bokashi bin would take months to compost in an outdoor pile, the pre-compost breaks down completely in about a month.
The acidic nature of Bokashi means that one should keep an eye on the pH of the pile, especially if one is adding Bokashi frequently.
How to Brew Your Own Bokashi Tea
Bokashi tea, aka Bokashi juice, is full of nutrients that improve nitrogen in the soil, thereby increasing plant yields, and is great for houseplants.
The traditional process requires burying boxes of rice and monitoring fermenting liquids with a thermometer. The recommended host — wheat mill run — is not something that everyone keeps at the back of the pantry.
Just about everyone has old newspapers, however, and these are the host recommended by most experts. Indeed, that version is much simpler all around, requiring no special tools whatsoever and working only with liquids until the newspapers are introduced.
The entire operation can be carried out in the kitchen. So while the traditional process can claim romance, experts describe the process as remarkable for its simplicity.
Neither process can be carried out in the afternoon. Any process that gathers, cultivates, brews, and inoculates indigenous organisms is a multi-step process requiring long waits between each step.
As an example, here’s a summary of the procedure described by Bokashi Composting:
- Capture organisms: wash a cup of rice, save the water, and set it aside for about a week;
- Make serum: add milk to the water; set it aside to ferment for two weeks.
- Strain the solids off; mix the inoculating liquid (1 part serum, 1 part molasses, 6 parts water.) Soak newspapers, drain, and seal in a plastic bag. Let ferment for two weeks.
- Separate the newspapers and let them dry.
At this point, you’re ready to set up a Bokashi bucket. Nothing about this process is difficult; none of the steps take much time. Even with all the waiting for the various fermentation stages, the entire process takes on the order of five weeks.
Efficient and easy to use! The composting bins and supplies available at Planet Natural will reward you with piles of rich organic matter to use in your yard, garden, or houseplants.
Related Questions
What products to compost
Hello, You will be able to source all of the essential elements in order to build a great compost pile without having to look too far! As long as your carbon to nitrogen ratio is optimal (25-30:1) your compost pile will be breaking down properly. Here are some lists of acceptable additions: Carbon Rich Material “Browns”
Cardboard (free of dyes)
Corn stalks
Fruit waste
Leaves
Newspaper
Peat Moss
Saw dust
Stems & twigs
Straw Nitrogen Rich Material “Greens”
Alfalfa/Clover/Hay
Algae
Coffee grounds
Kitchen food waste
Garden waste
Grass clippings
Hedge clippings
Manures
Vegetable scraps
Weeds (that have NOT gone to seed) Things to Avoid
Meats
Bones
Fats/oils/grease
Diseased plant material
Colored paper
Coal/charcoal
Cat/dog waste
Manures from carnivorous animals
Onions
Garlic
Citrus peels As for the rhododendron and holly leaves, you can definitely put them in your compost pile. However, it is a good idea to really chop or shred them up, as they take much longer to break down due to their fibrous and waxy make up. It really depends on how quickly you are trying to create usable compost. It might be a good idea to have a separate pile going that you incorporate those leaves into and another pile that you do not. That way you can have a pile you know will rapidly break down into garden goodness and have yet another ready to use later on. Good luck!Composting Guru
- Benefits
- + Getting Started
- Decision Time
- Systems (Methods)
- Best Compost Bins in 2023: How to Buy the Right Compost Bin
- How It Works
- Carbon-to-Nitrogen Ratios
- What You Need
- Extras & Additives
- What To Use
- How to Build a Compost Pile: Complete Guide with 9 Methods
- Maintenance
- When is it Finished?
- Troubleshooting
- Adding to Soil
- Bokashi Composting: A Step By Step Instructional Guide
- Using Worms
- Aerobic
- Anaerobic
- Biology
- Chemistry
- Physics
- Compost & Soil
- What is Compost: A Complete Guide to Composting at Home
- Myth Busting
- Garbage Problems
- Harmful Chemicals
- Nutrient Pollution
- Bioremediation
- Heavy Metals
- Pathogens
- Pesticides
- Home Testing


