Drawing instructors who look forward to teaching such drawings that give their students some educational benefits can find this a fascinating guide. Because scarecrow is made up of straw-stuffed but an example for essential body proportion, students can quickly get the idea of sketching a human body. While drawing, most of the students do not even think about the arm’s length, leg, head, etc. But this teaches you the proportion with symmetry-based drawing, which is easier to draw a scarecrow or things that seem like a scarecrow.
Scarecrow Directed Drawing & Writing Prompts
My students absolutely loved all of these directed drawings. We had so much fun creating our scarecrows! They always turn out so cute and the kids are so proud of these drawings.
— Jody S.
Rated 5 out of 5
See all reviews
Also included in
Celebrate each month with a FUN and CREATIVE STEP-BY-STEP Directed Drawing! This product includes easy to follow steps in PDF format, as well as JPEG images for easy transfer into Google Slides or PowerPoint, AND a simple one-page handout with drawing steps for each directed drawing!Three coordinati
Products
$28.00 Price $28.00 $42.00 Original Price $42.00 Save $14.00
View Bundle
Description
Celebrate Fall with this STEP-BY-STEP Scarecrow Directed Drawing! This product includes easy to follow steps in PDF format, as well as JPEG images for easy transfer into Google Slides or PowerPoint, AND a simple one-page handout with drawing steps!
Three coordinating and differentiated Writing Prompts are included in the following formats:
- How to Make a Scarecrow (Less Lines, No Picture Box)
- How to Make a Scarecrow (More Lines, No Picture Box)
- How to Make a Scarecrow (Handwriting Lines, No Picture Box)
- How to Make a Scarecrow (Less Lines, With Picture Box)
- How to Make a Scarecrow (More Lines, With Picture Box)
- How to Make a Scarecrow (Handwriting Lines, With Picture Box)
- If I Were a Scarecrow. (Less Lines, No Picture Box)
- If I Were a Scarecrow. (More Lines, No Picture Box)
- If I Were a Scarecrow. (Handwriting Lines, No Picture Box)
- If I Were a Scarecrow. (Less Lines, With Picture Box)
- If I Were a Scarecrow. (More Lines, With Picture Box)
- If I Were a Scarecrow. (Handwriting Lines, With Picture Box)
- The Best Part of Fall is. (Less Lines, No Picture Box)
- The Best Part of Fall is. (More Lines, No Picture Box)
- The Best Part of Fall is. (Handwriting Lines, No Picture Box)
- The Best Part of Fall is. (Less Lines, With Picture Box)
- The Best Part of Fall is. (More Lines, With Picture Box)
- The Best Part of Fall is. (Handwriting Lines, With Picture Box)
Have students create the directed drawing by itself on large construction paper and create a monthly display in your classroom! Or, pair it with a fun writing prompt in a writing center. There are many options available!
Your Drawing Guide
Reference Points are so helpful to remember the process of drawing. Also, to use the guidance. That is why we will start with reference points.
When you start drawing, you must have to find the vertical and horizontal lines. Even in this tutorial, you will find an image below to this text which has x-axis and y-axis denoted with a dashed line horizontally and vertically, respectively, which has the center. So, we will suggest students, before drawing, create their centered lines on your paper, which indeed gives you a fantastic reference to move further step by step.
So, let us take an illustration of a scarecrow only
While drawing, scarecrows start with their head and hat lying on paper, halfway up from the x-axis.
X-axis and Y-axis are not the most onerous terms to understand, but throughout this guide, for the horizontal line, we will use the x-axis, and for the vertical line, we will use the y-axis
as a reference so that you will not be messed up with basic ideas. Need Not to search about x-axis and y-axis.
Moving forward with Step 1 explanation, you need to sketch accordingly so that the waist of a scarecrow can lie on the middle line. Lines always help students to see the placement of everything more precisely.
Drawing is something if students have a good start, then there could be more chances for them to feel the successful completion of the sketch they have worked on.
Modeling, drawing, tracing skills are about getting the size and placement of axes on paper. As mentioned above, reference points can help the student start the drawing process and then reach its ends without much difficulty. Moreover, help anyone, either beginner or expertise to learn how they can be more accurate.
You might be wondering that students need to draw a big or bold line on the paper to make sure of center lines before they start? The answer is NO that will not be only hard to erase but also not give you a finished artwork. Instead, they fold the paper once through the x-axis and from the y-axis, just like the crease we make while ironing our clothes, and then unfold your paper. But make sure when you fold the paper, it should be half both ways.
It resulted as when your drawing is done and you colored in too, the creases you made will disappear.
Now, I am sure that you must have learned something from the advice mentioned earlier. It is time to start our scarecrow drawing project.
Before you read the guide, do check the steps given in the images. Also, use the link mentioned below to color the scarecrow according to your choices. Why don’t you color scarecrow, according to your one like: What if you have a scarecrow?
Link: https://tinyurl.com/colorScarecrow
Materials to make a Scarecrow Drawing
Disclaimer: Do collect these materials before you sit to draw a scarecrow, which does not even disturb you to find the stuff again and again and then find yourself in the disturbance. These are just like the ingredients to the drawing, which help you to draw.
So, now make a note of what you need and what you do not.
At first, you need PENCIL; this even comes off so much brand and now might be thinking which brand which shades of pencil you need to go for.
So, I prefer the Ticonderoga brand of pencil, which is the most reliable and makes nice dark lines. You can erase with ease too. I would suggest to busy teachers that if you buy the pre-sharpened ones, this will save you a lot of time.
Next is an obvious ERASER. Eraser, which helps you recorrect the mistakes you commit. Go for a more oversized eraser, which you can hold in your hand in comparison to the pencil tip erasers—most needfully when erasing leftover pencil lines after sketching.
Now a BLACK SHARPIE MARKER. These are the fine point permanent marker pens and make excellent black outlines, a good tip for coloring, and never spread over the page when they get wet (consider it waterproof).
When you use a marker, put extra paper underneath the sheet you have been working on, which protects your tables. Additionally, use a marker with ventilation.
Crayons, here you come with a kind of thing which helps you to color your imagination. There are two kinds of crayons
PRANG CRAYONS: These crayons are softer than other crayons, also look like oil pastels sometimes. Prang Crayons have some lovely brown shades, which Crayola does not have unless you buy their more extensive cases.
CRAYOLA CRAYONS: This brand always works so perfectly for your drawing. Pack of 24 has favorite golden orange and yellow colors that seem richer and warmer than Prang ones.
Draw a scarecrow Step by Step
Time is most important to all of us. So, be happy while sketching a scarecrow; you need 45-50 minutes. Isn’t it interesting?
Hurrah! finally reached the step part to draw a scarecrow
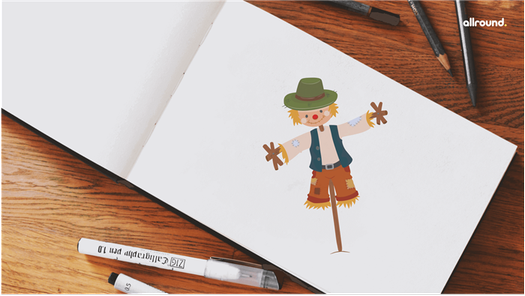
Step 1: First, draw a hat and then a face below it like a half egg.
Step 2: Draw a scarecrow shirt with two full or half sleeves, what you like most.
Step 3: Draw the pants and cuffs on the bottom.
Step 4: Complete his face with eyes, nose, and mouth. And add straw hair.
Step 5: Draw a bib on the shirt. Add Patches.
Step 6: Draw more straw for the hands and feet and add a post that supports the scarecrow to stand in the field.
Step 7: Draw the background of your choices like hills, sky, sun, etc.
Step 8: Since scarecrow stands in a farm field. Draw corn in the foreground.
Step 9: Make the border of the drawing you made with a pencil as of now, and then color them with your favorite shades.


