Drawing Halloween stuff can be super fun, and I hope these tips have helped you get started.
How To Draw Halloween Stuff Easy: Full Guide (2023)

Drawing Halloween-themed art can be a thrilling and enjoyable experience, even for those with limited artistic backgrounds. So, how to easily draw Halloween stuff?
As someone who once struggled to draw a stick figure, I’ve figured out easy tricks anyone can use to create spooky Halloween art.
Whether you want to decorate your house or have Halloween fun, these tips will help you make awesome drawings. Keep on reading.
Table of Contents
10 Halloween Images You Can Easily Draw
1. Jack-o’-Lantern Or Pumpkin

A jack-o’-lantern or pumpkin [1] is a classic Halloween symbol that’s easy to draw.
Start with a medium-sized circle, add a vertical line down the center, and a slightly curved horizontal line across the middle for the face.
Draw triangular eyes and a wickedly curved mouth with jagged teeth. Add carved lines around the features. Complete with a stem on top, you have a spooky pumpkin ready for Halloween.
2. Friendly Ghost
For this one, draw a small oval shape for the ghost’s body. Add big round eyes and a wide smile to make it friendly and cute.
Give the ghost a wavy, flowing bottom to make it look floating. For an extra touch of warmth, draw simple arms on the sides.
3. Vampire
Start with an oval shape for the face, and add sharp cheekbones and a pointed chin. Draw mysterious, large eyes with thin pupils and a long, slender nose.
Give the vampire fearsome fangs and a widow’s peak hairline. Complete the look with a dark, flowing cape around the shoulders.
4. Mummy
Draw an oval shape for the head and add vertical lines down the center to show the wrapping. Then, draw diagonal lines for the shoulders and curved lines for the body and legs.
“I prefer drawing to talking. Drawing is faster and leaves less room for lies.”
– Le Corbusier, Swiss-French Architect
Make two small circles for the eyes and add more curved lines for the bandages. For extra detail, draw lines on the arms and legs and some loose wrapping ends.
5. Skull & Cross
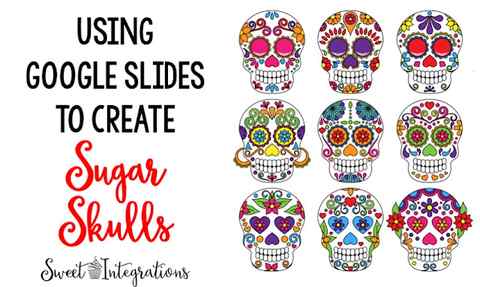
A skull and cross is one of the iconic images that immediately evokes Halloween vibes. First, sketch down an oval for the skull, then add two big eye sockets and a gleeful grin with teeth.
Then, draw two lines with an upside-down ”T” to make the crossbones. Add more detail by shading around the eyes and teeth to make it look more realistic.
Finally, outline the skull and crossbones with a thick marker or pen to make them stand out. But what are some Halloween words that start with the letter C?
6. Haunted House

Outline a house with straight and angled lines, giving it a spooky look. Add broken windows and crooked shutters for an eerie vibe.
Then, draw a creepy door with jagged edges on the top. Enhance the haunted effect by adding cracked bricks, cobwebs, and a crooked chimney.
To create depth and darkness, add shading. Finally, complete the haunted house by adding bats, a moon, and some bare trees.
7. Wicked Witch Hat
Begin by drawing a tall, conical triangle to form the hat’shat’s body. Extend a wide brim from the bottom of the triangle to complete the hat’shat’s iconic shape.
For an enchanting touch, add a buckle or stars on the hatband. Enhance the spooky atmosphere by drawing stars or a crescent moon in the background.
8. Creepy Spider
A spider [2] is one of the Halloween images that is fairly easy to draw and a bit creepy. Start by drawing a small circle for the spider’s head.
Then, using curved lines, sketch out the outline of the spider’s body, adding a few bumps and curves to give it a more lifelike appearance.
Next, draw eight long, thin legs radiating from the body. Add small triangles at the ends of each leg to represent the spider’s feet.
“Unlock the artist within and watch Halloween come alive on your canvas. With simple steps and a dash of creativity, drawing Halloween stuff becomes a great experience.”
– Howkapow Gift Site
For the finishing touch, draw two large, round eyes and a pair of fangs protruding from the spider’sspider’s head.
9. Flying Bat
Sketch a slightly elongated oval shape for the body. Next, add a pair of pointed ears on top of the oval and position two small eyes near the front.
Extend two curved lines from the bottom of the oval to form the wings, ensuring they come together at a point.
Finally, include a curved line to represent the mouth, and if desired, add fangs for extra spookiness. But when should you decorate for Halloween?
10. Candy Corn

In this simple Halloween image, draw a triangular shape, ensuring the base is flat while the sides slant inward.
Next, divide the triangle into three segments – a broad yellow section at the base, a slender orange strip in the middle, and a white top section.
Finally, bring your drawing to life with vibrant yellow, orange, and white hues.
Also Read:
- Best Homemade Day Of The Dead Costume Ideas
- Best Halloween Decorations Ideas Using A Paper
- Best Halloween Decoration Ideas For Your Car
FAQs
What can children make for Halloween?
Children can engage in various delightful Halloween crafts to add a festive flair to the spooky season, like foam Halloween masks, creating craft stick monsters, and decorating mini
Halloween pots or paper bats to hang around the house.
At what age do children begin celebrating Halloween?
The Halloween festivities, particularly the tradition of trick-or-treating, are often introduced to children around 3 to 4 years old.
At what age do children stop celebrating Halloween?
It is commonly observed that around the age of 17, children tend to retire their Halloween costumes and cease the traditional practice of trick-or-treating.
Step 1: Rough Sketch or Construct Drawing
I have also heard this called “layout” or an older term, “scaffolding”. I use to think this was merely a way instructional art books taught students how to draw, this is not the case. True, it may be a good way to show an object in a simplified form but it is not the sole purpose. Roughs can be useful in laying out multiple objects a composition, making sure the big picture is kept in mind right from the start. They can also be used to simply make sure the drawing will fit on the page.
In truth, here are many reason to make a rough but for this demonstration the rough sketch is used more to get out a loose idea for the purposes of discovering the character, placing facial feature and simply laying a foundation to build on. Try to avoid “undo” or erasing at this stage of the drawing, the idea here is to keep moving forward and lay down something to work with. Be as loose or as sketchy as you are comfortable. Keep the lines light so you are able to build them up if necessary to define alterations.
If you watched the video you may have noticed that all of the characters were started with a head shape boundary. When I am playing around with ideas like in this demo, I sometimes challenge myself with some random shape and try to make some character that come to mind from looking at that shape. Other times I will draw a grouping of shapes to make up the features and then draw the head shape based on the feeling I get from the features. I recommend trying out both and even come up with other ways to brainstorm ideas.
Add Tip Ask Question Comment Download
Step 2: Line Drawing or Inking
The line drawing establishes boundaries for colour and various objects in your painting. At another level it could also be used to define shadow shapes and texture but for our purposes, let’s treat this more like a colouring book. If you are drawing digitally, create a new layer above the existing one. You should be looking to use the rough sketch as a guide for the line drawing, however, do not feel bound to it, if you see areas for improvement continue to alter your character as you see fit. In other words unless you love part of your rough, do not feel the need to trace the drawing faithfully. If you have a better idea at this stage try it. If you are drawing digitally, all the more reason to try some ideas. There is always a few “undos” you can use.
Hot Tip: Whenever you are trying to follow or trace a line, keep you eye focused on a spot just ahead of your pencil or if using a tablet, the on screen cursor. The longer and gentler the curve, the further you eyes can be. Of course this sounds a bit crazy, feel awkward, maybe even seem impossible but trust me, if you get the hang of this it is awesome. It works great for more than just drawing. If it sounds familiar this is something I borrowed from driving and racing motorcycles. Your body has a strange ability to follow your eyes. The amazing thing is I find this work when drawing on a desk top tablet or drawing on screen in the case of my tablet PC I have a strange ability to account for the parallax that occurs due to the distance between the drawing surface and the screen. I even use the same technique to use a jigsaw and sewing machine for smoother more accurate curves. Try this, some people will benefit right away others it takes more time to get use to. Just remember you don’t look at your front wheel to ride your bike.
Some artist pay close attention to making sure the boundaries of all shapes are close, colouring book style, so the can take advantage of Fill or “Bucket” tools. You could try this for a more “comic book” or “cell painted” look.
Add Tip Ask Question Comment Download
Step 3: Blocking in Base Colours
The first step of the colouring or painting phase is called block in. Here it is just like kindergarten, try to stay in the lines.
Here you will want to apply the base colours of the different shapes. The colour you choose should be a middle tone, not too dark or too light. In order to keep the line work as a guide, a new layer is created beneath the lines done in the previous step. In a traditional approach, care is taken to work the paint up to but not over the lines.
It is normal for it to look cartoon-like regardless of how realistic your line work is.
Tip: Try and use the larges brush you can. This is not only quicker and more efficient but in traditional painting it tends to lay down a more even coat or tone. Digitally if you have pressure sensitivity enabled use a brush you can adjust the size with pressure.
Add Tip Ask Question Comment Download
