– Start drawing the stem.
Want to carve a fancy pumpkin? Here are Doug MacCash’s 10 steps to success
- BY DOUG MACCASH | Staff writer
3 min to read

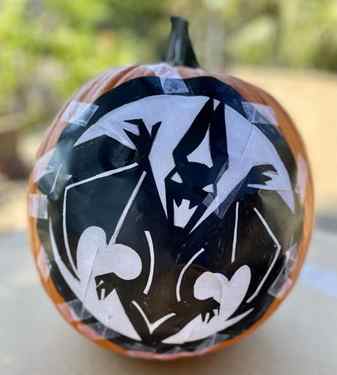
ARTSY EFFORT: Writer Doug MacCash drew a pattern — a bat that looks like a fleur-de-lis — and then carved it into a pumpkin. Photo director David Grunfeld used a glow stick and some special technique to give it this ghostly vibe.
photographed during Tuesday, Oct. 11, 2022. (Staff Photo by David Grunfeld, NOLA.com | The Times-Picayune | The New Orleans Advocate)
- STAFF PHOTO BY DAVID GRUNFELD
The carefully trimmed and tapes fancy Jack-o’-lantern stencil.
- (Photo by Doug MacCash NOLA.com | The Times-Picayune | The New Orleans Advocate)

A fancy Jack-o’-lantern with a fleur-de-lis-shaped bat.
- (Photo by Doug MacCash NOLA.com | The Times-Picayune | The New Orleans Advocate)
We’re not talking here about carving an old-fashioned spooky face with triangular eyes and a jagged, toothy grin into a pumpkin patch find with a dull butcher knife. No, we’re talking about trying to create one of those elaborate, artistic Jack-o’-lanterns, with fine lines, authentic features, and other creative complexities.
We’re talking about making a Jack-o’-lantern the way Michelangelo would have done it. Or Banksy anyway.
After trying making one myself, by drawing and then carving a bat that’s supposed to look like a fleur-de-lis (and it does, kind of), I’ve created a step-by-step guide that will lead you to certain success. Maybe.
1. Before attempting an artsy pumpkin, ask yourself some important questions. Are you crafty? Do you have time to kill? Are you able to endure the torture of your own perfectionism? If you even equivocated while answering any of the above, turn back now.
2. Buy an expensive pumpkin carving kit. Sure, you probably already have all the tools necessary in your kitchen drawers — a serving spoon and an old grapefruit knife would probably do the trick. But a real pumpkin carving kit is better, because all the tiny saws and the serrated scooper will help you pretend to be a ghoulish medieval surgeon.
3. Buy, download, or draw a pattern for your Jack-o’-lantern before you buy your pumpkin. That way you can find a pumpkin the right size to fit the pattern. Much, much easier than enlarging the pattern.
4. Use your large bone saw to cut a circle around the stem. The hole must be big enough for your hand to go through. Remove the cap. Scrape out the pumpkin brains — all the seeds and goo — with your serrated spoon. If this is your favorite part, you really shouldn’t tell anybody.
4B. Separate the seeds from the stringy stuff, coat them in some olive oil and lots of salt, and roast them until they’re crisp. Eat them. Or just feed the whole unspeakable mess to the birds.
5. Carefully tape your stencil to the pumpkin just so. Since flat paper doesn’t really like to wrap around a pumpkin, you probably need to cut some slits here and there, from the edges toward the center, until you can tape the stencil down smoothly.
6. Use a safety pin or a bulletin board tack to prick tiny holes through the paper, tracing the pattern onto the pumpkin. Take your time. Make lots and lots of holes. This will be your pattern when carving. Note: Some fancy-schmancy pumpkin carving kits come with a little pinwheel gizmo that probably makes this easier.
7. Remove the stencil. Use a nail, or the plastic poker in your Jack-o’-lantern carving kit, to pierce a hole somewhere in the negative area of the pattern (the part where going to cut the pumpkin away that will subsequently glow).
8. Use your finest, narrowest, cerebral saw to carefully, meticulously, tediously, cut out the pattern. Keep your head in the game. Don’t saw off a pinkie. And don’t mess up the whole project by cutting out what you’re supposed to save and saving the part you’re supposed to cut out. Aren’t you glad you made plenty of holes?
Step 1
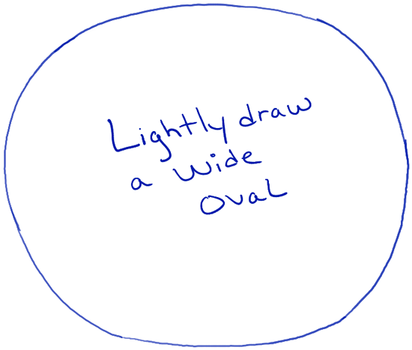
– Start drawing your pumpkin by lightly drawing an oval-ish shape.
Step 2
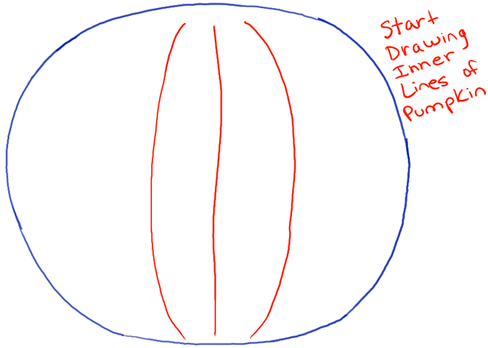
– Very lightly draw the inner lines of the pumpkin…the middle one is the straightest of the lines while the ones around it curve inwards.
Step 3
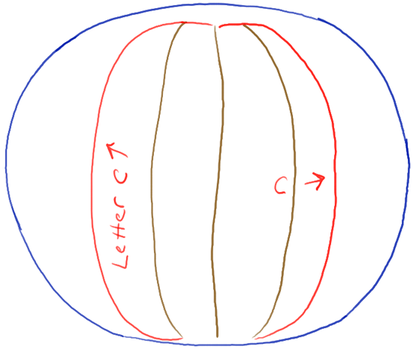
– Draw more inner lines…they too are turned inwards like a letter ‘C’ shape.


